Thursday 29 February 2024

Building a Vagrant Box: From Scratch to Sharing

Building a Vagrant Box: From Scratch to Sharing

Vagrant streamlines the creation and management of virtual machines, making it a valuable tool for IT engineers. This guide walks you through building a customized Vagrant box, step-by-step, from creating the virtual machine to sharing it with others.

Prerequisites:

Step 1: Setting Up the Virtual Machine

  1. Create a new virtual machine: Open VirtualBox and click "New." Choose the desired operating system (e.g., Ubuntu) and version. Allocate memory (e.g., 2048 MB) and storage space (e.g., 40 GB) for the virtual machine.

  2. Configure shared folder: Right-click on the newly created VM and select "Settings > Shared Folders." Add a shared folder, specifying the host path (e.g., your project directory) and the guest path (e.g., /vagrant).

Step 2: Provisioning the Virtual Machine with Vagrant

  1. Initialize Vagrant: In your project directory (containing the shared folder), open a terminal and run vagrant init to initialize a Vagrantfile.

  2. Configure the Vagrantfile: Open the Vagrantfile in a text editor and customize the following sections:

Ruby
# -*- mode: ruby -*-
# vi: set ft=ruby :

VAGRANTFILE_API_VERSION = "2"

# Provider configuration
Vagrant.configure(VAGRANTFILE_API_VERSION) do |config|
  config.vm.box = "ubuntu/focal64" # Replace with the desired box name and version

  # Shared folder configuration
  config.vm.synced_folder ".", "/vagrant"

  # Update packages & install essential tools
  config.vm.provision "shell", inline: <<-SHELL
    sudo apt-get update -y
    sudo apt-get upgrade -y
    sudo apt-get install -y essential curl unzip rsync
  SHELL
end

Explanation:

  • VAGRANTFILE_API_VERSION: Specifies the Vagrantfile API version.
  • config.vm.box: Sets the base box image to use.
  • config.vm.synced_folder: Configures the shared folder between the host and guest machines.
  • config.vm.provision: Defines provisioning scripts to run inside the virtual machine.

Step 3: Building the Vagrant Box

  1. Provision the VM: Run vagrant up in the terminal. This will download the base box, configure the virtual machine, and execute the provisioning scripts.

  2. Install additional software: Inside the virtual machine (accessible using vagrant ssh), install any additional software you need for your specific use case.

  3. Clean up the VM: Once the VM is configured, run sudo apt-get autoremove -y to remove unnecessary packages and free up disk space.

  4. Package the VM: Run vagrant package to create a compressed .box file containing the customized virtual machine.

Step 4: Sharing the Vagrant Box (Optional)

  1. Upload the .box file: Upload the .box file to a platform like Vagrant Cloud https://app.vagrantup.com/ or your private repository.

  2. Share the Vagrantfile: Share the Vagrantfile along with the .box file for others to easily provision the virtual machine.


Congratulations! You've successfully built and packaged a customized Vagrant box, ready to be used for your development or testing needs. 

By following these steps and customizing the configurations, you can create Vagrant boxes tailored to your specific requirements.

Monday 16 October 2023

List of the best Terraform infrastructure as Code Books, based on Readers feedback.

Based on readers’ feedback, here are some of the best books on Terraform Infrastructure as Code:


  • Continuous Delivery with Jenkins, Kubernetes, and Terraform: by Mohamed Labouardy. This book is a practical guide to automating your development pipeline in a cloud-native, service-driven world. It covers topics like the basics of Terraform and Jenkins, how to use Jenkins for code-driven CI/CD pipelines, and mastering the usage of Terraform for code-based infrastructure management.
Continuous Delivery with Jenkins, Kubernetes, and Terraform: by Mohamed Labouardy12


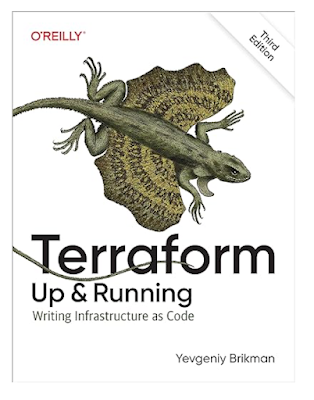
  • Terraform: Up & Running: Writing Infrastructure as Code by Yevgeniy (Jim) Brikman. This hands-on book shows you how to get up and running with Terraform fast. It covers topics like manual and automated testing for Terraform code, comparing Terraform to Chef, Puppet, Ansible, CloudFormation, and Salt Stack, and deploying server clusters, load balancers, and databases. It also important to mention here, this book is at 3rd edition already.


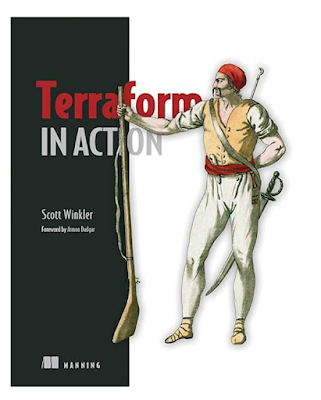
Terraform in Action


  • Terraform Cookbook: Efficiently define, launch, and manage Infrastructure as Code across various cloud platforms. This book is ideal for those who are new to Terraform and want to learn more about it.


Please, bear in mind that the availability of these books may vary. I recommend checking them out on your preferred book retailer or library.

1 - Here I can leave you guys with some more learning/Reading resources - GitHub - shuaibiyy/awesome-terraform: Curated list of resources on HashiCorp's Terraform

2 - Hashicorp Terraform source documentation - https://developer.hashicorp.com/terraform/docs 

3 - Master Terraform: A cheat sheet for infrastructure automation - https://www.architect.io/blog/2023-02-02/terraform-cheat-sheet/ 


Friday 4 August 2023

From Silos to Success: How DevOps Transforms Development and Operations


In the rapidly evolving landscape of software development, the term "DevOps" has gained significant prominence.

DevOps, short for combination of work and efforts from Development teams and Operations teams, represents a collaborative and holistic approach to software development and deployment...                


It aims to break down traditional silos between development and IT operations teams, fostering a culture of seamless communication, continuous integration, and rapid delivery. This article provides an introduction to the concept of DevOps, its principles, benefits, and its role in modern software development.

**Understanding DevOps:**

DevOps is a methodology that emphasises the collaboration and cooperation of software development (Dev) and IT operations (Ops) teams throughout the entire software development lifecycle. 

Traditionally, these two functions worked in isolation, leading to communication gaps, slower release cycles, and a lack of accountability in case of issues. DevOps seeks to bridge this gap by promoting shared responsibilities and a more streamlined approach.

**Key Principles of DevOps:**

1. **Collaboration:**DevOps encourages open communication and cooperation between developers, testers, and operations teams. This helps in identifying and addressing potential problems early in the development process.


2. **Automation:** Automation is a core principle of DevOps. By automating tasks like testing, deployment, and infrastructure provisioning, teams can reduce human errors, improve efficiency, and ensure consistent processes.


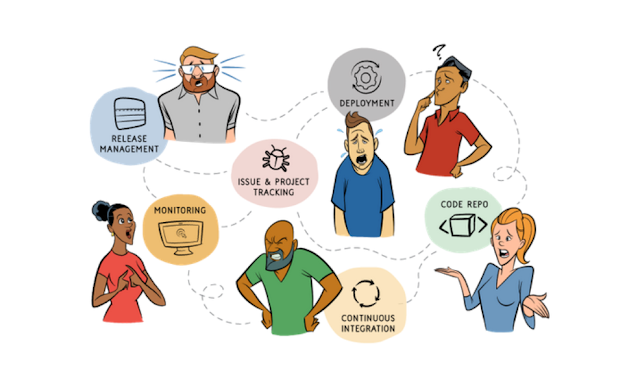
e.g. Example of DevOps LifeCycle - planning your platform and mapping out what you need to accomplish at each step


3. **Continuous Integration (CI):**CI involves integrating code changes from multiple developers into a shared repository several times a day. This ensures that new code is regularly tested and merged, reducing integration issues and improving software quality.


4. **Continuous Delivery (CD):** CD builds upon CI by automating the deployment process. It allows for the rapid and reliable release of software updates to production environments, minimising manual interventions and reducing deployment risks.


5. **Monitoring and Feedback:**DevOps emphasises real-time monitoring of applications and infrastructure. This helps teams identify performance bottlenecks, security vulnerabilities, and other issues, enabling quick remediation.


DevOps LifeCycle
e.g - Of DevOps Lifecycle

[ “ While Talking to customers, we found that while automating the continuous delivery pipeline was important, the missing part was enabling the feedback loop,” Monitoring and logging software packages are rapidly converging on the notion of becoming “DevOps hubs” ]

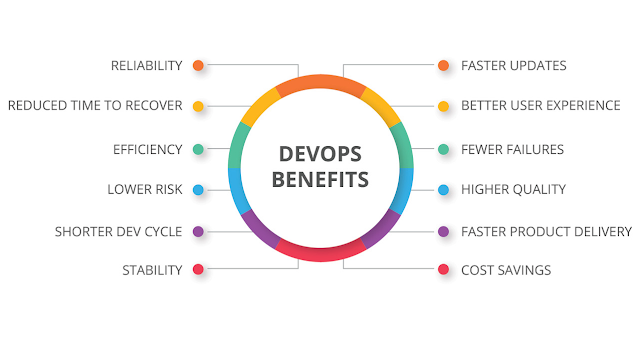
**Benefits of DevOps:**

1. **Faster Time to Market:** DevOps practices enable quicker development cycles and faster release of features or updates, allowing businesses to respond to market demands more effectively.


2. **Improved Collaboration:** DevOps breaks down barriers between teams, fostering better understanding and cooperation, which ultimately leads to improved software quality.


3. **Enhanced Reliability:** Automation and continuous testing ensure that changes are thoroughly tested and consistently deployed, reducing the likelihood of failures in production environments.


4. **Scalability:** DevOps practices, combined with cloud technologies, allow applications to scale seamlessly according to demand.


5. **Higher Quality Software:**Continuous testing and feedback loops lead to higher software quality, as issues are identified and addressed early in the development process.


**Conclusion:**

DevOps represents a paradigm shift in software development, moving away from traditional, siloed approaches towards a collaborative, automated, and customer-focused methodology. By promoting a culture of collaboration, automation, and continuous improvement. 

DevOps has become an essential framework for organisations looking to accelerate their software development lifecycle, enhance software quality, and meet the ever-changing demands of the modern market. Embracing DevOps principles can lead to more efficient, reliable, and successful software development projects.

Saturday 22 July 2023

Mastering Docker Minified Systems: A Step-by-Step Guide with Real Use Cases

Introduction

Docker is a powerful platform for developing, shipping, and running applications. Minified Docker systems are optimized for size and efficiency, making them ideal for production environments where resources are at a premium.

Step 1: Understanding Docker Basics

Before diving into minified systems, ensure you have a solid understanding of Docker concepts like images, containers, volumes, and networks.

Key Commands:

docker pull [image_name] # Download an image from Docker Hub
docker run -d --name [container_name] [image_name] # Run a container in detached mode

Step 2: Creating a Minified Dockerfile

A minified Dockerfile contains only the essential layers needed to run your application.

Example Dockerfile:

FROM alpine:latest
RUN apk add --no-cache python3 py3-pip
COPY . /app
WORKDIR /app
RUN pip install -r requirements.txt
CMD ["python3", "app.py"]

Step 3: Building and Running Your Minified Container

Build your image with the Docker build command, tagging it appropriately.

Build Command:

docker build -t my-minified-app .

Step 4: Optimizing Your Image

Use multi-stage builds to reduce size and remove unnecessary build dependencies.

Multi-Stage Dockerfile:

# Build stage
FROM python:3.8-slim as builder
COPY requirements.txt .
RUN pip install --user -r requirements.txt
# Final stage
FROM python:3.8-alpine
COPY --from=builder /root/.local /root/.local
COPY . .
CMD ["python", "./app.py"]

Step 5: Managing Data and State

For stateful applications, use volumes to persist data.

Volume Command:

docker volume create my_volume
docker run -d -v my_volume:/data my-minified-app

Step 6: Networking and Communication

Link containers and enable communication between them using Docker networks.

Network Commands:

docker network create my_network
docker run -d --net=my_network my-minified-app

Step 7: Deploying to Production

Deploy your containerized application using orchestration tools like Docker Swarm or Kubernetes.

Step 8: Monitoring and Maintenance

Monitor your containers and systems using tools like Docker stats, cAdvisor, or Prometheus.

Conclusion

Mastering Docker minified systems involves understanding Docker fundamentals, optimizing Dockerfiles, managing data, and deploying efficiently.

Further Learning

Remember, practice makes perfect. Start small, iterate, and gradually incorporate these practices into larger projects.

OBs:

Docker is an open platform for developing, shipping, and running applications. Docker enables you to separate your applications from your infrastructure so you can deliver software quickly. 


With Docker, you can manage your infrastructure in the same ways you manage your applications. By taking advantage of Docker’s methodologies for shipping, testing, and deploying code quickly, you can significantly reduce the delay between writing code and running it in production.

Certainly! Here’s an extensive guide titled “Mastering Docker Minified Systems: A Step-by-Step Guide with Real Use Cases.” ]


This guide provides a foundational understanding of working with minified Docker systems. For more in-depth learning, refer to the provided links and continue exploring real-world use cases. Happy Dockering!

Thursday 6 April 2023

What would happen if a non-technological person found himself in the world of high technology?

If a non-technological person found themselves in a world of high technology, they would likely experience a significant culture shock. 

The rapid pace of technological advancements in the modern world could be overwhelming to someone who is not accustomed to it. They may find it difficult to keep up with the latest technologies and the ever-evolving digital landscape.

In some cases, the non-technological person may feel intimidated or even frightened by the advanced technology around them. They may struggle to understand the terminology and concepts used in the tech industry, which can make it challenging to communicate with others and to participate in the tech-driven economy.

On the other hand, if the person is willing to learn and adapt, they may find that the high-tech world offers many opportunities for growth and advancement. 

They could learn new skills and technologies that could help them succeed in their career or personal life.

Ultimately, whether a non-technological person thrives or struggles in a high-tech world depends on their openness to learning and their willingness to adapt to new technologies and ways of thinking.

PS I love you. And i asked the Ask AI app to write this for me. 

Get it for free --> https://get-askai.app

Wednesday 23 March 2022

Terraform Availability Zone on Azure Deployment. Documentation and Good Examples Missing..


While learning Terraform some time back, I wanted to leverage Availability Zones in Azure. I was specifically looking at Virtual Machine Scale Sets.  https://www.terraform.io/docs/providers/azurerm/r/virtual_machine_scale_set.html 

Looking at the documentation Terraform has, I noticed there is no good example on using zones. So, I tried a few things to see what was really needed for that field. While doing some research, I noticed there are many people in the same situation. No good examples. I figured I'd create this post to help anyone else. And, of course, it's a good reminder for me too if I forget the syntax on how I did this.

Here's a very simple Terraform file. I just created a new folder then a new file called zones.tf. Here's the contents:

variable "location" {
description = "The location where resources will be created"
default = "centralus"
type = string
}

locals {
regions_with_availability_zones = ["centralus","eastus2","eastus","westus"]
zones = contains(local.regions_with_availability_zones, var.location) ? list("1","2","3") : null
}

output "zones" {
value = local.zones
}


The variable 'location' is allowed to be changed from outside the script. But, I used 'locals' for variables I didn't want to be changed from outside. I hard coded a list of Azure regions that have availability zones. Right now it's just a list of regions in the United States. Of course, this is easily modifiable to add other regions.

The 'zones' local variable uses the contains function to see if the specified region is in that array. If so, then the value is a list of strings. Else it's null. This is important. The zones field in Azure resources required either a list of strings or null. An empty list didn't work for me.

As it is right now, you can run the Terraform Apply command and you should see some output. Changing the value of the location variable to something not in the list and you may not see output at all simply because the value is null.

Now, looking at a partial example from the Terraform documentation:

resource "azurerm_virtual_machine_scale_set" "example" { name = "mytestscaleset-1" location = var.location resource_group_name = "${azurerm_resource_group.example.name}" upgrade_policy_mode = "Manual" zones = local.zones

Now the zones field can be used safely when the value is either a list of strings or null. After I ran the complete Terraform script for VM Scale Set, I went to the Azure Portal to verify it worked.

I also changed the specified region to one that I know does not use Availability Zones, South Central US.

This proved to me that I can use a region with and without availability zones in the same Terraform script.

For a list of Azure regions with Availability Zones, see:
https://docs.microsoft.com/en-us/azure/availability-zones/az-overview

Tuesday 12 November 2019

Changing Perpectives into DevSecOPs - Playing around with ParrotOS


For quite sometime, I have refrain myself to keep this blog updated. The last time I did published something was around March this year (2019). Uhmm, I guess I've being a bit lazy I'd say ..

Lolo 😀 ..

Joke apart - today, I am starting a series of blog post for around stuff, I am currently working on..

And this is post is around ParrotOS ..

Due to the nature of this post, I'll presume the reader is familiar with ParrotOS - if not the please have read more about ParrotOS .. As I will not explain it here.

So - Today I did quick refreshment into the ParrotOS VM instance I have installed on VMware Workstation *[https://www.vmware.com/products/workstation-pro.html ]. I haven't used if for quite a while so, it was a bit rustier, therefore I need to updated it.

Whoever the ParrotOS update command was failing with error:

code: [
Temporary failure resolving ‘deb.parrot.sh”

Fig - 01


- As per the screenshot shows, I was unable to connect into Update ParrotOS or connect into the web, as the DNS was not resolving.

Fig. 02


- Neither ping commands worked.

--
After some search into Google here is how I did resolved this..


- By updating the DNS record I was able to then Connect into the internet .. Also you can check the following file:
 ==> $ cat /etc/resolv.conf

*Optional*  - I would advice you to add temporarily
 ==> $ echo >> "nameserver 1.1.1.1" /etc/resolv.conf

It started work afterwards ..


As also was by then able to update the OS;


As still working.. Hope this helps whoever struggles to connect your VM or main machine into the internet.

===> $ sudo anosurf dns


Till next post  :-) 

How to Create a Ansible Lab on your Local Machine using Vagrant in 5 min using ChatGPT - Part 2

Update the above Vagrantfile Centos 8 servers and add Public IP and dhcp on each server .. To update the provided Vagrantfile for the three ...