Showing posts with label commands. Show all posts
Showing posts with label commands. Show all posts
Saturday, 9 April 2016
Tuesday, 10 September 2013
Linux Containers on Virtualbox - Disposal Boxes by Michal Migurski's
Hey look, a month went by and I stopped blogging because I have a new job. Great.
One of my responsibilities is keeping an eye on our sprawling Github account, currently at 326 repositories and 151 members. The current fellows are working on a huge number of projects and I frequently need to be able to quickly install, test and run projects with a weirdly-large variety of backend and server technologies. So, it’s become incredibly important to me to be able to rapidly spin up disposable Linux web servers to test with. Seth clued me in to Linux Containers (LXC) for this:
This is a guide for creating an Ubuntu Linux virtual machine under Virtualbox to host individual containers with simple two-way network connectivity. You’ll be able to clone a container with a single command, and connect to it using a simple <container>.local host name.
Create a new Virtualbox virtual machine to boot from the Ubuntu installation ISO. For a root volume, I selected the VDI format with a size of 32GB. The disk image will expand as it’s allocated, so it won’t take up all that space right away. I manually created three partitions on the volume:
During the OS installation process, you’ll need to select a host name. I used “ubuntu-demo” for this demonstration.
Set up /etc/network/interfaces with two bridges for eth0 and eth1, both DHCP. Note that eth0 and eth1 must be commented-out, as in this sample part of my /etc/network/interfaces:


Shut down the Linux host, and add the secondary interface in Virtual box. Choose host-only networking, the vboxnet0 adapter, and “Allow All” promiscuous mode so that the containers can see inbound network traffic.

The primary interface will be NAT by default, which will carry normal out-bound internet traffic.
Modify the container’s network interfaces by editing /var/lib/lxc/base/rootfs/etc/network/interfaces (/var/lib/lxc/base/rootfs is the root filesystem of the new container) to look like this:
On the other hand, having ready access to a variety of local Linux environments has been a boon to my ability to quickly try out ideas. Special thanks again to Seth for helping me work through some of the networking ugliness.
Shift describes a Vagrant and LXC setup that skips Avahi and uses a plain hostnames for internal connectivity.
The Owner of this post is Michal Migurski
Find is Blog here http://mike.teczno.com/notes/disposable-virtualbox-lxc-environments.html
One of my responsibilities is keeping an eye on our sprawling Github account, currently at 326 repositories and 151 members. The current fellows are working on a huge number of projects and I frequently need to be able to quickly install, test and run projects with a weirdly-large variety of backend and server technologies. So, it’s become incredibly important to me to be able to rapidly spin up disposable Linux web servers to test with. Seth clued me in to Linux Containers (LXC) for this:
LXC provides operating system-level virtualization not via a full blown virtual machine, but rather provides a virtual environment that has its own process and network space. LXC relies on the Linux kernel cgroups functionality that became available in version 2.6.24, developed as part of LXC. … It is used by Heroku to provide separation between their “dynos.”I use a Mac, so I’m running these under Virtualbox. I move around between a number of different networks, so each server container had to have a no-hassle network connection. I’m also impatient, so I really needed to be able to clone these in seconds and have them ready to use.
This is a guide for creating an Ubuntu Linux virtual machine under Virtualbox to host individual containers with simple two-way network connectivity. You’ll be able to clone a container with a single command, and connect to it using a simple <container>.local host name.
The Linux Host
First, download an Ubuntu ISO. I try to stick to the long-term support releases, so I’m using Ubuntu 12.04 here. Get a copy of Virtualbox, also free.Create a new Virtualbox virtual machine to boot from the Ubuntu installation ISO. For a root volume, I selected the VDI format with a size of 32GB. The disk image will expand as it’s allocated, so it won’t take up all that space right away. I manually created three partitions on the volume:
- 4.0 GB ext4 primary.
- 512 MB swap, matching RAM size. Could use more.
- All remaining space btrfs, mounted at /var/lib/lxc.
During the OS installation process, you’ll need to select a host name. I used “ubuntu-demo” for this demonstration.
Host Linux Networking
Boot into Linux. I started by installing some basics, for me: git, vim, tcsh, screen, htop, and etckeeper.Set up /etc/network/interfaces with two bridges for eth0 and eth1, both DHCP. Note that eth0 and eth1 must be commented-out, as in this sample part of my /etc/network/interfaces:
## The primary network interface
#auto eth0
#iface eth0 inet dhcp

auto br0
iface br0 inet dhcp
        dns-nameservers 8.8.8.8
        bridge_ports eth0
        bridge_fd 0
        bridge_maxwait 0

auto br1
iface br1 inet dhcp
        bridge_ports eth1
        bridge_fd 0
        bridge_maxwait 0
Back in Virtualbox preferencese, create a new network adapter and call
it “vboxnet0”. My settings are 10.1.0.1, 255.255.255.0, with DHCP turned
on.
Shut down the Linux host, and add the secondary interface in Virtual box. Choose host-only networking, the vboxnet0 adapter, and “Allow All” promiscuous mode so that the containers can see inbound network traffic.
The primary interface will be NAT by default, which will carry normal out-bound internet traffic.
- Adapter 1: NAT (default)
- Adapter 2: Host-Only vboxnet0
% ping 8.8.8.8

PING 8.8.8.8 (8.8.8.8) 56(84) bytes of data.
64 bytes from 8.8.8.8: icmp_req=1 ttl=63 time=340 ms
…
Use ifconfig to find your Linux IP address (mine is 10.1.0.2), and try ssh’ing to that address from your Mac command line with the username you chose during initial Ubuntu installation.
% ifconfig br1

br1       Link encap:Ethernet  HWaddr 08:00:27:94:df:ed
          inet addr:10.1.0.2  Bcast:10.1.0.255  Mask:255.255.255.0
          inet6 addr: …
Next, we’ll set up Avahi to broadcast host names so we don’t need to remember DHCP-assigned IP addresses. On the Linux host, install avahi-daemon:
% apt-get install avahi-daemonIn the configuration file /etc/avahi/avahi-daemon.conf, change these lines to clarify that our host names need only work on the second, host-only network adapter:
allow-interfaces=br1,eth1
deny-interfaces=br0,eth0,lxcbr0
Then restart Avahi.
% sudo service avahi-daemon restartNow, you should be able to ping and ssh to ubuntu-demo.local from within the virtual machine and your Mac command line.
No Guest Containers
So far, we have a Linux virtual machine with a reliable two-way network connection that’s resilient to external network failures, available via a meaningful host name, and with a slightly funny disk setup. You could stop here, skipping the LXC steps and use Virtualbox’s built-in cloning functionality or something like Vagrant to set up fresh development environments. I’m going to keep going and set up LXC.Linux Guest Containers
Install LXC.% sudo apt-get lxcInitial LXC setup uses templates, and on Ubuntu there are several useful ones that come with the package. You can find them under /usr/lib/lxc/templates; I have templates for ubuntu, fedora, debian, opensuse, and other popular Linux distributions. To create a new container called “base” use lxc-create with a chosen template.
% sudo lxc-create -n base -t ubuntuThis takes a few minutes, because it needs retrieve a bunch of packages for a minimal Ubuntu system. You’ll see this message at some point:
##
# The default user is 'ubuntu' with password 'ubuntu'!
# Use the 'sudo' command to run tasks as root in the container.
##
Without starting the container, modify its network adapters to match the two we set up earlier. Edit the top of /var/lib/lxc/base/config to look something like this:
lxc.network.type=veth
lxc.network.link=br0
lxc.network.flags=up
lxc.network.hwaddr = 00:16:3e:c2:9d:71

lxc.network.type=veth
lxc.network.link=br1
lxc.network.flags=up
lxc.network.hwaddr = 00:16:3e:c2:9d:72
An initial MAC address will be randomly generated for you under lxc.network.hwaddr, just make sure that the second one is different.
Modify the container’s network interfaces by editing /var/lib/lxc/base/rootfs/etc/network/interfaces (/var/lib/lxc/base/rootfs is the root filesystem of the new container) to look like this:
auto eth0
iface eth0 inet dhcp
        dns-nameservers 8.8.8.8

auto eth1
iface eth1 inet dhcp
Now your container knows about two network adapters, and they have been
bridged to the Linux host OS virtual machine NAT and host-only adapters.
Start your new container:
% sudo lxc-start -n baseYou’ll see a normal Linux login screen at first, use the default username and password “ubuntu” and “ubuntu” from above. The system starts out with minimal packages. Install a few so you can get around, and include language-pack-en so you don’t get a bunch of annoying character set warnings:
% sudo apt-get install language-pack-en
% sudo apt-get install git vim tcsh screen htop etckeeper
% sudo apt-get install avahi-daemon
Make a similar change to the /etc/avahi/avahi-daemon.conf as above:
allow-interfaces=eth1
deny-interfaces=eth0
Shut down to return to the Linux host OS.
% sudo shutdown -h nowNow, restart the container with all the above modifications, in daemon mode.
% sudo lxc-start -d -n baseAfter it’s started up, you should be able to ping and ssh to base.local from your Linux host OS and your Mac.
% ssh ubuntu@base.local
Cloning a Container
Finally, we will clone the base container. If you’re curious about the effects of Btrfs, check the overall disk usage of the /var/lib/lxc volume where the containers are stored:% df -h /var/lib/lxc Filesystem Size Used Avail Use% Mounted on /dev/sda3 28G 572M 26G 3% /var/lib/lxcClone the base container to a new one, called “clone”.
% sudo lxc-clone -o base -n cloneLook at the disk usage again, and you will see that it’s not grown by much.
% df -h /var/lib/lxc

Filesystem      Size  Used Avail Use% Mounted on
/dev/sda3        28G  573M   26G   3% /var/lib/lxc
If you actually look at the disk usage of the individual container directories, you’ll see that Btrfs is allowing 1.1GB of files to live in just 573MB of space, representing the repeating base files between the two containers.
% sudo du -sch /var/lib/lxc/*

560M /var/lib/lxc/base
560M /var/lib/lxc/clone
1.1G total
You can now start the new clone container, connect to it and begin making changes.
% sudo lxc-start -d -n clone
% ssh ubuntu@clone.local
Conclusion
I have been using this setup for the past few weeks, currently with a half-dozen containers that I use for a variety of jobs: testing TileStache, installing Rails applications with RVM, serving Postgres data, and checking out new packages. One drawback that I have encountered is that as the disk image grows, my nightly time machine backups grow considerably. The Mac host OS can only see the Linux disk image as a single file.On the other hand, having ready access to a variety of local Linux environments has been a boon to my ability to quickly try out ideas. Special thanks again to Seth for helping me work through some of the networking ugliness.
Further Reading
Tao of Mac has an article on a similar, but slightly different Virtualbox and LXC setup. They don’t include the promiscuous mode setting for the second network adapter, which I think is why they advise using Avahi and port forwarding to connect to the machine. I believe my way here might be easier.Shift describes a Vagrant and LXC setup that skips Avahi and uses a plain hostnames for internal connectivity.
The Owner of this post is Michal Migurski
Find is Blog here http://mike.teczno.com/notes/disposable-virtualbox-lxc-environments.html
Wednesday, 10 July 2013
Manually uninstalling VMware Workstation from Linux hosts
Manually uninstalling VMware Workstation from Linux
Friday, 21 June 2013
About TrueCrypt
I've made up an experimental video showing how to install trueCrypt on uBuntu 13 .. Please check it out..
Wednesday, 23 January 2013
All You Need To Know About Linux Commands

System Info
date – Show the current date and time
cal – Show this month's calendar
uptime – Show current uptime
w – Display who is online
whoami – Who you are logged in as
finger user – Display information about user
uname -a – Show kernel information
cat /proc/cpuinfo – CPU information
cat /proc/meminfo – Memory information
df – Show disk usage
du – Show directory space usage
free – Show memory and swap usage
Keyboard Shortcuts
Enter – Run the command
Up Arrow – Show the previous command
Ctrl + R – Allows you to type a part of the command you're looking for and finds it
Ctrl + Z – Stops the current command, resume with fg in the foreground or bg in the background
Ctrl + C – Halts the current command, cancel the current operation and/or start with a fresh new line
Ctrl + L – Clear the screen
command | less – Allows the scrolling of the bash command window using Shift + Up Arrow and Shift + Down Arrow
!! – Repeats the last command
command !$ – Repeats the last argument of the previous command
Esc + . (a period) – Insert the last argument of the previous command on the fly, which enables you to edit it before executing the command
Ctrl + A – Return to the start of the command you're typing
Ctrl + E – Go to the end of the command you're typing
Ctrl + U – Cut everything before the cursor to a special clipboard, erases the whole line
Ctrl + K – Cut everything after the cursor to a special clipboard
Ctrl + Y – Paste from the special clipboard that Ctrl + U and Ctrl + K save their data to
Ctrl + T – Swap the two characters before the cursor (you can actually use this to transport a character from the left to the right, try it!)
Ctrl + W – Delete the word / argument left of the cursor in the current line
Ctrl + D – Log out of current session, similar to exit
Learn the Commands
apropos subject – List manual pages for subject
man -k keyword – Display man pages containing keyword
man command – Show the manual for command
man -t man | ps2pdf - > man.pdf – Make a pdf of a manual page
which command – Show full path name of command
time command – See how long a command takes
whereis app – Show possible locations of app
which app – Show which app will be run by default; it shows the full path
Searching
grep pattern files – Search for pattern in files
grep -r pattern dir – Search recursively for pattern in dir
command | grep pattern – Search for pattern in the output of command
locate file – Find all instances of file
find / -name filename – Starting with the root directory, look for the file called filename
find / -name ”*filename*” – Starting with the root directory, look for the file containing the string
filename
locate filename – Find a file called filename using the locate command; this assumes you have already used the command updatedb (see next)
updatedb – Create or update the database of files on all file systems attached to the Linux root directory
which filename – Show the subdirectory containing the executable file called filename
grep TextStringToFind /dir – Starting with the directory called dir, look for and list all files containing TextStringToFind
File Permissions
chmod octal file – Change the permissions of file to octal, which can be found separately for user, group, and world by adding: 4 – read (r), 2 – write (w), 1 – execute (x)
Examples:
chmod 777 – read, write, execute for all
chmod 755 – rwx for owner, rx for group and world
For more options, see man chmod.
File Commands
ls – Directory listing
ls -l – List files in current directory using long format
ls -laC – List all files in current directory in long format and display in columns
ls -F – List files in current directory and indicate the file type
ls -al – Formatted listing with hidden files
cd dir – Change directory to dir
cd – Change to home
mkdir dir – Create a directory dir
pwd – Show current directory
rm name – Remove a file or directory called name
rm -r dir – Delete directory dir
rm -f file – Force remove file
rm -rf dir – Force remove an entire directory dir and all it’s included files and subdirectories (use with extreme caution)
cp file1 file2 – Copy file1 to file2
cp -r dir1 dir2 – Copy dir1 to dir2; create dir2 if it doesn't exist
cp file /home/dirname – Copy the file called filename to the /home/dirname directory
mv file /home/dirname – Move the file called filename to the /home/dirname directory
mv file1 file2 – Rename or move file1 to file2; if file2 is an existing directory, moves file1 into directory file2
ln -s file link – Create symbolic link link to file
touch file – Create or update file
cat > file – Places standard input into file
cat file – Display the file called file
more file – Display the file called file one page at a time, proceed to next page using the spacebar
head file – Output the first 10 lines of file
head -20 file – Display the first 20 lines of the file called file
tail file – Output the last 10 lines of file
tail -20 file – Display the last 20 lines of the file called file
tail -f file – Output the contents of file as it grows, starting with the last 10 lines
Compression
tar cf file.tar files – Create a tar named file.tar containing files
tar xf file.tar – Extract the files from file.tar
tar czf file.tar.gz files – Create a tar with Gzip compression
tar xzf file.tar.gz – Extract a tar using Gzip
tar cjf file.tar.bz2 – Create a tar with Bzip2 compression
tar xjf file.tar.bz2 – Extract a tar using Bzip2
gzip file – Compresses file and renames it to file.gz
gzip -d file.gz – Decompresses file.gz back to file
Printing
/etc/rc.d/init.d/lpd start – Start the print daemon
/etc/rc.d/init.d/lpd stop – Stop the print daemon
/etc/rc.d/init.d/lpd status – Display status of the print daemon
lpq – Display jobs in print queue
lprm – Remove jobs from queue
lpr – Print a file
lpc – Printer control tool
man subject | lpr – Print the manual page called subject as plain text
man -t subject | lpr – Print the manual page called subject as Postscript output
printtool – Start X printer setup interface
Network
ifconfig – List IP addresses for all devices on the local machine
ping host – Ping host and output results
whois domain – Get whois information for domain
dig domain – Get DNS information for domain
dig -x host – Reverse lookup host
wget file – Download file
wget -c file – Continue a stopped download
SSH
ssh user@host – Connect to host as user
ssh -p port user@host – Connect to host on port port as user
ssh-copy-id user@host – Add your key to host for user to enable a keyed or passwordless login
User Administration
adduser accountname – Create a new user call accountname
passwd accountname – Give accountname a new password
su – Log in as superuser from current login
exit – Stop being superuser and revert to normal user
Process Management
ps – Display your currently active processes
top – Display all running processes
kill pid – Kill process id pid
killall proc – Kill all processes named proc (use with extreme caution)
bg – Lists stopped or background jobs; resume a stopped job in the background
fg – Brings the most recent job to foreground
fg n – Brings job n to the foreground
Installation from source
./configure
make
make install
dpkg -i pkg.deb – install a DEB package (Debian / Ubuntu / Linux Mint)
rpm -Uvh pkg.rpm – install a RPM package (Red Hat / Fedora)
Stopping & Starting
shutdown -h now – Shutdown the system now and do not reboot
halt – Stop all processes - same as above
shutdown -r 5 – Shutdown the system in 5 minutes and reboot
shutdown -r now – Shutdown the system now and reboot
reboot – Stop all processes and then reboot - same as above
startx – Start the X system
Recommended reading:
Cheat-Sheets.org – All cheat sheets, round-ups, quick reference cards, quick reference guides and quick reference sheets in one page. The only one you need.
Tutorial: The best tips & tricks for bash, explained – Linux Tutorial Blog / Quality Linux tutorials without clutter
LinuxCommand.org – Learning the shell, Writing shell scripts, Script library, SuperMan pages, Who, What, Where, Why
LinuxManPages.com – General commands, System calls, Subroutines, Special files, File formats, Games, Macros and conventions, Maintenence commands, Most Popular Man Pages
Linux Newbie Guide: Shorcuts and Commands - Linux essential shortcuts and sanity commands; Common Linux commands - system info; Basic operations, network apps, file (de)compression; Process control; Basic administration commands, accessing drives/partitions; Network administration tools, music-related commands, graphics-related commands.

Thursday, 13 December 2012
Using Virtual Ethernet Adapters in Promiscuous Mode on a Linux Host
VMware Workstation does not allow the virtual Ethernet adapter to go into promiscuous mode unless the user running VMware Workstation has permission to make that setting. This follows the standard Linux practice that only root can put a network interface into promiscuous mode.
When you install and configure VMware Workstation, you must run the installation as root. VMware Workstation creates the VMnet devices with root ownership and root group ownership, which means that only root has read and write permissions to the devices.
To set the virtual machine's Ethernet adapter to promiscuous mode, you must launch VMware Workstation as root because you must have read and write access to the VMnet device. For example, if you are using bridged networking, you must have access to /dev/vmnet0.
To grant selected other users read and write access to the VMnet device, you can create a new group, add the appropriate users to the group and grant that group read and write access to the appropriate device. You must make these changes on the host operating system as root (su -). For example, you can enter the following commands:
chgrp <newgroup> /dev/vmnet0
chmod g+rw /dev/vmnet0
<newgroup> is the group that should have the ability to set vmnet0 to promiscuous mode.
The command to run vmware workstations ads root is simple: user@user#:~$ sudo vmware start
If you want all users to be able to set the virtual Ethernet adapter (/dev/vmnet0 in our example) to promiscuous mode, run the following command on the host operating system as root:
chmod a+rw /dev/vmnet0
This is another posting showing "how to do computing" for everyday computer usages... For a general public
VMware on Linux : Running in Permiscuous Mode
VMware on Linux: Promiscuous Mode
When VMware Workstation is hosted under Linux, by default it doesn't
allow VM Guests to access the network in Promiscuous mode. There's an
easy fix for this...
If you run something like Wireshark from a VM Guest, you'll see VMware display an error message.
The problem lies with the permissions on the Host. When VMware is started without root privileges, it doesn't have the permissions necessary to access the /dev/vmnet0 device.
A quick temporary bodge is to use chgrp and chmod on the Host, to tweak the permissions on /dev/vmnet* until the next reboot (where yourgroup is a group that your user account is in - typically admin on my Ubuntu machines):
chgrp yourgroup /dev/vmnet*
chmod g+rw /dev/vmnet*
A more permanent fix is to edit /etc/init.d/vmware on the Host, and tweak the ownership and permissions when the device is created, by adding the lines in red:
# Start the virtual ethernet kernel service
vmwareStartVmnet() {
vmwareLoadModule $vnet
"$BINDIR"/vmware-networks --start >> $VNETLIB_LOG 2>&1
chgrp yourgroup /dev/vmnet*
chmod g+rw /dev/vmnet*
After you restart the Host's VMware daemon ...
/etc/init.d/vmware stop
/etc/init.d/vmware start
you'll be able to boot your Guest VM, and use Wireshark or whatever in the Guest. Just Remember! Your VM Guest's Network Adapter must be set to BRIDGED (connected directly to the physical network), not NAT (used to share the host's IP address).
Aside: I did think it ought be possible to achieve the same effect a little more cleanly, by creating a file in /etc/udev/rules.d to set the desired ownership and permission modes for /dev/vmnet*. But nothing I've tried has worked. Anyone?
Monday, 12 November 2012
How to format USB drive using Linux terminal ..
How to format USB with Linux terminal ..
[ Formatting a USB in Ubuntu or linux is as easy as make filesystem (mkfs).
mkfs and tab will show you all the filesystem types you can use:
 [anc@localhost~]$ mkfs
mkfs mkfs.ext3 mkfs.jfs mkfs.ntfs mkfs.vfat
mkfs.cramfs mkfs.ext4 mkfs.minix mkfs.reiserfs mkfs.xfs
mkfs.ext2 mkfs.ext4dev mkfs.msdos mkfs.udffs
To format a USB drive all you need to know is its name, this can be found by
typing df at a terminal:
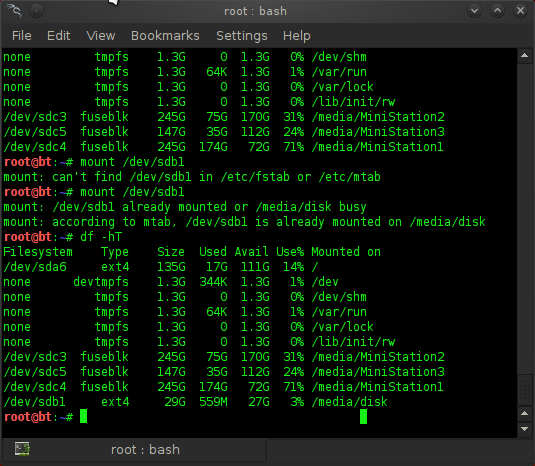
[anc@localhost~]$ df -hT
Filesystem Type Size Used Avail Use% Mounted on
--snip
/dev/sdc1 ext3 3.6G 3.3G 134M 97% /media/disk
 In the above example my USB is sdc1 and is a 4G USB stick. As you can see
I changed it from NTFS to ext3.
FAT32 and NTFS are weak filesystems, not only are they prone to losing data but also
require constant defragging. Most linux filesystems (except ext2) are journalled. Thye never require defragging and have better security- the disadvantage is that if you format a USB memory stick as ext3 it cant be read under windows.
To answer your earlier question,
mkfs.vfat /dev/sdc1
mkfs.ntfs /dev/sdc1
would make FAT32 and NTFS filesystems on a memory stick called sdc1
Hope that helps. ]
[ This is another posting showing "how to do computing" for everyday computer usages... For a general public ]
[ Formatting a USB in Ubuntu or linux is as easy as make filesystem (mkfs).
mkfs and tab will show you all the filesystem types you can use:
 [anc@localhost~]$ mkfs
mkfs mkfs.ext3 mkfs.jfs mkfs.ntfs mkfs.vfat
mkfs.cramfs mkfs.ext4 mkfs.minix mkfs.reiserfs mkfs.xfs
mkfs.ext2 mkfs.ext4dev mkfs.msdos mkfs.udffs
To format a USB drive all you need to know is its name, this can be found by
typing df at a terminal:
[anc@localhost~]$ df -hT
Filesystem Type Size Used Avail Use% Mounted on
--snip
/dev/sdc1 ext3 3.6G 3.3G 134M 97% /media/disk
 In the above example my USB is sdc1 and is a 4G USB stick. As you can see
I changed it from NTFS to ext3.
FAT32 and NTFS are weak filesystems, not only are they prone to losing data but also
require constant defragging. Most linux filesystems (except ext2) are journalled. Thye never require defragging and have better security- the disadvantage is that if you format a USB memory stick as ext3 it cant be read under windows.
To answer your earlier question,
mkfs.vfat /dev/sdc1
mkfs.ntfs /dev/sdc1
would make FAT32 and NTFS filesystems on a memory stick called sdc1

Hope that helps. ]
[ This is another posting showing "how to do computing" for everyday computer usages... For a general public ]
Subscribe to:
Posts (Atom)
-
How To Hide and unhide the hard disk Volumes using CMD Commands : First check how many drives are there in my computer and then s...
-
In the rapidly evolving landscape of software development, the term " DevOps " has gained significant prominence. DevOps, short fo...
-
 While learning Terraform some time back, I wanted to leverage Availability Zones in Azure. I was specifically looking at Virtual Machine Sca...

