Showing posts with label Terminal. Show all posts

Friday, 29 September 2017

Working with PuppetLabs Using Vagrant


While working as DevOps Engineer one of the tools by definition that we use more, often is Puppet. Guess most people will think that you are 100% expert, which is not always the case. So, I need to create this post and track record of my own experiments with Puppet and (PuppetLabs + Vagrant)

You might as what is Vagrant ?
==> "Vagrant is an open-source software product for building and maintaining portable virtual software development environments, e.g. for VirtualBox, Hyper-V, Docker, VMware, and AWS. ... Vagrant simplifies the necessary software configuration management in order to increase development productivity. " read more here: https://www.vagrantup.com/intro/index.html

The initial indentation was to gain better understanding puppet file structure. So, I decided to use Puppetlabs for this ...


So, basically. I did create installed

  • Installed Vagrant
  • Used the Vagrant init command to pull the puppetlabs ubuntu VM
  • Which created a file "Vagrantfile"
  • created a dir puppetlabs


And then started the Setup, so here are the Logs ..

Tdls-Air:puppetlabs psalms91$ vagrant up
Bringing machine 'default' up with 'virtualbox' provider...
==> default: Box 'puppetlabs/ubuntu-16.04-32-puppet' could not be found. Attempting to find and install...
    default: Box Provider: virtualbox
    default: Box Version: 1.0.0
==> default: Loading metadata for box 'puppetlabs/ubuntu-16.04-32-puppet'
    default: URL: https://vagrantcloud.com/puppetlabs/ubuntu-16.04-32-puppet
==> default: Adding box 'puppetlabs/ubuntu-16.04-32-puppet' (v1.0.0) for provider: virtualbox
    default: Downloading: https://vagrantcloud.com/puppetlabs/boxes/ubuntu-16.04-32-puppet/versions/1.0.0/providers/virtualbox.box
==> default: Successfully added box 'puppetlabs/ubuntu-16.04-32-puppet' (v1.0.0) for 'virtualbox'!
==> default: Importing base box 'puppetlabs/ubuntu-16.04-32-puppet'...
==> default: Matching MAC address for NAT networking...
==> default: Checking if box 'puppetlabs/ubuntu-16.04-32-puppet' is up to date...
==> default: Setting the name of the VM: puppetlabs_default_1506687306250_65705
==> default: Clearing any previously set network interfaces...
==> default: Preparing network interfaces based on configuration...
    default: Adapter 1: nat
==> default: Forwarding ports...
    default: 22 (guest) => 2222 (host) (adapter 1)
==> default: Booting VM...
==> default: Waiting for machine to boot. This may take a few minutes...
    default: SSH address: 127.0.0.1:2222
    default: SSH username: vagrant
    default: SSH auth method: private key
    default:
    default: Vagrant insecure key detected. Vagrant will automatically replace
    default: this with a newly generated keypair for better security.
    default:
    default: Inserting generated public key within guest...
    default: Removing insecure key from the guest if it's present...
    default: Key inserted! Disconnecting and reconnecting using new SSH key...
==> default: Machine booted and ready!
==> default: Checking for guest additions in VM...
    default: The guest additions on this VM do not match the installed version of
    default: VirtualBox! In most cases this is fine, but in rare cases it can
    default: prevent things such as shared folders from working properly. If you see
    default: shared folder errors, please make sure the guest additions within the
    default: virtual machine match the version of VirtualBox you have installed on
    default: your host and reload your VM.
    default:
    default: Guest Additions Version: 5.0.20
    default: VirtualBox Version: 5.1
==> default: Mounting shared folders...
    default: /vagrant => /Users/psalms91/Vagrant_VM/puppetlabs
Tdls-Air:puppetlabs psalms91$

Tdls-Air:puppetlabs psalms91$ vagrant ssh

Welcome to Ubuntu 16.04 LTS (GNU/Linux 4.4.0-21-generic i686)

 * Documentation:  https://help.ubuntu.com/

vagrant@localhost:~$

After this I have my Puppet Labs VM running ... After this point was easy, I just needed to goo into the puppet installation dir and look into the dir structure.


done.. :-)

Friday, 28 July 2017

Reset Your Forgotten Ubuntu Password in 2 Minutes or Less


If you’ve ever forgotten your password, you aren’t alone… it’s probably one of the most common tech support problems I’ve encountered over the years. Luckily if you are using Ubuntu they made it incredibly easy to reset your password.
image
All it takes is adjusting the boot parameters slightly and typing a command or two, but we’ll walk you through it.
Reset Your Ubuntu Password
Reboot your computer, and then as soon as you see the GRUB Loading screen, make sure to hit the ESC key so that you can get to the menu.
image
Root Shell – Easy Method
If you have the option, you can choose the “recovery mode” item on the menu, usually found right below your default kernel option.
image[3]
Then choose “Drop to root shell prompt” from this menu.
image[6]
This should give you a root shell prompt.
Alternate Root Shell Method
If you don’t have the recovery mode option, this is the alternate way to manually edit the grub options to allow for a root shell.
First you’ll want to make sure to choose the regular boot kernel that you use (typically just the default one), and then use the “e” key to choose to edit that boot option.
image
Now just hit the down arrow key over to the “kernel” option, and then use the “e” key to switch to edit mode for the kernel option.
image
You’ll first be presented with a screen that looks very similar to this one:
image
You’ll want to remove the “ro quiet splash” part with the backspace key, and then add this onto the end:
rw init=/bin/bash
image
Once you hit enter after adjusting the kernel line, you’ll need to use the B key to choose to boot with that option.
image
At this point the system should boot up very quickly to a command prompt.
Changing the Actual Password
You can use the following command to reset your password:
passwd <username>
For example my username being geek I used this command:
passwd geek
image
After changing your password, use the following commands to reboot your system. (The sync command makes sure to write out data to the disk before rebooting)
sync
reboot –f
I found that the –f parameter was necessary to get the reboot command to work for some reason. You could always hardware reset instead, but make sure to use the sync command first.
And now you should be able to login without any issues.

Tuesday, 24 March 2015

Error while trying to update Ubuntu 14.04 LTS

Hi all this morning, as usual I was kind updating my Ubuntu and part of my normal system maintenance check up and find this error, while trying to update my system.


It seems strange to me, after a quick google - I found a work around on this website on AskUbuntu forum.. http://askubuntu.com/questions/599112/google-chrome-ppa-upgrade-invalid-signature.

"
Open a terminal and enter the following:
wget -q -O - https://dl-ssl.google.com/linux/linux_signing_key.pub | sudo apt-key add -
 
That will import Google's updated GPG Key.

You should be able to update the system without any errors.
Source: Google Linux Repositories
"

Friday, 13 June 2014

How to Install vsftpd on Ubuntu and Add New User


Warning: FTP is inherently insecure. If you must use FTP, consider securing your FTP connection with SSL/TLS. Otherwise, it is best to use SFTP, a secure alternative to FTP.

The first two letters of vsftpd stand for "very secure" and the program was built to have strongest protection against possible FTP vulnerabilities.

Step One—Install vsftpd
You can quickly install vsftpd on your virtual private server in the command line:

sudo apt-get install vsftpd

Once the file finishes downloading, the VSFTP will be on your droplet. Generally speaking, it is already configured with a reasonable amount of security. However, it does provide access on your VPS to anonymous users.

Step Two—Configure vsftpd
Once vsftpd is installed, you can adjust the configuration.

Open up the configuration file:

sudo nano /etc/vsftpd.conf

The biggest change you need to make is to switch the Anonymous_enable from YES to NO:

anonymous_enable=NO

Prior to this change, vsftpd allowed anonymous, unidentified users to access the server's files. This is useful if you are seeking to distribute information widely, but may be considered a serious security issue in most other cases.

After that, uncomment the local_enable option, changing it to yes and, additionally, allow the user to write to the directory.

local_enable=YES
write_enable=YES

Finish up by uncommenting command to chroot_local_user. When this line is set to Yes, all the local users will be jailed within their chroot and will be denied access to any other part of the server.

chroot_local_user=YES
Save and Exit that file.

Because of a recent vsftpd upgrade, vsftpd is "refusing to run with writable root inside chroot". A handy way to address this issue to is to take the following steps:

Create a new directory within the user's home directory
mkdir /home/username/files
Change the ownership of that file to root
chown root:root /home/username

Make all necessary changes within the "files" subdirectory
Then, as always, restart:

sudo service vsftpd restart
Step Three—Access the FTP server
Once you have installed the FTP server and configured it to your liking, you can now access it.

You can reach an FTP server in the browser by typing the domain name into the address bar and logging in with the appropriate ID. Keep in mind, you will only be able to access the user's home directory.

ftp://example.com
Alternatively, you can reach the FTP server on your virtual server through the command line by typing:

ftp example.com

Then you can use the word, "exit," to get out of the FTP shell.


Adding New Users To vsftpd

I found it rather strange that there arent any good tutorial that can explain how to add new users to vftpd. Google gives few results but most of them are trial and error method. So i decided to write this post after spending 1 hr trying to accomplish this simple task.

#edit /etc/vsftpd.conf or /opt/etc/vsftpd.conf
Open the vsftpd.conf file and search for chroot_list_enable=YES
Make sure it is YES. Do the same for the following variables
chroot_list_file=/etc/vsftpd.chroot_list or /opt/etc/vsftpd.chroot_list
chroot_list_enable=YES
Save and close the file

Create vsftpd.chroot_list in /etc/ or /opt/etc/
Add the username you want to export to ftp.
IMP: The user must already be a system user with a valid passwd. You must be able to find /home/
If the user you want to add is not a system user then create that user first before editing the above file.
#adduser 
#passwd 

Restart the vsftpd server using /etc/init.d/vsftpd restart or service vsftpd restart
Now you can log into ftp using the new user.


Tuesday, 30 July 2013

Issues with VMware 8 wont run Kernel 3.8 wont let VMware 8 & 9 work


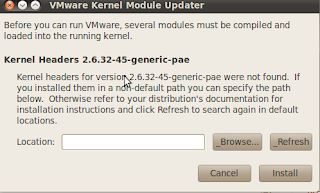
When I try to launch VMware workstation, I get the following error:
Before you can run VMware, several modules must be compiled and loaded into the kernel CANCEL / INSTALL

No errors, when I select INSTALL nothing happens just closes.
I install manually:
sudo apt-get install open-vm-tools open-vm-tools-dev open-vm-dkms open-vm-toolbox open-vm-tools-dev
But already installed to the latest versions.
I will start a bounty to fix this.
Ubuntu 13.04 64bit

pst007x@pst007x-Serval-Professional:~$ uname -a
Linux pst007x-Serval-Professional 3.9.0-030900-generic #201304291257 SMP Mon Apr 29 16:58:15 UTC 2013 x86_64 x86_64 x86_64 GNU/Linux

I have uninstalled and reinstalled all components, but same problem.
I have tried a different Kernel, but end up with the same problem.

Tried this as suggested: here

#!/bin/bash
cd
cp -prn /usr/lib/vmware/modules/source /usr/lib/vmware/modules/source-backup
mkdir fixed
cd fixed
find /usr/lib/vmware/modules/source -name "*.tar" -exec tar xf '{}' \;

## add missing header on kernels
sed -i '/#include "compat_wait.h"/a\#include "compat_sched.h"' vmnet-only/vnetUserListener.c
sed -i '/#include "compat_page.h"/a\#include "compat_sched.h"' vmci-only/include/pgtbl.h
## comment out an invalid definition
sed -i 's|\(extern void poll_initwait(compat_poll_wqueues \*);\)|//\1|' *-only/include/compat_wait.h

tar cf vmblock.tar vmblock-only
tar cf vmci.tar vmci-only
tar cf vmmon.tar vmmon-only
tar cf vmnet.tar vmnet-only
tar cf vmppuser.tar vmppuser-only
tar cf vsock.tar vsock-only

cp -p *.tar /usr/lib/vmware/modules/source

cd /lib/modules/`uname -r`/build/include/linux
ln -s ../generated/autoconf.h
ln -s ../generated/utsrelease.h
cd

vmware-modconfig --console --install-all

# clean up
cd
rm -rf fixed
cd /lib/modules/`uname -r`/build/include/linux
rm autoconf.h utsrelease.h
cd /usr/lib/vmware/modules/
rm -rf source-backup
cd

Didn't work, results of script in terminal:

pst007x@pst007x-Serval-Professional:~/Desktop$ sudo ./run
[sudo] password for pst007x: 
sed: can't read vmci-only/include/pgtbl.h: No such file or directory
sed: can't read *-only/include/compat_wait.h: No such file or directory
tar: vmppuser-only: Cannot stat: No such file or directory
tar: Exiting with failure status due to previous errors
ln: failed to create symbolic link ‘./autoconf.h’: File exists
ln: failed to create symbolic link ‘./utsrelease.h’: 

File exists
Stopping VMware services:
   VMware Authentication Daemon                                        done
   VM communication interface socket family                            done
   Virtual machine communication interface                             done
   Virtual machine monitor                                             done
   Blocking file system                                                done
Using 2.6.x kernel build system.

make: Entering directory `/tmp/modconfig-tGleah/vmmon-only'
/usr/bin/make -C /lib/modules/3.9.0-030900-generic/build/include/.. SUBDIRS=$PWD SRCROOT=$PWD/. \
      MODULEBUILDDIR= modules
make[1]: Entering directory `/usr/src/linux-headers-3.9.0-030900-generic'
  CC [M]  /tmp/modconfig-tGleah/vmmon-only/linux/driver.o
  CC [M]  /tmp/modconfig-tGleah/vmmon-only/linux/driverLog.o
  CC [M]  /tmp/modconfig-tGleah/vmmon-only/linux/hostif.o
  CC [M]  /tmp/modconfig-tGleah/vmmon-only/common/apic.o
  CC [M]  /tmp/modconfig-tGleah/vmmon-only/common/comport.o
  CC [M]  /tmp/modconfig-tGleah/vmmon-only/common/cpuid.o
  CC [M]  /tmp/modconfig-tGleah/vmmon-only/common/hashFunc.o
  CC [M]  /tmp/modconfig-tGleah/vmmon-only/common/memtrack.o
  CC [M]  /tmp/modconfig-tGleah/vmmon-only/common/phystrack.o
  CC [M]  /tmp/modconfig-tGleah/vmmon-only/common/task.o
  CC [M]  /tmp/modconfig-tGleah/vmmon-only/common/vmx86.o
  CC [M]  /tmp/modconfig-tGleah/vmmon-only/vmcore/moduleloop.o
  LD [M]  /tmp/modconfig-tGleah/vmmon-only/vmmon.o
  Building modules, stage 2.
  MODPOST 1 modules
  CC      /tmp/modconfig-tGleah/vmmon-only/vmmon.mod.o
  LD [M]  /tmp/modconfig-tGleah/vmmon-only/vmmon.ko
make[1]: Leaving directory `/usr/src/linux-headers-3.9.0-030900-generic'
/usr/bin/make -C $PWD SRCROOT=$PWD/. \
      MODULEBUILDDIR= postbuild
make[1]: Entering directory `/tmp/modconfig-tGleah/vmmon-only'
make[1]: `postbuild' is up to date.
make[1]: Leaving directory `/tmp/modconfig-tGleah/vmmon-only'
cp -f vmmon.ko ./../vmmon.o
make: Leaving directory `/tmp/modconfig-tGleah/vmmon-only'
Using 2.6.x kernel build system.
make: Entering directory `/tmp/modconfig-tGleah/vmnet-only'
/usr/bin/make -C /lib/modules/3.9.0-030900-generic/build/include/.. SUBDIRS=$PWD SRCROOT=$PWD/. \
      MODULEBUILDDIR= modules
make[1]: Entering directory `/usr/src/linux-headers-3.9.0-030900-generic'
  CC [M]  /tmp/modconfig-tGleah/vmnet-only/driver.o
  CC [M]  /tmp/modconfig-tGleah/vmnet-only/hub.o
  CC [M]  /tmp/modconfig-tGleah/vmnet-only/userif.o
  CC [M]  /tmp/modconfig-tGleah/vmnet-only/netif.o
  CC [M]  /tmp/modconfig-tGleah/vmnet-only/bridge.o
  CC [M]  /tmp/modconfig-tGleah/vmnet-only/filter.o
  CC [M]  /tmp/modconfig-tGleah/vmnet-only/procfs.o
  CC [M]  /tmp/modconfig-tGleah/vmnet-only/smac_compat.o
  CC [M]  /tmp/modconfig-tGleah/vmnet-only/smac.o
  CC [M]  /tmp/modconfig-tGleah/vmnet-only/vnetEvent.o
  CC [M]  /tmp/modconfig-tGleah/vmnet-only/vnetUserListener.o
  LD [M]  /tmp/modconfig-tGleah/vmnet-only/vmnet.o
  Building modules, stage 2.
  MODPOST 1 modules
  CC      /tmp/modconfig-tGleah/vmnet-only/vmnet.mod.o
  LD [M]  /tmp/modconfig-tGleah/vmnet-only/vmnet.ko
make[1]: Leaving directory `/usr/src/linux-headers-3.9.0-030900-generic'
/usr/bin/make -C $PWD SRCROOT=$PWD/. \
      MODULEBUILDDIR= postbuild
make[1]: Entering directory `/tmp/modconfig-tGleah/vmnet-only'
make[1]: `postbuild' is up to date.
make[1]: Leaving directory `/tmp/modconfig-tGleah/vmnet-only'
cp -f vmnet.ko ./../vmnet.o
make: Leaving directory `/tmp/modconfig-tGleah/vmnet-only'
Using 2.6.x kernel build system.
make: Entering directory `/tmp/modconfig-tGleah/vmblock-only'
/usr/bin/make -C /lib/modules/3.9.0-030900-generic/build/include/.. SUBDIRS=$PWD SRCROOT=$PWD/. \
      MODULEBUILDDIR= modules
make[1]: Entering directory `/usr/src/linux-headers-3.9.0-030900-generic'
  CC [M]  /tmp/modconfig-tGleah/vmblock-only/linux/block.o
  CC [M]  /tmp/modconfig-tGleah/vmblock-only/linux/control.o
  CC [M]  /tmp/modconfig-tGleah/vmblock-only/linux/dentry.o
  CC [M]  /tmp/modconfig-tGleah/vmblock-only/linux/file.o
  CC [M]  /tmp/modconfig-tGleah/vmblock-only/linux/filesystem.o
  CC [M]  /tmp/modconfig-tGleah/vmblock-only/linux/inode.o
  CC [M]  /tmp/modconfig-tGleah/vmblock-only/linux/module.o
  CC [M]  /tmp/modconfig-tGleah/vmblock-only/linux/stubs.o
/tmp/modconfig-tGleah/vmblock-only/linux/dentry.c:38:4: warning: initialisation from incompatible pointer type [enabled by default]
/tmp/modconfig-tGleah/vmblock-only/linux/dentry.c:38:4: warning: (near initialisation for ‘LinkDentryOps.d_revalidate’) [enabled by default]
/tmp/modconfig-tGleah/vmblock-only/linux/dentry.c: In function ‘DentryOpRevalidate’:
/tmp/modconfig-tGleah/vmblock-only/linux/dentry.c:104:7: warning: passing argument 2 of ‘actualDentry->d_op->d_revalidate’ makes integer from pointer without a cast [enabled by default]
/tmp/modconfig-tGleah/vmblock-only/linux/dentry.c:104:7: note: expected ‘unsigned int’ but argument is of type ‘struct nameidata *’
  CC [M]  /tmp/modconfig-tGleah/vmblock-only/linux/super.o
/tmp/modconfig-tGleah/vmblock-only/linux/control.c: In function ‘ExecuteBlockOp’:
/tmp/modconfig-tGleah/vmblock-only/linux/control.c:285:9: warning: assignment from incompatible pointer type [enabled by default]
/tmp/modconfig-tGleah/vmblock-only/linux/control.c:296:4: warning: passing argument 1 of ‘putname’ from incompatible pointer type [enabled by default]
In file included from include/linux/proc_fs.h:5:0,
                 from /tmp/modconfig-tGleah/vmblock-only/linux/control.c:28:
include/linux/fs.h:2040:13: note: expected ‘struct filename *’ but argument is of type ‘char *’
/tmp/modconfig-tGleah/vmblock-only/linux/inode.c:49:4: warning: initialisation from incompatible pointer type [enabled by default]
/tmp/modconfig-tGleah/vmblock-only/linux/inode.c:49:4: warning: (near initialisation for ‘RootInodeOps.lookup’) [enabled by default]
  LD [M]  /tmp/modconfig-tGleah/vmblock-only/vmblock.o
  Building modules, stage 2.
  MODPOST 1 modules
WARNING: "putname" [/tmp/modconfig-tGleah/vmblock-only/vmblock.ko] undefined!
  CC      /tmp/modconfig-tGleah/vmblock-only/vmblock.mod.o
  LD [M]  /tmp/modconfig-tGleah/vmblock-only/vmblock.ko
make[1]: Leaving directory `/usr/src/linux-headers-3.9.0-030900-generic'
/usr/bin/make -C $PWD SRCROOT=$PWD/. \
      MODULEBUILDDIR= postbuild
make[1]: Entering directory `/tmp/modconfig-tGleah/vmblock-only'
make[1]: `postbuild' is up to date.
make[1]: Leaving directory `/tmp/modconfig-tGleah/vmblock-only'
cp -f vmblock.ko ./../vmblock.o
make: Leaving directory `/tmp/modconfig-tGleah/vmblock-only'
Using 2.6.x kernel build system.
make: Entering directory `/tmp/modconfig-tGleah/vmci-only'
/usr/bin/make -C /lib/modules/3.9.0-030900-generic/build/include/.. SUBDIRS=$PWD SRCROOT=$PWD/. \
      MODULEBUILDDIR= modules
make[1]: Entering directory `/usr/src/linux-headers-3.9.0-030900-generic'
  CC [M]  /tmp/modconfig-tGleah/vmci-only/linux/driver.o
  CC [M]  /tmp/modconfig-tGleah/vmci-only/linux/vmciKernelIf.o
  CC [M]  /tmp/modconfig-tGleah/vmci-only/common/vmciContext.o
  CC [M]  /tmp/modconfig-tGleah/vmci-only/common/vmciDoorbell.o
  CC [M]  /tmp/modconfig-tGleah/vmci-only/common/vmciDriver.o
  CC [M]  /tmp/modconfig-tGleah/vmci-only/common/vmciDatagram.o
  CC [M]  /tmp/modconfig-tGleah/vmci-only/common/vmciEvent.o
  CC [M]  /tmp/modconfig-tGleah/vmci-only/common/vmciHashtable.o
/tmp/modconfig-tGleah/vmci-only/linux/driver.c:127:4: error: implicit declaration of function ‘__devexit_p’ [-Werror=implicit-function-declaration]
/tmp/modconfig-tGleah/vmci-only/linux/driver.c:127:4: error: initialiser element is not constant
/tmp/modconfig-tGleah/vmci-only/linux/driver.c:127:4: error: (near initialisation for ‘vmci_driver.remove’)
/tmp/modconfig-tGleah/vmci-only/linux/driver.c:1754:1: error: expected ‘=’, ‘,’, ‘;’, ‘asm’ or ‘__attribute__’ before ‘vmci_probe_device’
/tmp/modconfig-tGleah/vmci-only/linux/driver.c:1982:1: error: expected ‘=’, ‘,’, ‘;’, ‘asm’ or ‘__attribute__’ before ‘vmci_remove_device’
/tmp/modconfig-tGleah/vmci-only/linux/driver.c:119:12: warning: ‘vmci_probe_device’ used but never defined [enabled by default]
/tmp/modconfig-tGleah/vmci-only/linux/driver.c:121:13: warning: ‘vmci_remove_device’ used but never defined [enabled by default]
/tmp/modconfig-tGleah/vmci-only/linux/driver.c:2063:1: warning: ‘vmci_interrupt’ defined but not used [-Wunused-function]
/tmp/modconfig-tGleah/vmci-only/linux/driver.c:2137:1: warning: ‘vmci_interrupt_bm’ defined but not used [-Wunused-function]
/tmp/modconfig-tGleah/vmci-only/linux/driver.c:1717:1: warning: ‘vmci_enable_msix’ defined but not used [-Wunused-function]
cc1: some warnings being treated as errors
make[2]: *** [/tmp/modconfig-tGleah/vmci-only/linux/driver.o] Error 1
make[2]: *** Waiting for unfinished jobs....
make[1]: *** [_module_/tmp/modconfig-tGleah/vmci-only] Error 2
make[1]: Leaving directory `/usr/src/linux-headers-3.9.0-030900-generic'
make: *** [vmci.ko] Error 2
make: Leaving directory `/tmp/modconfig-tGleah/vmci-only'
Unable to install all modules.  See log for details.

pst007x@pst007x-Serval-Professional:~/Desktop$ 


Tried as suggested below, but same issue:

pst007x@pst007x-Serval-Professional:~$ sudo vmware-modconfig --console --install-all
[sudo] password for pst007x: 
Stopping VMware services:
   VMware Authentication Daemon                                        done
   VM communication interface socket family                            done
   Virtual machine communication interface                             done
   Virtual machine monitor                                             done
   Blocking file system                                                done
Using 2.6.x kernel build system.
make: Entering directory `/tmp/modconfig-IFjtiM/vmmon-only'
/usr/bin/make -C /lib/modules/3.9.0-030900-generic/build/include/.. SUBDIRS=$PWD SRCROOT=$PWD/. \
      MODULEBUILDDIR= modules
make[1]: Entering directory `/usr/src/linux-headers-3.9.0-030900-generic'
  CC [M]  /tmp/modconfig-IFjtiM/vmmon-only/linux/driver.o
  CC [M]  /tmp/modconfig-IFjtiM/vmmon-only/linux/driverLog.o
  CC [M]  /tmp/modconfig-IFjtiM/vmmon-only/linux/hostif.o
  CC [M]  /tmp/modconfig-IFjtiM/vmmon-only/common/apic.o
  CC [M]  /tmp/modconfig-IFjtiM/vmmon-only/common/comport.o
  CC [M]  /tmp/modconfig-IFjtiM/vmmon-only/common/cpuid.o
  CC [M]  /tmp/modconfig-IFjtiM/vmmon-only/common/hashFunc.o
  CC [M]  /tmp/modconfig-IFjtiM/vmmon-only/common/memtrack.o
  CC [M]  /tmp/modconfig-IFjtiM/vmmon-only/common/phystrack.o
  CC [M]  /tmp/modconfig-IFjtiM/vmmon-only/common/task.o
  CC [M]  /tmp/modconfig-IFjtiM/vmmon-only/common/vmx86.o
  CC [M]  /tmp/modconfig-IFjtiM/vmmon-only/vmcore/moduleloop.o
  LD [M]  /tmp/modconfig-IFjtiM/vmmon-only/vmmon.o
  Building modules, stage 2.
  MODPOST 1 modules
  CC      /tmp/modconfig-IFjtiM/vmmon-only/vmmon.mod.o
  LD [M]  /tmp/modconfig-IFjtiM/vmmon-only/vmmon.ko
make[1]: Leaving directory `/usr/src/linux-headers-3.9.0-030900-generic'
/usr/bin/make -C $PWD SRCROOT=$PWD/. \
      MODULEBUILDDIR= postbuild
make[1]: Entering directory `/tmp/modconfig-IFjtiM/vmmon-only'
make[1]: `postbuild' is up to date.
make[1]: Leaving directory `/tmp/modconfig-IFjtiM/vmmon-only'
cp -f vmmon.ko ./../vmmon.o
make: Leaving directory `/tmp/modconfig-IFjtiM/vmmon-only'
Using 2.6.x kernel build system.
make: Entering directory `/tmp/modconfig-IFjtiM/vmnet-only'
/usr/bin/make -C /lib/modules/3.9.0-030900-generic/build/include/.. SUBDIRS=$PWD SRCROOT=$PWD/. \
      MODULEBUILDDIR= modules
make[1]: Entering directory `/usr/src/linux-headers-3.9.0-030900-generic'
  CC [M]  /tmp/modconfig-IFjtiM/vmnet-only/driver.o
  CC [M]  /tmp/modconfig-IFjtiM/vmnet-only/hub.o
  CC [M]  /tmp/modconfig-IFjtiM/vmnet-only/userif.o
  CC [M]  /tmp/modconfig-IFjtiM/vmnet-only/netif.o
  CC [M]  /tmp/modconfig-IFjtiM/vmnet-only/bridge.o
  CC [M]  /tmp/modconfig-IFjtiM/vmnet-only/filter.o
  CC [M]  /tmp/modconfig-IFjtiM/vmnet-only/procfs.o
  CC [M]  /tmp/modconfig-IFjtiM/vmnet-only/smac_compat.o
  CC [M]  /tmp/modconfig-IFjtiM/vmnet-only/smac.o
  CC [M]  /tmp/modconfig-IFjtiM/vmnet-only/vnetEvent.o
  CC [M]  /tmp/modconfig-IFjtiM/vmnet-only/vnetUserListener.o
  LD [M]  /tmp/modconfig-IFjtiM/vmnet-only/vmnet.o
  Building modules, stage 2.
  MODPOST 1 modules
  CC      /tmp/modconfig-IFjtiM/vmnet-only/vmnet.mod.o
  LD [M]  /tmp/modconfig-IFjtiM/vmnet-only/vmnet.ko
make[1]: Leaving directory `/usr/src/linux-headers-3.9.0-030900-generic'
/usr/bin/make -C $PWD SRCROOT=$PWD/. \
      MODULEBUILDDIR= postbuild
make[1]: Entering directory `/tmp/modconfig-IFjtiM/vmnet-only'
make[1]: `postbuild' is up to date.
make[1]: Leaving directory `/tmp/modconfig-IFjtiM/vmnet-only'
cp -f vmnet.ko ./../vmnet.o
make: Leaving directory `/tmp/modconfig-IFjtiM/vmnet-only'
Using 2.6.x kernel build system.
make: Entering directory `/tmp/modconfig-IFjtiM/vmblock-only'
/usr/bin/make -C /lib/modules/3.9.0-030900-generic/build/include/.. SUBDIRS=$PWD SRCROOT=$PWD/. \
      MODULEBUILDDIR= modules
make[1]: Entering directory `/usr/src/linux-headers-3.9.0-030900-generic'
  CC [M]  /tmp/modconfig-IFjtiM/vmblock-only/linux/block.o
  CC [M]  /tmp/modconfig-IFjtiM/vmblock-only/linux/control.o
  CC [M]  /tmp/modconfig-IFjtiM/vmblock-only/linux/dentry.o
  CC [M]  /tmp/modconfig-IFjtiM/vmblock-only/linux/file.o
  CC [M]  /tmp/modconfig-IFjtiM/vmblock-only/linux/filesystem.o
  CC [M]  /tmp/modconfig-IFjtiM/vmblock-only/linux/inode.o
  CC [M]  /tmp/modconfig-IFjtiM/vmblock-only/linux/module.o
  CC [M]  /tmp/modconfig-IFjtiM/vmblock-only/linux/stubs.o
/tmp/modconfig-IFjtiM/vmblock-only/linux/control.c: In function ‘ExecuteBlockOp’:
/tmp/modconfig-IFjtiM/vmblock-only/linux/control.c:285:9: warning: assignment from incompatible pointer type [enabled by default]
/tmp/modconfig-IFjtiM/vmblock-only/linux/control.c:296:4: warning: passing argument 1 of ‘putname’ from incompatible pointer type [enabled by default]
In file included from include/linux/proc_fs.h:5:0,
                 from /tmp/modconfig-IFjtiM/vmblock-only/linux/control.c:28:
include/linux/fs.h:2040:13: note: expected ‘struct filename *’ but argument is of type ‘char *’
/tmp/modconfig-IFjtiM/vmblock-only/linux/dentry.c:38:4: warning: initialisation from incompatible pointer type [enabled by default]
/tmp/modconfig-IFjtiM/vmblock-only/linux/dentry.c:38:4: warning: (near initialisation for ‘LinkDentryOps.d_revalidate’) [enabled by default]
/tmp/modconfig-IFjtiM/vmblock-only/linux/dentry.c: In function ‘DentryOpRevalidate’:
/tmp/modconfig-IFjtiM/vmblock-only/linux/dentry.c:104:7: warning: passing argument 2 of ‘actualDentry->d_op->d_revalidate’ makes integer from pointer without a cast [enabled by default]
/tmp/modconfig-IFjtiM/vmblock-only/linux/dentry.c:104:7: note: expected ‘unsigned int’ but argument is of type ‘struct nameidata *’
/tmp/modconfig-IFjtiM/vmblock-only/linux/inode.c:49:4: warning: initialisation from incompatible pointer type [enabled by default]
/tmp/modconfig-IFjtiM/vmblock-only/linux/inode.c:49:4: warning: (near initialisation for ‘RootInodeOps.lookup’) [enabled by default]
  CC [M]  /tmp/modconfig-IFjtiM/vmblock-only/linux/super.o
  LD [M]  /tmp/modconfig-IFjtiM/vmblock-only/vmblock.o
  Building modules, stage 2.
  MODPOST 1 modules
WARNING: "putname" [/tmp/modconfig-IFjtiM/vmblock-only/vmblock.ko] undefined!
  CC      /tmp/modconfig-IFjtiM/vmblock-only/vmblock.mod.o
  LD [M]  /tmp/modconfig-IFjtiM/vmblock-only/vmblock.ko
make[1]: Leaving directory `/usr/src/linux-headers-3.9.0-030900-generic'
/usr/bin/make -C $PWD SRCROOT=$PWD/. \
      MODULEBUILDDIR= postbuild
make[1]: Entering directory `/tmp/modconfig-IFjtiM/vmblock-only'
make[1]: `postbuild' is up to date.
make[1]: Leaving directory `/tmp/modconfig-IFjtiM/vmblock-only'
cp -f vmblock.ko ./../vmblock.o
make: Leaving directory `/tmp/modconfig-IFjtiM/vmblock-only'
Using 2.6.x kernel build system.

make: Entering directory `/tmp/modconfig-IFjtiM/vmci-only'
/usr/bin/make -C /lib/modules/3.9.0-030900-generic/build/include/.. SUBDIRS=$PWD SRCROOT=$PWD/. \
      MODULEBUILDDIR= modules
make[1]: Entering directory `/usr/src/linux-headers-3.9.0-030900-generic'
  CC [M]  /tmp/modconfig-IFjtiM/vmci-only/linux/driver.o
  CC [M]  /tmp/modconfig-IFjtiM/vmci-only/linux/vmciKernelIf.o
  CC [M]  /tmp/modconfig-IFjtiM/vmci-only/common/vmciContext.o
  CC [M]  /tmp/modconfig-IFjtiM/vmci-only/common/vmciDatagram.o
  CC [M]  /tmp/modconfig-IFjtiM/vmci-only/common/vmciDoorbell.o
  CC [M]  /tmp/modconfig-IFjtiM/vmci-only/common/vmciDriver.o
  CC [M]  /tmp/modconfig-IFjtiM/vmci-only/common/vmciHashtable.o
  CC [M]  /tmp/modconfig-IFjtiM/vmci-only/common/vmciEvent.o
/tmp/modconfig-IFjtiM/vmci-only/linux/driver.c:127:4: error: implicit declaration of function ‘__devexit_p’ [-Werror=implicit-function-declaration]
/tmp/modconfig-IFjtiM/vmci-only/linux/driver.c:127:4: error: initialiser element is not constant
/tmp/modconfig-IFjtiM/vmci-only/linux/driver.c:127:4: error: (near initialisation for ‘vmci_driver.remove’)

/tmp/modconfig-IFjtiM/vmci-only/linux/driver.c:1754:1: error: expected ‘=’, ‘,’, ‘;’, ‘asm’ or ‘__attribute__’ before ‘vmci_probe_device’
/tmp/modconfig-IFjtiM/vmci-only/linux/driver.c:1982:1: error: expected ‘=’, ‘,’, ‘;’, ‘asm’ or ‘__attribute__’ before ‘vmci_remove_device’
/tmp/modconfig-IFjtiM/vmci-only/linux/driver.c:119:12: warning: ‘vmci_probe_device’ used but never defined [enabled by default]
/tmp/modconfig-IFjtiM/vmci-only/linux/driver.c:121:13: warning: ‘vmci_remove_device’ used but never defined [enabled by default]
/tmp/modconfig-IFjtiM/vmci-only/linux/driver.c:2063:1: warning: ‘vmci_interrupt’ defined but not used [-Wunused-function]
/tmp/modconfig-IFjtiM/vmci-only/linux/driver.c:2137:1: warning: ‘vmci_interrupt_bm’ defined but not used [-Wunused-function]
/tmp/modconfig-IFjtiM/vmci-only/linux/driver.c:1717:1: warning: ‘vmci_enable_msix’ defined but not used [-Wunused-function]
cc1: some warnings being treated as errors
make[2]: *** [/tmp/modconfig-IFjtiM/vmci-only/linux/driver.o] Error 1
make[2]: *** Waiting for unfinished jobs....
make[1]: *** [_module_/tmp/modconfig-IFjtiM/vmci-only] Error 2
make[1]: Leaving directory `/usr/src/linux-headers-3.9.0-030900-generic'
make: *** [vmci.ko] Error 2
make: Leaving directory `/tmp/modconfig-IFjtiM/vmci-only'
Unable to install all modules.  See log for details.


pst007x@pst007x-Serval-Professional:~$ sudo apt-get install build-essential
Reading package lists... Done
Building dependency tree       
Reading state information... Done
build-essential is already the newest version.
0 upgraded, 0 newly installed, 0 to remove and 1 not upgraded.
pst007x@pst007x-Serval-Professional:~$ 

Monday, 13 May 2013

How to Upgrade Wine from the Older version to Wine1.5 on uBuntu

I am new to Wine and anything like it. I want to run the application "ATCS Monitor". When I installed ATCS Monitor I received an error message:

C:\windows\system32\wshom.ocx

Unable to register the DLL/OCX: RegSvr32 failed with exit code 0x1

-From Terminal-

err:typelib:sltg_get_typelib_ref Unable to find reference
err:module:import_dll Library ScrRun.dll (which is needed by L"C:\\windows\\system32\\wshom.ocx") not found


I can get through it by just ignoring it but I then have errors in ATCS Monitor.

First, upgrade to Wine 1.3.35. Wine 1.2.3 is almost a year old and is 
missing some very important updates. 

Second, do a search for the file in the directory $HOME/.wine I suspect 
that either it is not there or it is in the same directory as where the 
program installed. ...


Ubuntu and Ubuntu derivatives (such as Kubuntu) obtain software from packages which are stored in repositories. Ubuntu's default repository includes Wine, however if you want to stay up to date with the latest Wine package you can use WineHQ's by following these instructions.

Adding the WineHQ PPA Repository:

Open the Software Sources menu by launching the Ubuntu Software Center and selecting Edit->Software Sources. Choose the Other Software tab and click Add.
Software Center->Edit->Software Sources->Other Software
Then, copy and paste the line below.
ppa:ubuntu-wine/ppa

Warning: Beta packages

The 1.5 packages here are beta packages. This means they will periodically suffer from regressions, and as a result an update may break functionality in Wine. If the stable 1.4 Wine version works for you, then you may not want to use these beta packages.

Installing Wine:

Once you have added the WineHQ PPA Repository, you are ready to install.
To get the most recent Wine 1.5 beta, click this link to install the wine1.5 package.
To install the older, stable Wine 1.4 version, click this link to install the wine1.4 package.

Upgrading to a new version of Ubuntu

If you are upgrading the entire system, such as going from Ubuntu 11.10 to 12.04, you will need to come back to this page and add the repository again. The built in update manager will not switch the Wine repository automatically.

Alternative Command Line Instructions for Installing Wine:

It is also possible to add the Wine PPA and install via the terminal. This may be useful on Kubuntu, Xubuntu, and other Ubuntu derivatives.
sudo add-apt-repository ppa:ubuntu-wine/ppa
Then update APT package information by running 'sudo apt-get update'. You can now install Wine by typing 'sudo apt-get install wine1.5'.
If you'd like to browse the PPA manually, you can visit its Launchpad page.

Thursday, 4 April 2013

HOW TO Solve issue Nvidia & X.org Server Problems on Linux or BackTrack5


  1. I spent a week trying to resolve the error generated by X.org Server and Nvidia drivers, and I think I've finally solved.
    This is the solution for my Nvidia GT540M & Intel i7-2670QM (ASUS X53SV-SX598V)
    1. Download NVIDIA driver from here: http://www.nvidia.com/object/unix.html.
    I use Linux x86_64/AMD64/EM64T (NVIDIA-Linux-x86_64-285.05.09.run) for my system at 64bit
    2. Install system updates
    Code:
    sudo apt-get update && sudo apt-get upgrade
    3. Install linux-header to the upgraded kernel
    Code:
    sudo apt-get install linux-headers-$(uname -r)
    4. If dkms and build essential haven't been installed
    Code:
    sudo apt-get install dkms build-essential
    5. Open blacklist.conf file to add some lines (I use vi command)
    Code:
    vi /etc/modprobe.d/blacklist.conf
    6. Press i and after others “blacklist” list add this list
    Code:
    blacklist vga16fb
    blacklist nouveau
    blacklist rivafb
    blacklist nvidiafb
    blacklist rivatv
    7. After that, press ESC and type :wq (this write the file)
    8. Make grub.cfg writable
    Code:
    chmod +w /boot/grub/grub.cfg
    9. Open grub.cfg file
    Code:
    vi /boot/grub/grub.cfg
    10. Find text splash text inside the document and add nouveau.modeset=0 text like this
    Code:
    text splash nouveau.modeset=0 vga=791
    11. After that, press ESC and type :wq (this write the file)
    12. Disable writable mode to grub.cfg file
    Code:
    chmod -w /boot/grub/grub.cfg
    13. Update grub.cfg file
    Code:
    update-grub‎
    14. Reboot
    15. Login and don’t write startx
    16. Remove all previous Nvidia drivers
    Code:
    sudo apt-get --purge remove nvidia-*
    17. Remove default drivers
    Code:
    sudo apt-get --purge remove xserver-xorg-video-nouveau
    18. Chmod the nvidia driver file
    Code:
    chmod a+x NVIDIA-Linux-x86_64-285.05.09.run
    19. Run the nvidia driver*
    Code:
    sh ./NVIDIA-Linux-x86_64-285.05.09.run
    *If you use a 64bit system don’t install the OpenGL 32bit
    20. Reboot

    If you have a problem like this:
    Code:
     
    X.Org X Server 1.7.6
    Release Date: 2010-03-17
    X Protocol Version 11, Revision 0
    Build Operating System: Linux 2.6.24-28-server x86_64 Ubuntu
    [...]
    Fatal server error:
    no screens found

    It means that the automatic writing of xorg.conf (nvidia-xconfig command) during installation is not successful., but the driver has been installed correctly.
    To solve this problem just delete the xorg.conf file:

    Code:
    rm /etc/X11/xorg.conf
    When you restart the PC the file xorg.conf file will be created automatically.
    Reebot and type
    Code:
    startx
    I hope it helps

Saturday, 23 March 2013

How to Setup Chroot Directory Structure ...


DebootstrapChroot


This article demonstrates a quick and easy way to create a chroot environment on an Ubuntu computer, which is like having a virtual system without the overhead of actual virtualization.
A chroot can be used for things like:
  • Running a 32-bit Firefox browser or a 32-bit Wine bottle on a 64-bit system.
  • Trying an older or newer Ubuntu release without reinstalling the operating system.
  • Trying a Debian release or other distribution derived from Debian.
  • Cross compiling and building packages for a different platform like Launchpad or Soyuz does it.

Example Configuration


In this example, we use a current Ubuntu 9.04 Jaunty system (the "host") to create a chroot for the older Ubuntu 8.04 Hardy release (the "target"). We are arbitrarily naming the new chroot environment hardy_i386 and putting it in the /srv/chroot directory on the host system.

Step 1: Install packages on the host computer.


First, install debootstrap, which is a utility that downloads and unpacks a basic Ubuntu system:

 $ sudo apt-get install debootstrap


Second, install schroot, which is a utility that wraps the regular chroot program and automatically manages chroot environments:

 $ sudo apt-get install schroot


Note: The debootstrap utility is usually backwards compatible with older releases, but it may be incompatible with newer releases. For example, the debootstrap that is bundled with Jaunty can prepare a Hardy chroot like we are doing here, but the debootstrap that is bundled with Hardy cannot prepare a Jaunty chroot.

If you have any difficultly with a debootstrap version mismatch, then visit http://packages.ubuntu.com/ to manually download and install the debootstrap package on the host system from the repository for the target release.

Step 2: Create a configuration file for schroot.


Choose a short name for the chroot, we use hardy_i386 in this example, and create a configuration file for it like this:

  sudo editor /etc/schroot/chroot.d/hardy_i386.conf


Note: In lucid the filename must not contain '.' , it should be lucid_i386_conf.
Put this in the new file:

  [hardy_i386]
  description=Ubuntu 8.04 Hardy for i386
  location=/srv/chroot/hardy_i386
  #personality=linux32
  root-users=bob
  run-setup-scripts=true
  run-exec-scripts=true
  type=directory
  users=alice,bob,charlie


Note: if you copy this example to your clipboard, be careful to start each line in column 1 before you save the new file! If you forget, the command schroot -l will fail with an error, e.g. 

E:/etc/schroot/chroot.d/hardy_i386.conf: line 0: Invalid line: “  [hardy_i386]”.

Note: for lucid use directory instead of location, e.g. directory=/srv/chroot/hardy_i386 .
Change these things in the example configuration file to fit your system:
  • location: This should be a directory that is outside of the /home tree. The latest schroot documentation recommends /srv/chroot.
  • personality: Enable this line if the host system is 64-bit running on an amd64/x64 computer and the chroot is 32-bit for i386. Otherwise, leave it disabled.
  • users: These are users on the host system that can invoke the schroot program and get access to the chroot system. Your username on the host system should be here.
  • root-users: These are users on the host system that can invoke the schroot program and get direct access to the chroot system as the root user.
Note: Do not put whitespace around the '=' character, and do not quote strings after the '=' character.

Step 3: Run debootstrap.


This will download and unpack a basic Ubuntu system to the chroot directory, similar to what the host system already has at the real root directory ("/").

 $ sudo mkdir -p /srv/chroot/hardy_i386
 $ sudo debootstrap --variant=buildd --arch=i386 hardy /srv/chroot/hardy_i386 http://archive.ubuntu.com/ubuntu/


This command should work for any distribution that is derived from Debian. Substitute the architecture "i386", the release name "hardy", and the repository address "http://archive.ubuntu.com/ubuntu/" appropriately. For example, do this to get the 64-bit build of Hardy instead of the 32-bit build:

  $ sudo debootstrap --arch=amd64 hardy /srv/chroot/hardy_amd64/ http://archive.ubuntu.com/ubuntu/


Note: Remember to change all instances of hardy_i386 to hardy_amd64 in the configuration file and on the command line if you actually do this.
Do something like this to get an upstream Debian release:

  $ sudo debootstrap --arch=amd64 sid /srv/chroot/sid_amd64/ http://ftp.debian.org/debian/


If trouble arises, debootsrap accepts a --verbose flag that may provide further insight.

Step 4: Check the chroot


This command lists configured chroots:tro
  $ schroot -l


If hardy_i386 appears in the list, then run:
  $ schroot -c hardy_i386 -u root


Note: This should work without using sudo to invoke the schroot program, and it should result in a root prompt in the chroot environment. Check that the root prompt is in a different system:

  # lsb_release -a


For the Hardy system that we just built, the lsb_release command should print:

No LSB modules are available.
Distributor ID: Ubuntu
Description:    Ubuntu 8.04
Release:        8.04
Codename:       hardy

We're done!

WARNING


For convenience, the default schroot configuration rebinds the /home directory on the host system so that it appears in the chroot system. This could be unexpected if you are familiar with the older dchroot program or the regular chroot program because it means that you can accidentally delete or otherwise damage things in /home on the host system.

To change this behavior run:
  $ sudo editor /etc/schroot/mount-defaults


And disable the /home line so that the file reads:

  # mount.defaults: static file system information for chroots.
  # Note that the mount point will be prefixed by the chroot path
  # (CHROOT_PATH)
  #
  # <file system> <mount point>   <type>  <options>       <dump>  <pass>
  proc            /proc           proc    defaults        0       0
  /dev/pts        /dev/pts        none    rw,bind         0       0
  tmpfs           /dev/shm        tmpfs   defaults        0       0
  #/home           /home           none    rw,bind         0       0
  /tmp            /tmp            none    rw,bind         0       0


The mount.defaults file is the /etc/fstab for chroot environments.

Hints


Install the ubuntu-minimal package in a new chroot after you create it:

  $ schroot -c hardy_i386 -u root
  # apt-get install ubuntu-minimal

If you get locale warnings in the chroot like "Locale not supported by C library." or "perl: warning: Setting locale failed." , then try one or more of these commands:

  $ sudo dpkg-reconfigure locales

  $ sudo apt-get install language-pack-en

  $ locale-gen en_US.UTF-8


If your preferred language is not English, then change "-en" and "en_US" appropriately.
As of Lucid, schroot has changed in these ways:
  • The file should be named: /etc/schroot/chroot.d/hardy-i386
  • The keywords in the file have changed and some have been deprecated. Additionally, keywords have to start at the beginning of the line. The file should read:
  [hardy-i386]
  description=Ubuntu 8.04 Hardy for i386
  directory=/srv/chroot/hardy-i386
  #personality=linux32
  root-users=bob
  type=directory
  users=alice,bob,charlie


As of Maverick schroot has further changed in these ways:
  • The configuration file should be stored in /etc/schroot/

TLDR


There's a much simplier way to get a basic chroot environment from an ISO image; if the text above seems TLDR, try this.

First of all, install Ubuntu Customization Kit:

  $ sudo apt-get install uck


Then set the directory in which you want to create the chroot environment:
  $ export BASEDIR=/path/to/chroot/directory/


Unpack the ISO image (this may take quite some time):
  $ sudo uck-remaster-unpack-iso /path/to/your/image.iso "$BASEDIR" && sudo uck-remaster-unpack-rootfs "$BASEDIR" && sudo uck-remaster-unpack-initrd "$BASEDIR"


You're done! Now, to enter the chroot environment, just execute
  $ sudo uck-remaster-chroot-rootfs /path/to/chroot/directory/


every time you wish to enter the chroot console. To leave it, type "exit".
To be able to run X applications, e.g. gedit, run

  # HOME=/root


in the chroot environment. 

How to check for open ports on Linux

Checking for open ports is among the first steps to secure your device. Listening services may be the entrance for attackers who may exploit...