Showing posts with label ubuntu. Show all posts

Tuesday, 1 October 2024

How to Install Bottles on Ubuntu 24.04, 22.04, or 20.04

Bottles is a versatile tool designed to streamline the management and execution of Windows applications on Linux systems. It offers a user-friendly interface that simplifies the configuration of wine bottles, enabling users to run a wide array of Windows software efficiently.

Key features include:

  • Isolation: Each application operates in its containerized environment, enhancing compatibility and reducing conflicts.
  • Customization: Users can tailor settings, dependencies, and environments for each bottle, ensuring optimal performance.
  • Version Control: Bottles support multiple Wine versions, allowing users to select the most suitable one for their applications.
  • Performance Tuning: Advanced configuration options are available to optimize the performance of Windows applications on Linux.
  • Easy Integration: Bottles integrate seamlessly with the Linux desktop, providing a coherent user experience.
  • Snapshot Feature: Users can take snapshots of their bottle configurations, making it easy to revert to a previous state if needed.
  • Community Templates: Bottles offers community-driven templates, streamlining the setup of typical applications.
  • Update Management: The client provides straightforward mechanisms to update Wine and applications within bottles.

With Bottles, users gain a powerful ally to enhance their productivity and expand the range of applications available on their Linux systems. Let’s explore the technical steps to get Bottles up and running on your Ubuntu system.

Install Bottles via Flatpak with Flathub

Install Flatpak for Bottles Installation (Skip if Installed)

Begin by installing Flatpak, which the package manager requires for bottles. If Flatpak is already in your system, you can skip this step.

Execute the following command:

sudo apt install flatpak -y

A system reboot is recommended for those installing Flatpak for the first time. This step ensures that all necessary paths, especially for icons, are correctly set up. If not rebooted, you may encounter unexpected issues.

To reboot, save your work and use the traditional graphical shutdown interface, or use the command:

reboot

For detailed instructions on installing or upgrading Flatpak, including accessing the latest stable or development builds, refer to our comprehensive guide on installing Flatpak on Ubuntu.

Enable Flathub for Bottles Installation

To proceed with the installation of Bottles, enable Flathub repository with the following command:

sudo flatpak remote-add --if-not-exists flathub https://flathub.org/repo/flathub.flatpakrepo

Enabling Flathub is crucial as it provides access to the Bottles package and other applications not typically available in the Ubuntu repositories.

Install Bottles via Flatpak Command

Finally, install Bottles using Flatpak. Run the command below in your terminal:

flatpak install flathub com.usebottles.bottles -y

This command fetches and installs Bottles from the Flathub repository, ensuring you get the latest version that is compatible with your Ubuntu system.

Launch Bottles

CLI Command to Launch Bottles

To launch Bottles from your terminal, utilize the following command:

flatpak run com.usebottles.bottles

This command instantly activates Bottles, providing immediate access to its features. Using the command line for launching applications like Bottles is a direct approach many users favor for its speed and simplicity.

GUI Method to Launch Bottles

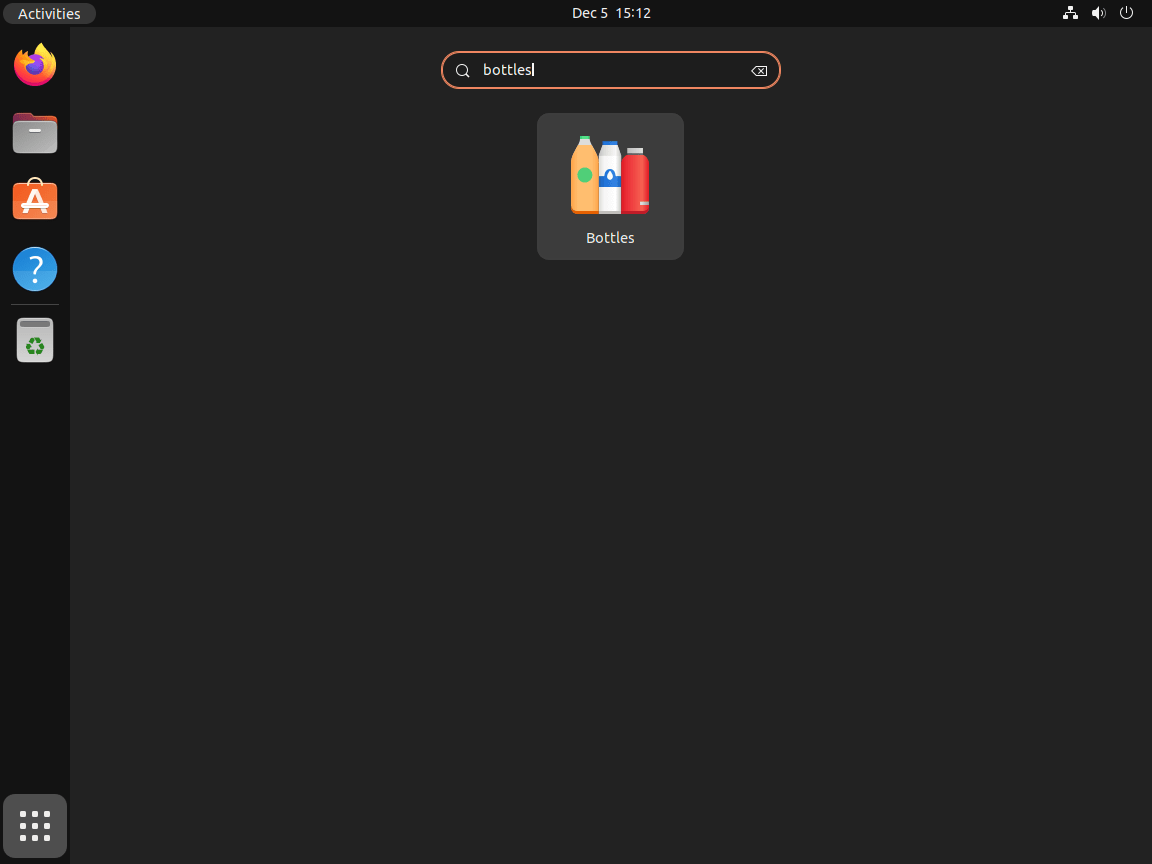
For those who prefer a graphical user interface (GUI), Bottles can be launched without using the command line. Follow these steps to open Bottles through the GUI:

  1. Click on Activities at the top left corner of your screen.
  2. Select Show Applications to view a list of all installed applications.
  3. Scroll to find and click on the Bottles application icon.
Example: Setting Up a Gaming Environment with Bottles

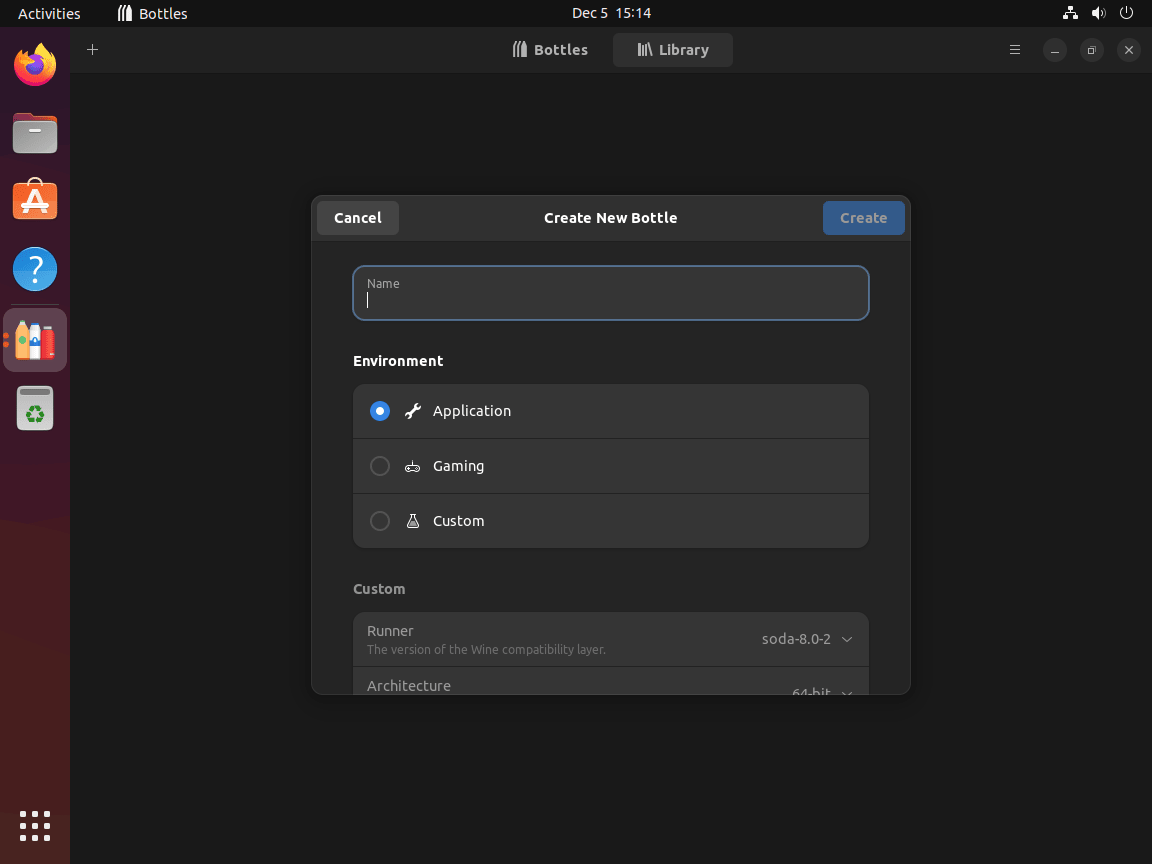
Establishing Your Environment

Initiate the process by creating a new environment in Bottles. This environment will be dedicated to your gaming applications. Name it appropriately to reflect its usage or the types of games you intend to install. Naming conventions help organize and differentiate various environments, especially if you plan to create multiple ones for different purposes.
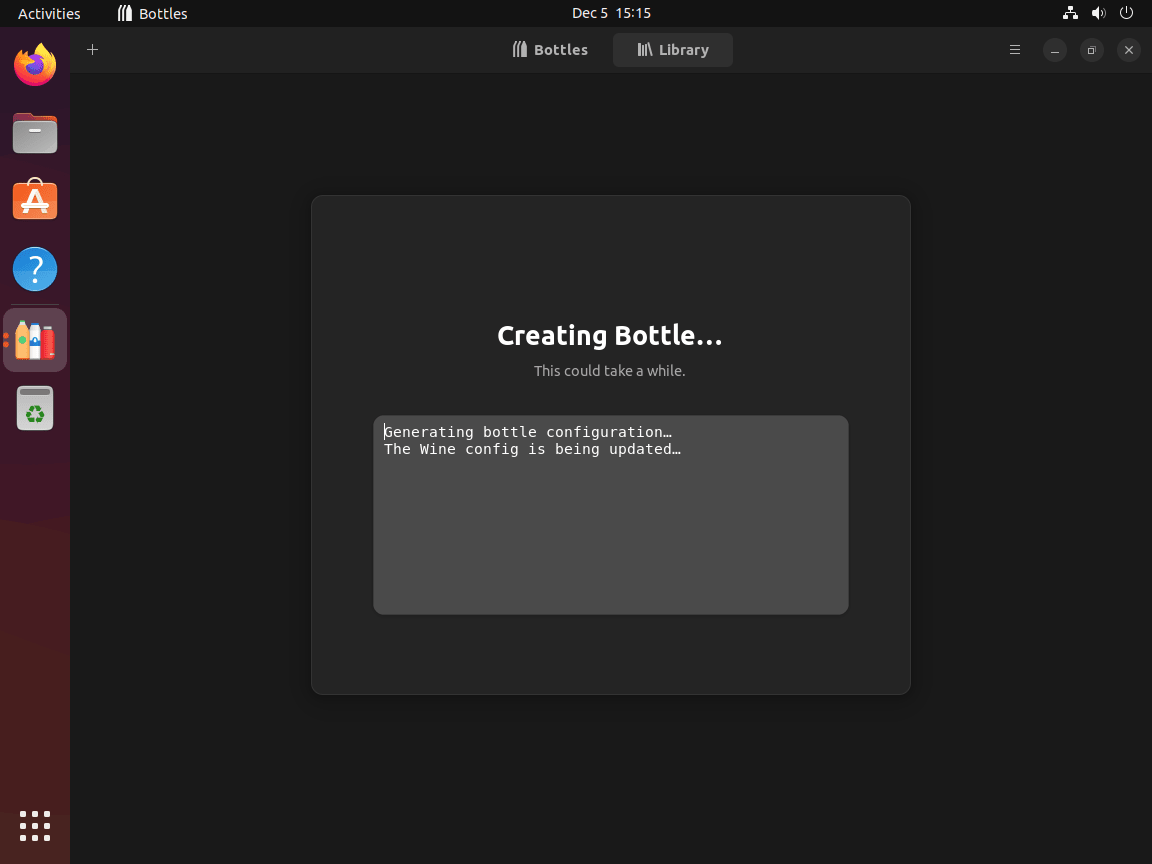
Environment Setup and Dependencies Installation

After naming your environment, Bottles will commence the setup. This includes installing necessary Windows dependencies, a crucial step for ensuring compatibility with gaming applications.

Note: The time taken for this setup varies based on your system’s specifications and performance capabilities.
Configuring Environment Details

Once the environment setup is complete, you will access the Bottles details section. Here, you can fine-tune various aspects like preferences, dependencies, and program settings.
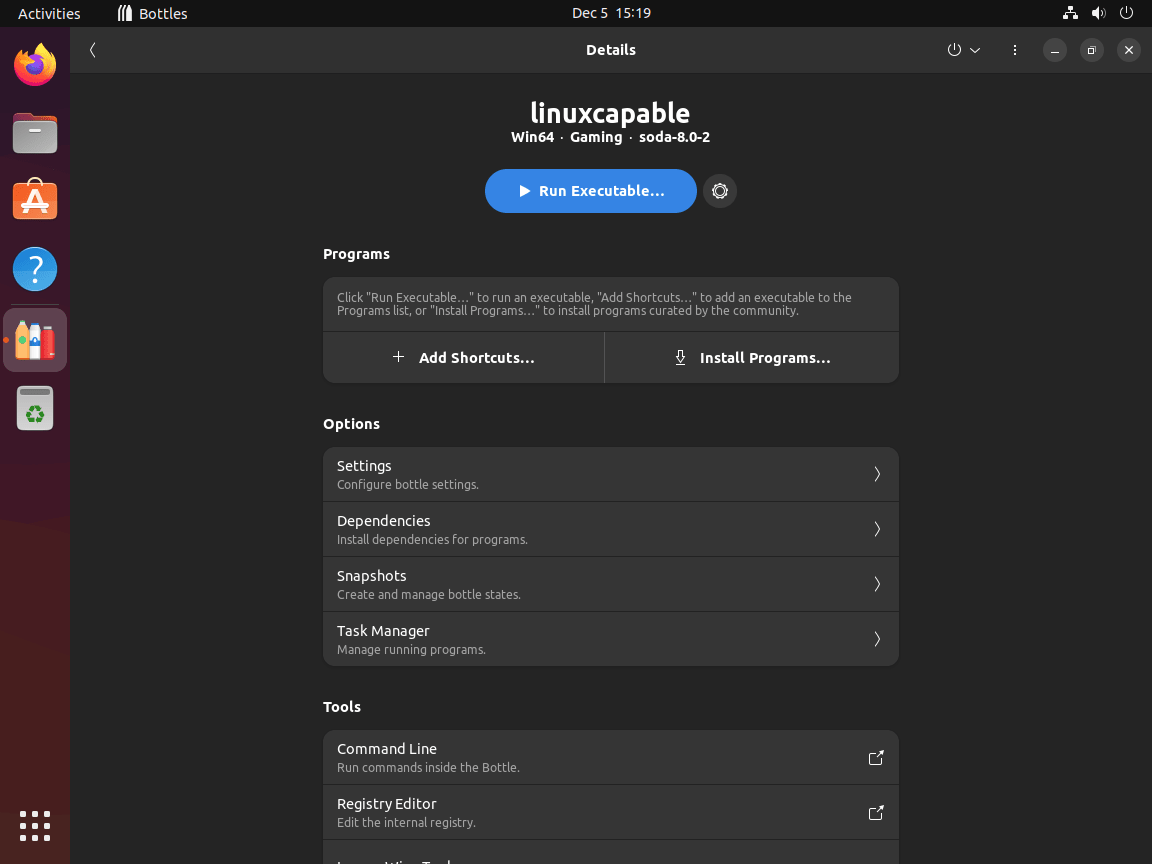
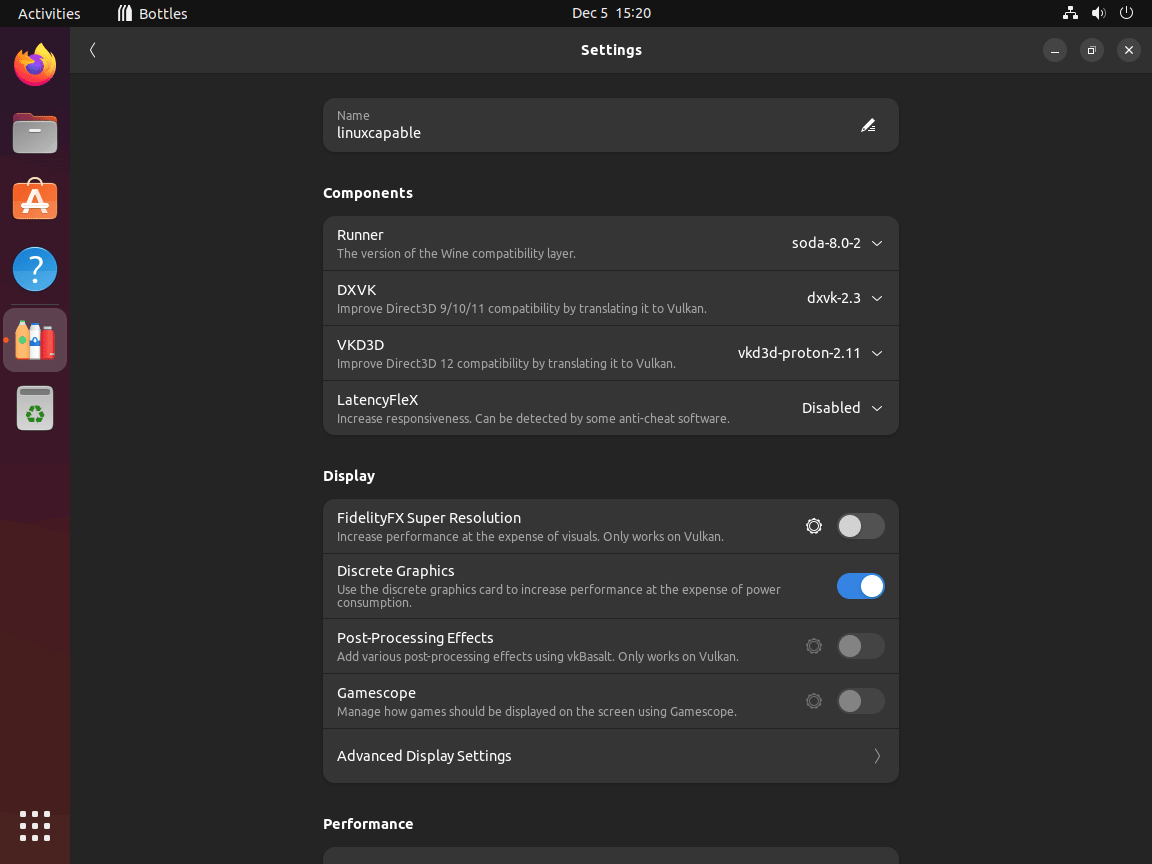
Setting Preferences

In the preferences section, you can adjust settings to improve your gaming experience. This might include tweaking graphics settings, managing resource allocation, or making other modifications that enhance game performance. Each adjustment should be considered carefully to balance system performance with gaming quality.
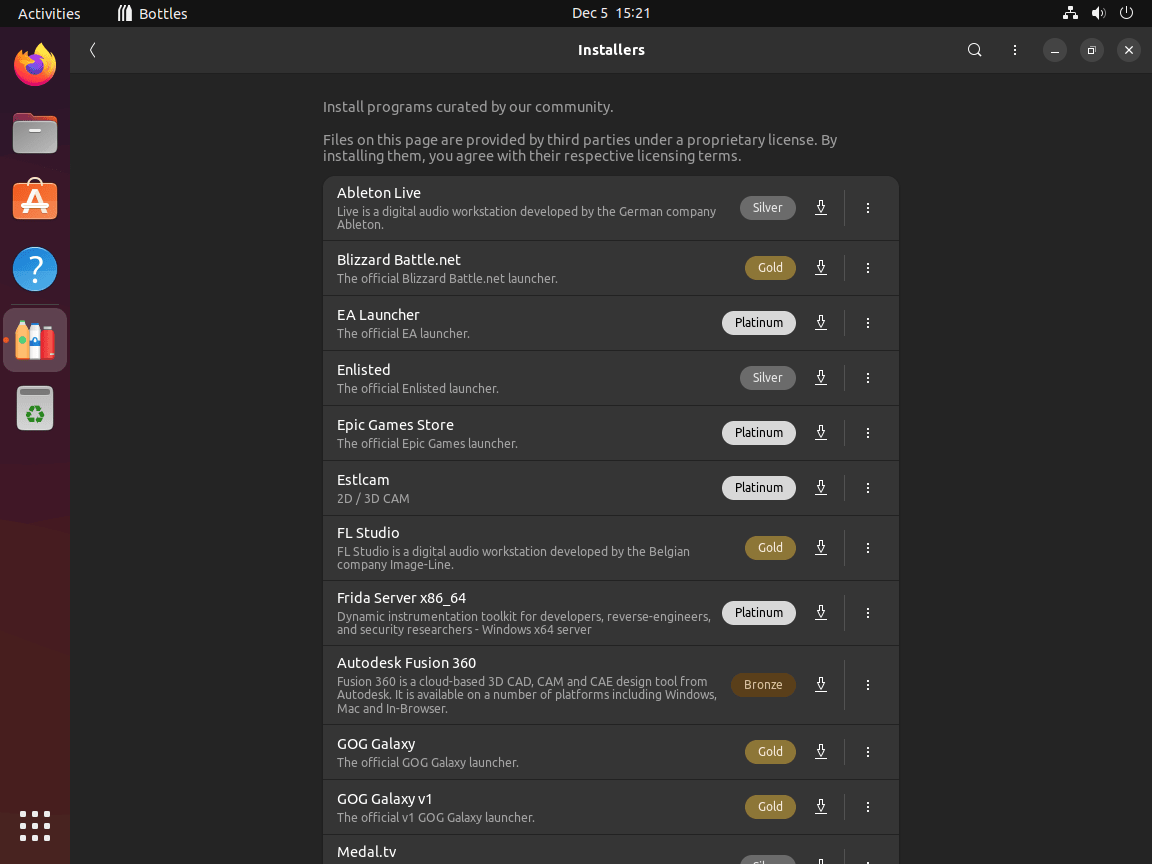
Installing Gaming Installers (If you created a Gaming Bottles)

Bottles provide direct access to popular gaming installers like Battle.net and EA Launcher. This feature simplifies the process of installing and managing your favorite games. Select the desired installer, and Bottles will handle the installation process, integrating these platforms into your Ubuntu system seamlessly.
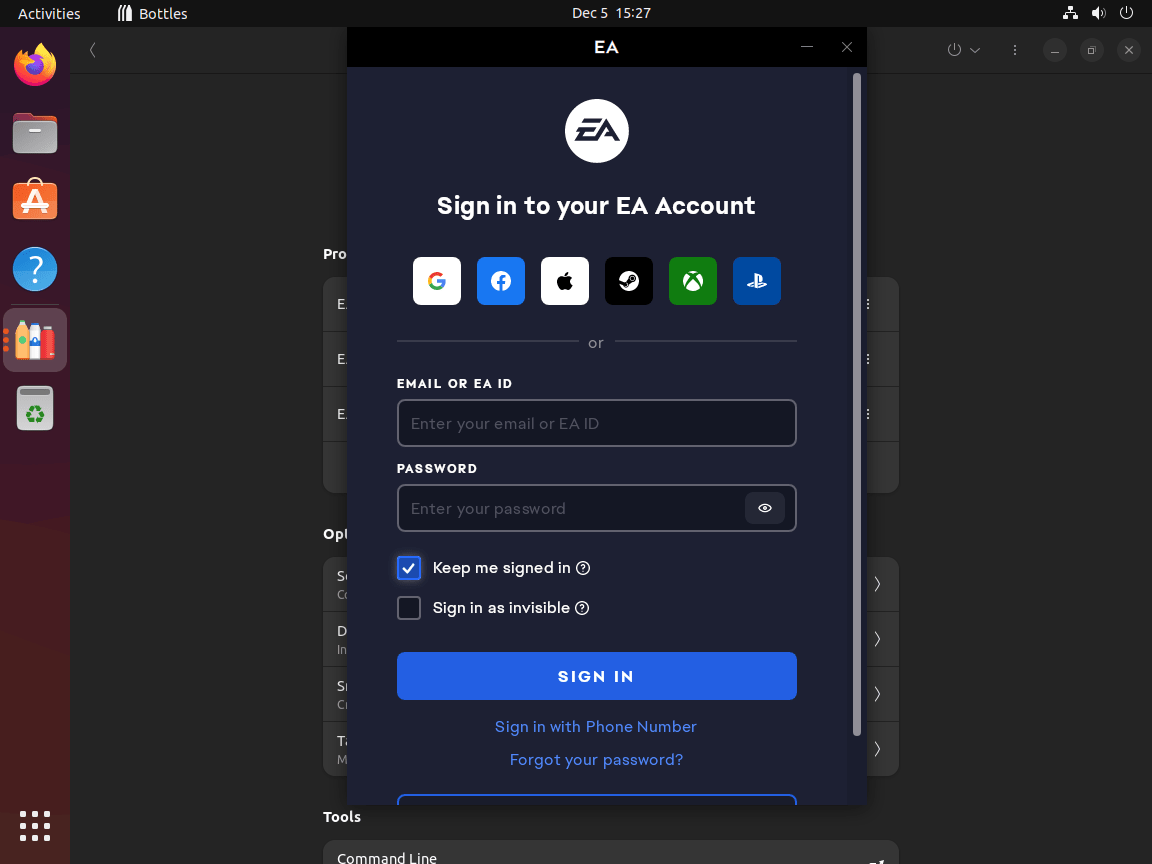
Launching Applications from Programs

After installing the gaming applications, you can launch them directly from the Programs section in Bottles. This centralized approach to accessing your games streamlines the user experience, keeping all your gaming tools in one convenient location.
Managing Bottles via Terminal

Update Bottles

To keep Bottles up-to-date, employ the following command in the terminal. Regular updates ensure that you have the latest features and security enhancements. It’s important to note that the version of Bottles you have installed dictates the specific updates that will be applied.

flatpak update

By design, Flatpak routinely checks for updates automatically. This feature helps maintain your software without manual intervention, ensuring you’re always running the most current version.

Remove (Uninstalling) Bottles

If you decide Bottles are no longer needed on your system, the uninstallation process is straightforward. Use the command below to remove Bottles. This command uninstalls the software and deletes related data, ensuring a clean removal.

flatpak uninstall --delete-data com.usebottles.bottles

After uninstalling Bottles, it is a good practice to clean up any remaining residual files. The following command removes unused components, which helps free up space and keep your system organized.

flatpak remove --unused

Executing this command efficiently ensures your system remains clutter-free, especially after removing software like Bottles.

Conclusion

We’ve walked through the steps to install Bottles on Ubuntu 24.04, 22.04, or 20.04 LTS, making running Windows apps on your Linux machine easier. Remember, Bottles offers a great blend of flexibility and user-friendliness, so don’t hesitate to explore its features and tailor it to your needs.

Useful Links

Here are some valuable links related to using Bottles:

  • Bottles Official Website: Visit the official Bottles website for information about the software, features, and download options.
  • Bottles Documentation: Access comprehensive documentation for detailed guides on installing, configuring, and using Bottles.
  • Bottles App Store: Explore the Bottles App Store for various applications that can be managed and run using Bottles.
  • Bottles Database: Check out the Bottles database for a list of applications and their compatibility statuses.
  • Bottles Forum: Join the Bottles community forum to discuss issues, share solutions, and get support from other users.

Tuesday, 2 July 2024

How to LVM resize filesystem Guide

 Increase the size of an LVM logical volume - Step-by-step Guide.

Tested on

Debian (Etch, Lenny, Squeeze)
Fedora (14)
Ubuntu (Hardy, Intrepid, Jaunty, Karmic, Lucid, Maverick, Natty)

Objective

To increase the size of an existing LVM logical volume

Background

Be aware that extending a logical volume does not by itself let you to store more files in a filesystem located on that volume. If that is your aim then you will need to:
  1. increase the size of the underlying block device (the logical volume), then
  2. increase the size of the filesystem to fill the block device.
These instructions cover the first step only. The method for the second step will depend on the type of filesystem (and in some cases there will be no practicable method). See below for further information.

Scenario

Suppose that /dev/vg0/foo is a logical volume of size 80GB. You wish to increase its size by 40GB to 120GB.

Method

A logical volume can be extended using the lvextend command. You can specify either the amount by which you want to increase the size of the volume:
lvextend --size +40G /dev/vg0/foo

or the final size that you want to achieve:
lvextend --size 120G /dev/vg0/foo

If successful you should see a response of the form:
Extending logical volume foo to 8.00 GB
Logical volume foo successfully resized

Testing

Verify the new size of the logical volume using the lvdisplay command:
lvdisplay /dev/vg0/foo

This should give a response of the form:
--- Logical volume ---
LV Name /dev/vg0/foo
VG Name vg0
LV UUID w2q9ZN-hKnN-CLGf-6Z5g-e1QZ-DCKX-1DYZvR
LV Write Access read/write
LV Status available
# open 0
LV Size 120.00 GB
Current LE 30720
Segments 2
Allocation inherit
Read ahead sectors auto
- currently set to 256
Block device 254:85

You should not at this stage expect to see any increase in the amount of usable space within whatever filesystem located on the logical volume, for example, as reported by the df command: it is only the size of the underlying block device that has been changed.

Next steps

If the logical volume contains a filesystem then you will probably now want to extend it to fill the newly available space. Filesystems that can be extended include ext2, ext3, ext4, jfs, reiserfs and xfs. See:
Some filesystems cannot be extended, either because their design makes this impracticable or because the necessary software has not been written. In that case your only option is to move the files somewhere else, then recreate the filesystem, then move the files back.

Troubleshooting

Alternatives

lvresize

An alternative to lvextend is to use the lvresize command:
lvresize --size +40G /dev/vg0/foo

or:
lvresize --size 120G /dev/vg0/foo

The difference is that lvextend can only increase the size of a volume, whereas lvresize can increase or reduce it. This makes lvresize more powerful but more dangerous. If you accidentally reduce the size of a volume without first reducing the size of the filesystem contained within it then the filesystem is likely to be damaged irreparably. For scenarios similar to the one described here, lvextend is recommended because mistakes of this type are not then possible.

See also

Tuesday, 25 June 2024

How to install the lasted Terraform with Home Brew on Mac or Ubuntu

 Hello all welcome into my blog. Here you author, on this article I will be sharing my solution around a problem I found today while updating Home brew on my Machine.

This solution applies both to MacOS as to Ubuntu - as long as you have Homebrew installed on you machine. Please, this article assumes, you are experienced with command line and you have homebrew installed and running through your system..

In case, you have not installed on your system,  then please - here on this page check [ Step-by-steps guide to install home brew Mac ] and how to do the same on Linux/Ubuntu .


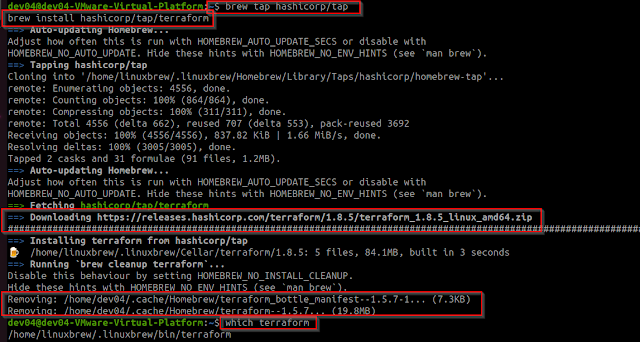
The above screenshot was captured while, I was updating all libs installed by Homebrew - and noticed that Terraform have a quite outdated version.👌.. It got me thinking.. 

Uhmm, what if I check it out then, brew throw another message on output


This second message, we can clearly see, the message saying quote "We will nor accept any new Terraform releases in homebrew/core" I was a bit confused here. So, I decided to start investigating is .. So my next step was to run the following command to check, the current installed Terraform was accepted as figure out ways to solve the problem.

So, run $ brew doctor command;


Although, brew reported both Terraform and OpenSSL 1.1 as deprecated - lets focus only on Terraform lets talk about OpenSSL in another blog post.

  I removed Terraform currently installed on my system:


Consulting - Terraform Documentation here I done reinstalled Terraform with Homebrew

Using the lasted version.

The lasts steps is to close your terminal and start new session on Terminal and run - the command $ terraform version

Now you have the latest version of Terraform running on Infra. Happy coding 😁😀😄 ..See you all on the next blog post, happy reading.

Friday, 28 July 2017

Reset Your Forgotten Ubuntu Password in 2 Minutes or Less


If you’ve ever forgotten your password, you aren’t alone… it’s probably one of the most common tech support problems I’ve encountered over the years. Luckily if you are using Ubuntu they made it incredibly easy to reset your password.
image
All it takes is adjusting the boot parameters slightly and typing a command or two, but we’ll walk you through it.
Reset Your Ubuntu Password
Reboot your computer, and then as soon as you see the GRUB Loading screen, make sure to hit the ESC key so that you can get to the menu.
image
Root Shell – Easy Method
If you have the option, you can choose the “recovery mode” item on the menu, usually found right below your default kernel option.
image[3]
Then choose “Drop to root shell prompt” from this menu.
image[6]
This should give you a root shell prompt.
Alternate Root Shell Method
If you don’t have the recovery mode option, this is the alternate way to manually edit the grub options to allow for a root shell.
First you’ll want to make sure to choose the regular boot kernel that you use (typically just the default one), and then use the “e” key to choose to edit that boot option.
image
Now just hit the down arrow key over to the “kernel” option, and then use the “e” key to switch to edit mode for the kernel option.
image
You’ll first be presented with a screen that looks very similar to this one:
image
You’ll want to remove the “ro quiet splash” part with the backspace key, and then add this onto the end:
rw init=/bin/bash
image
Once you hit enter after adjusting the kernel line, you’ll need to use the B key to choose to boot with that option.
image
At this point the system should boot up very quickly to a command prompt.
Changing the Actual Password
You can use the following command to reset your password:
passwd <username>
For example my username being geek I used this command:
passwd geek
image
After changing your password, use the following commands to reboot your system. (The sync command makes sure to write out data to the disk before rebooting)
sync
reboot –f
I found that the –f parameter was necessary to get the reboot command to work for some reason. You could always hardware reset instead, but make sure to use the sync command first.
And now you should be able to login without any issues.

Tuesday, 26 July 2016

How to Create You Lab on Kali Linux - Using VMware or VBox

Before you start - Here are something that you need to consider..

  • Install VirtualBox or Vmware
  • Install LiveCD in VirtualBox or Vmware
  • Boot and try out your LiveCD

Introduction.


There are lots of tutorials available on the internet related to hacking but the big problem lies in testing your theoretical skills. Unless you don't have practical exposure to hacking, you cannot really understand the strength of it. The technique I will discuss here will be advantageous for those who have only single system and want to set up a testing network using it. In case you have multiple systems then you can easily test for your skills by making one system as target and other as attacker.
VMware Workstation 12 Pro - Leading Edge PC Virtualization VMware Workstation 12 Pro


Download VMware Workstation or Player

The best way to practice hacking is within a virtual environment. Essentially, you set up a hacking system, such as Kali Linux, and some victims to exploit. Ideally, you would want multiple operating systems (Windows XP, Vista, 7, and 8, as well as a Linux flavor) and applications so that you can try out a variety of hacks.

Virtual machines and a virtual network are the best and safest way to set up a hacking lab. There are several virtualization systems out there, including Citrix, Oracle's VirtualBox, KVM, Microsoft's Virtual PC and Hyper-V, and VMware'sWorkstation, VMware Player and ESXi. For a laboratory environment, I strongly recommend VMware's Workstation or Player. Workstation is commercial product that costs under $200, while Player is free. You can also get a free 30-day trial of Workstation.

Player is limited to just playing VMs , while Workstation can both create and play VMs. Let's download VMware's Workstation or Player here.


Then - For you Images you can download a pre-built image. As it will allow you to save some time, you don't need to build the image from scratch. Here is a link for you to download several Linux pre-built Linux Images on SourceForge.

I don't encourage you to download pre-built Windows VM from anywhere, for the single fact that Microsoft itself provides you with pre-built Windows VM for you to use on your VM Lab. Again I did the research for you and here it the link for you to download the Windows of your choice,  Obs: Remember Windows only allow you to use those VM images for 30 days. Please, READ Microsoft TERMS AND CONDITIONS before you use their software here is the url for you.


Keep posted - This tutorial continues on Part 2

Also check this Handful tutorials I have found online:

Checkout our tutorial videos below. Learn more about.
  1. OWASP AppSec Basics: http://www.youtube.com/watch?v=CDbWvEwBBxo
  2. OWASP SQL Injection: http://www.youtube.com/watch?v=pypTYPaU7mM
  3. OWASP Cross Site Scripting: http://www.youtube.com/watch?v=_Z9RQSnf8-g
  4. OWASP Strict Transport Security: http://www.youtube.com/watch?v=zEV3HOuM_Vw

How to Use Microsoft Ready-Made VM Images for VMware and VBox

Microsoft Officially Offering Ready-Made VirtualBox And VMWare Images

Microsoft Offering ready made pre-installed windows operating system to test Internet Explorer  , virtual machine images are available for windows ,mac and linux virtualization solutions , for cross browser testing , so you can test your site in different operating systems .
IE versions being offered are:
  • IE7 on Vista
  • IE8 on Windows 7
  • IE9 on Windows 7
  • IE10 on Windows 8
Offered  VMs that will run on:
  • Windows
  • OSX
  • Linux
The VM software choices are specific to the OS you choose:
  • Windows – Hyper-V, Virtual PC, VirtualBox & VMWare Player
  • OSX- VirtualBox & VMWare Fusion
  • Linux – VirtualBox
Cross-browser testing  simplified
Cross-browser testing
simplified
You have to just download and open vbox files with virtualbox or vmx files with vmware and you will get all pre-installed windows operating system , and you are good to go ,
there is pre-installed windows 8 virtual image if you want to test drive windows 8 🙂
How to Install virtual images :
  1. Download Virtual Images
  2. extract it somehwhere
  3. open vmware player or workstation
  4. click on file >> open
  5. locate  ” somefile”.vmx
  6. it will load up virtual image component

Monday, 11 July 2016

How to Complete Uninstall VMware Workstation from Kali Linux, Ubuntu 15 - 16 and Debian 7/8

VMWare Workstation doesn't ship in a deb, so it isn't registered in dpkg (which is why you can't find it in the software center). It does have an install and uninstall utility though.
To uninstall VMWare Workstation, you will need to run:
sudo vmware-installer --uninstall-product vmware-workstation  
If you just run:
vmware-installer
by itself, it will print all the options you have available. If you run:
vmware-installer -l
It will print a list of all VMWare products you have installed.
Similarly, to uninstall VMWare Player:
sudo vmware-installer --uninstall-product vmware-player

Tuesday, 24 March 2015

Error while trying to update Ubuntu 14.04 LTS

Hi all this morning, as usual I was kind updating my Ubuntu and part of my normal system maintenance check up and find this error, while trying to update my system.


It seems strange to me, after a quick google - I found a work around on this website on AskUbuntu forum.. http://askubuntu.com/questions/599112/google-chrome-ppa-upgrade-invalid-signature.

"
Open a terminal and enter the following:
wget -q -O - https://dl-ssl.google.com/linux/linux_signing_key.pub | sudo apt-key add -
 
That will import Google's updated GPG Key.

You should be able to update the system without any errors.
Source: Google Linux Repositories
"

Thursday, 28 August 2014

How Update DNS Records in Local Linux Machine - [ Ubuntu ]

Created Thursday 28 August 2014

By TDL Matias


***************************************************************
This tutorial is to use as my own keep track record of things I do everyday with Linux.. I had to install a new linux distro into a user computers, the distro in question was Ubuntu 12.04 - 64bit.

I have gave the machine a name = DevOps14 with IP 172.xx.xx.184 - The problem is that that same machine, had being installed on the intranet before with same hostname (DevOps14) and had assigned previously the IP address 172.xx.xx.185 ..

after installed, I tried to access it using the hostname, I was getting network names conflit errors ..

When I tried to ping it .. I was getting the following error ...


user@host1:~$ traceroute -n devops14.uk.domain
traceroute to devops14.uk.domain (172.xx.xx.185), 30 hops max, 60 byte packets
1 172.16.14.70 2996.257 ms !H 2996.201 ms !H 2996.180 ms !H

user@host1:~$ ping -c 3 devops14.uk.domain
PING devops14.uk.domain(172.xx.xx.185) 56(84) bytes of data.
From host1.uk.domain (172.xx.xx.xx) icmp_seq=1 Destination Host Unreachable
From host1.uk.domain (172.xx.xx.xx) icmp_seq=2 Destination Host Unreachable
From host1.uk.domain(172.xx.xx.xx) icmp_seq=3 Destination Host Unreachable


--- devops14.uk.domain ping statistics ---
3 packets transmitted, 0 received, +3 errors, 100% packet loss, time 2014ms


Then, I went and updated our DNS server records usind rndc tool ... Tried do ping the devops14 again .. but not avail ..


user@host1:~$ ping -c 3 devops14.uk.domain
PING devops14.uk.domain (172.xx.xx.185) 56(84) bytes of data.
From host1.uk.domain (172.xx.xx.xx) icmp_seq=1 Destination Host Unreachable
From host1.uk.domain (172.xx.xx.xx) icmp_seq=2 Destination Host Unreachable
From host1.uk.domain (172.xx.xx.xx) icmp_seq=3 Destination Host Unreachable


---devops14.uk.domain ping statistics ---
3 packets transmitted, 0 received, +3 errors, 100% packet loss, time 2000ms
pipe 3


Ok then ..IF I have updated the DNS - Records, theres no reason that I could not ping that machine right into the IP - 172.xx.xx.184 instead of 172.xx.xx.185 ... Something was no really adding up ...


So I went into https://www.google.com/ to investigate and se if someone had come accross the same issue it was then when I found in a Ubuntu forum [http://askubuntu.com/questions/414826/how-to-flush-dns-in-ubuntu-12-04 ]


That I had only to refresh the network DNS record on my local machine with this command.


user@host1:~$ sudo /etc/init.d/nscd restart
* Restarting Name Service Cache Daemon nscd                                                                      [ OK ]


And then PING it again ....


user@host1:~$ ping -c 3 devops14.uk.domain
PING devops14.uk.domain (172.xx.xx.184) 56(84) bytes of data.
64 bytes from devops14.local (172.xx.xx.184): icmp_seq=1 ttl=64 time=0.582 ms
64 bytes from devops14.local (172.xx.xx.184): icmp_seq=2 ttl=64 time=0.139 ms
64 bytes from devops14.local (172.xx.xx.184): icmp_seq=3 ttl=64 time=0.103 ms


---devops14.uk.domain ping statistics ---
3 packets transmitted, 3 received, 0% packet loss, time 2000ms rtt min/avg/max/mdev = 0.103/0.274/0.582/0.218 ms


 All working fine now ... 

Friday, 13 June 2014

How to Install vsftpd on Ubuntu and Add New User


Warning: FTP is inherently insecure. If you must use FTP, consider securing your FTP connection with SSL/TLS. Otherwise, it is best to use SFTP, a secure alternative to FTP.

The first two letters of vsftpd stand for "very secure" and the program was built to have strongest protection against possible FTP vulnerabilities.

Step One—Install vsftpd
You can quickly install vsftpd on your virtual private server in the command line:

sudo apt-get install vsftpd

Once the file finishes downloading, the VSFTP will be on your droplet. Generally speaking, it is already configured with a reasonable amount of security. However, it does provide access on your VPS to anonymous users.

Step Two—Configure vsftpd
Once vsftpd is installed, you can adjust the configuration.

Open up the configuration file:

sudo nano /etc/vsftpd.conf

The biggest change you need to make is to switch the Anonymous_enable from YES to NO:

anonymous_enable=NO

Prior to this change, vsftpd allowed anonymous, unidentified users to access the server's files. This is useful if you are seeking to distribute information widely, but may be considered a serious security issue in most other cases.

After that, uncomment the local_enable option, changing it to yes and, additionally, allow the user to write to the directory.

local_enable=YES
write_enable=YES

Finish up by uncommenting command to chroot_local_user. When this line is set to Yes, all the local users will be jailed within their chroot and will be denied access to any other part of the server.

chroot_local_user=YES
Save and Exit that file.

Because of a recent vsftpd upgrade, vsftpd is "refusing to run with writable root inside chroot". A handy way to address this issue to is to take the following steps:

Create a new directory within the user's home directory
mkdir /home/username/files
Change the ownership of that file to root
chown root:root /home/username

Make all necessary changes within the "files" subdirectory
Then, as always, restart:

sudo service vsftpd restart
Step Three—Access the FTP server
Once you have installed the FTP server and configured it to your liking, you can now access it.

You can reach an FTP server in the browser by typing the domain name into the address bar and logging in with the appropriate ID. Keep in mind, you will only be able to access the user's home directory.

ftp://example.com
Alternatively, you can reach the FTP server on your virtual server through the command line by typing:

ftp example.com

Then you can use the word, "exit," to get out of the FTP shell.


Adding New Users To vsftpd

I found it rather strange that there arent any good tutorial that can explain how to add new users to vftpd. Google gives few results but most of them are trial and error method. So i decided to write this post after spending 1 hr trying to accomplish this simple task.

#edit /etc/vsftpd.conf or /opt/etc/vsftpd.conf
Open the vsftpd.conf file and search for chroot_list_enable=YES
Make sure it is YES. Do the same for the following variables
chroot_list_file=/etc/vsftpd.chroot_list or /opt/etc/vsftpd.chroot_list
chroot_list_enable=YES
Save and close the file

Create vsftpd.chroot_list in /etc/ or /opt/etc/
Add the username you want to export to ftp.
IMP: The user must already be a system user with a valid passwd. You must be able to find /home/
If the user you want to add is not a system user then create that user first before editing the above file.
#adduser 
#passwd 

Restart the vsftpd server using /etc/init.d/vsftpd restart or service vsftpd restart
Now you can log into ftp using the new user.


Tuesday, 22 April 2014

Read Media .vob Files on Ubuntu

Finally I figured out how to do it. These are the steps:
  • Create a subdirectory called VIDEO_TS and move all files there.
  • Create an DVD ISO file by executing:
genisoimage -iso-level 1 -dvd-video -volset-size 1 -o output.iso root_folder
  • Mount the DVD ISO by executing:
sudo mount -t iso9660 -o loop output.iso /media/cd/
The result will be a compatible ISO image which can be played using any video player (Totem, MPlayer, Dragon, etc.).
For those ones who are too ubuntufied, you can use K3B to create a DVD project and select "Create image only" before burn it.
Anyway, thanks for the answers. This site is too different from what I was used to in StackOverflow though, I have to say. It seems that some of you just read the title of the questions before answering. Maybe my English is too bad :)

Tuesday, 22 October 2013

OpenVPN Client Configuration on Ubuntu 12.04

OpenVPN Client Configuration on Ubuntu 12.04

To use the Ubuntu as OpenVPN client, install these packages:
sudo apt-get install network-manager-openvpn
2
sudo apt-get install network-manager-openvpn-gnome
3
Select the “Edit Connections” from Network Manager GUI:
4
From the VPN tab, click on ‘Add‘ button:
5
Select OpenVPN as the VPN Connection Type and press “Create“:
6
Enter all the required information like OpenVPN’s server ip address/name as the “Gateway“, “Type” to “Certificates (TLS)“, locate and point your “User Certificate” , “CA Certificate and “Private Key“. Also click on “Advanced” button:
7
Enable compression or other special settings as per your requirement:
8
Connect to the VPN:
9
If everything go well, it will show you the success message:
10
Check your interface configuration, you will find one new interface named “tun0” something:
ifconfig
11
Hope this will help you!

How to check for open ports on Linux

Checking for open ports is among the first steps to secure your device. Listening services may be the entrance for attackers who may exploit...