Thursday, 23 May 2013
Tuesday, 21 May 2013
How to add Swap Memory into uBuntu ..

Linux RAM is composed of chunks of memory called pages. To free up pages of RAM, a “linux swap” can occur and a page of memory is copied from the RAM to preconfigured space on the hard disk. Linux swaps allow a system to harness more memory than was originally physically available.
However, swapping does have disadvantages. Because hard disks have a much slower memory than RAM, virtual private server performance may slow down considerably. Additionally, swap thrashing can begin to take place if the system gets swamped from too many files being swapped in and out.
Check for Swap Space
Before we proceed to set up a swap file, we need to check if any swap files have been enabled on the VPS by looking at the summary of swap usage.
swapon -s
An empty list will confirm that you have no swap files enabled:
Filename Type Size Used Priority
Check the File System
After we know that we do not have a swap file enabled on the virtual server, we can check how much space we have on the server with the
df command. The swap file will take 512MB— since we are only using up about 8% of the /dev/sda, we can proceed.df Filesystem 1K-blocks Used Available Use% Mounted on /dev/sda 20907056 1437188 18421292 8% / udev 121588 4 121584 1% /dev tmpfs 49752 208 49544 1% /run none 5120 0 5120 0% /run/lock none 124372 0 124372 0% /run/shm

Create and Enable the Swap File
Now it’s time to create the swap file itself using the dd command :
sudo dd if=/dev/zero of=/swapfile bs=1024 count=512k
“of=/swapfile” designates the file’s name. In this case the name is swapfile.
Subsequently we are going to prepare the swap file by creating a linux swap area:
sudo mkswap /swapfile
The results display:
Setting up swapspace version 1, size = 262140 KiB
no label, UUID=103c4545-5fc5-47f3-a8b3-dfbdb64fd7eb
Finish up by activating the swap file:
sudo swapon /swapfile
You will then be able to see the new swap file when you view the swap summary.
swapon -s
Filename    Type  Size Used Priority
/swapfile                               file  262140 0 -1
This file will last on the virtual private server until the machine reboots. You can ensure that the swap is permanent by adding it to the fstab file.
Open up the file:
sudo nano /etc/fstab
Paste in the following line:
/swapfile none swap sw 0 0
To prevent the file from being world-readable, you should set up the correct permissions on the swap file:
sudo chown root:root /swapfile
sudo chmod 0600 /swapfile

How to Code in Python 3 metaprogramming!
Some of the most significant changes in Python 3 are related to metaprogramming. In this tutorial, I'll cover decorators, class decorators, descriptors, and metaclasses. However, the focus will be on idioms and examples that are only....
Friday, 17 May 2013
Raspberry Pi Wireless Attack Toolkit
Raspberry Pi Wireless Attack Toolkit
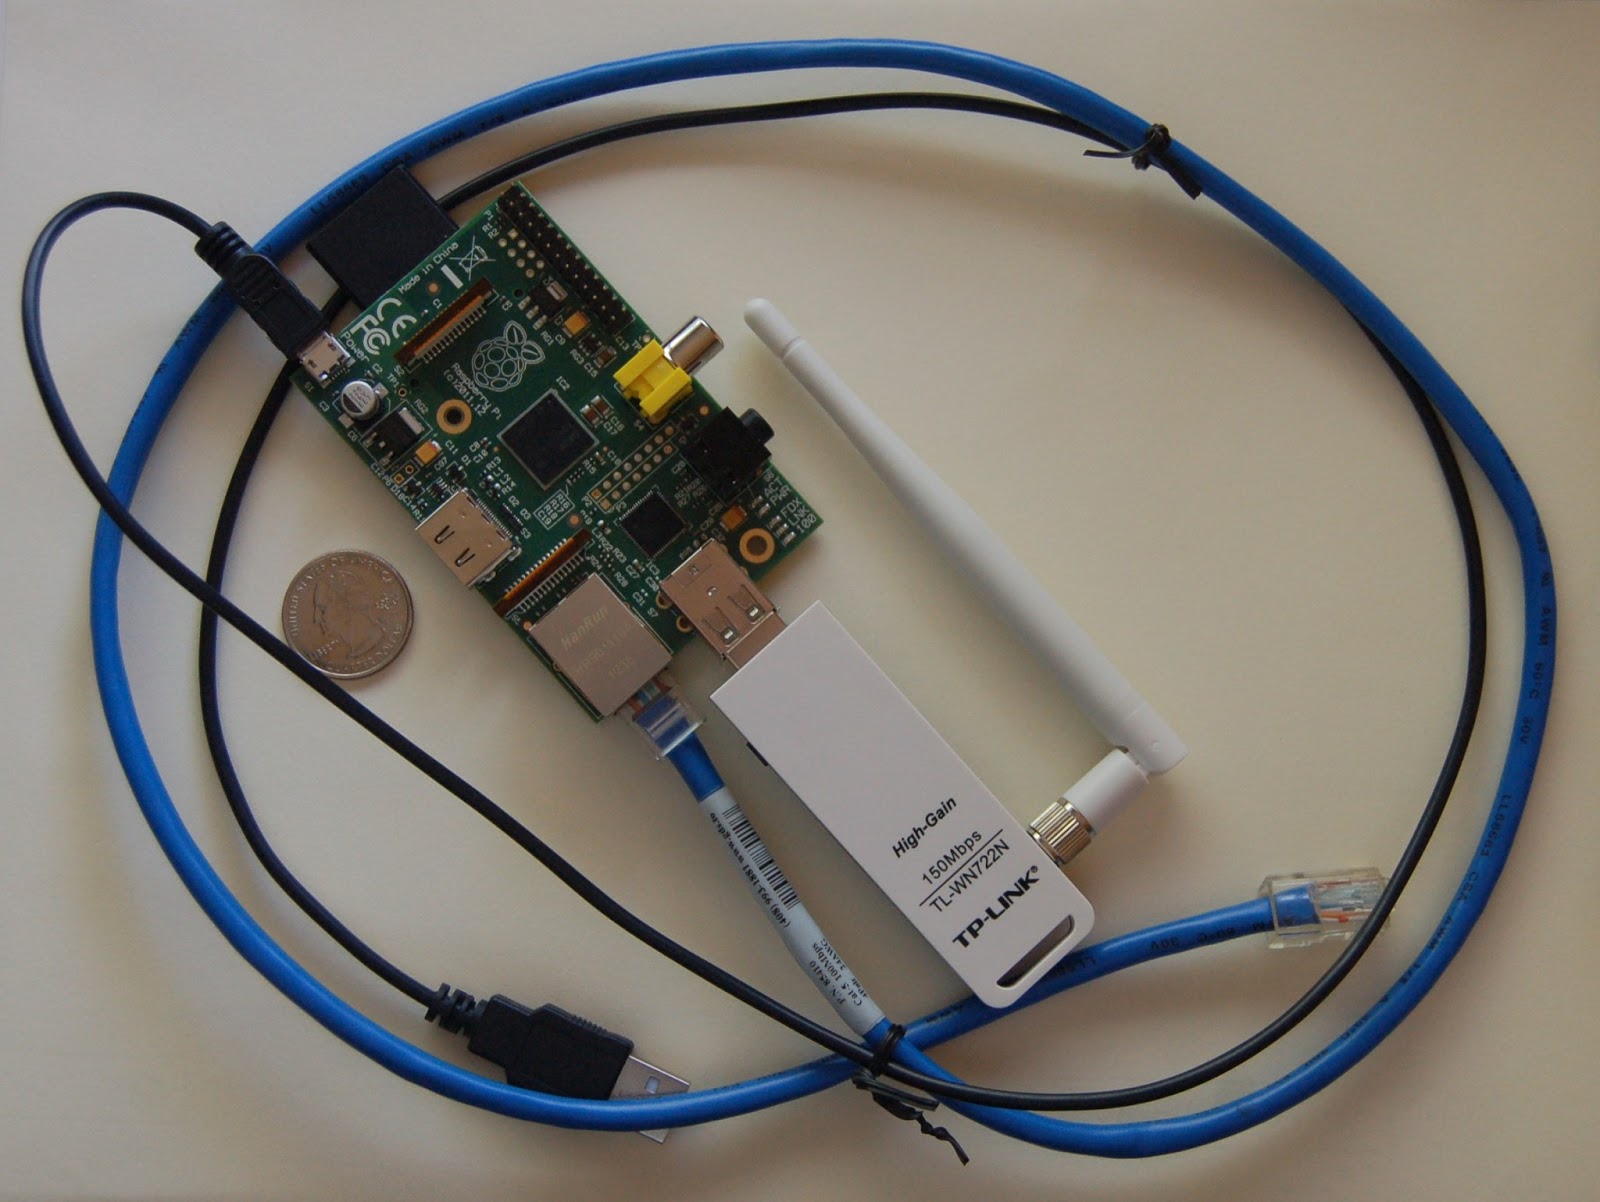
A collection of pre-configured or automatically-configured tools that automate and ease the process of creating robust Man-in-the-middle attacks. The toolkit allows your to easily select between several attack modes and is specifically designed to be easily extendable with custom payloads, tools, and attacks.
The cornerstone of this project is the ability to inject Browser Exploitation Framework Hooks into a web browser without any warnings, alarms, or alerts to the user.
The cornerstone of this project is the ability to inject Browser Exploitation Framework Hooks into a web browser without any warnings, alarms, or alerts to the user.
We accomplish this objective mainly through wireless attacks, but also have a limpet mine mode with ettercap and a few other tricks.
Limpet Mine Mode:
Poisons a network with ettercap + runs MITM Attacks
Poisons a network with ettercap + runs MITM Attacks
Passive Wireless Mode:
Free Wifi anyone?
Free Wifi anyone?
Agressive Wireless Mode:
Become every access point with hostapd-karma
Become every access point with hostapd-karma
Once the RaspberryPi becomes the gateway, it fires up a MITM DNS server, metasploit, BEEF, and an injection proxy server for HTTP which injects the BEEF hook. From there, you log into the beef console and start popping shell.
It's in Alpha, so complain about things you want to see in it now.
Frequently Asked Questions:
How do I install this?
How do I Put Cellular Internet onto the Pi
What Hardware Should I Get?
What is Included in The Toolkit?
Why Doesn't Airdrop Work?
You Just Glued Software Together, This Isn't Original
How do I install this?
How do I Put Cellular Internet onto the Pi
What Hardware Should I Get?
What is Included in The Toolkit?
Why Doesn't Airdrop Work?
You Just Glued Software Together, This Isn't Original
Project Members:
- Bryan "Crypt0s" Halfpap (admin)
Download the Raspeberry Pi ISO here
Thursday, 16 May 2013
Update script working with Backtrack 5
I could not find an update script working with Backtrack 5 so I decided to make a quick one.
Updated version: 2.0
Changelog Version 2.0
Screenshot:

If you know more tools I could add to the script in order to update them please feel free to post them here.
Also if you find any bugs or have any feedback feel free to contact me in this thread. I will update the thread with each update to the script.
NOTE: Please make sure you understand what the script does before running it.
Enjoy!
Updated version: 2.0
Changelog Version 2.0
Code:
* Reviewed all tools.
* Compatible with Backtrack 5 R2/R3.
* Removed the menu.
Code:
git clone git://github.com/sickn3ss/backtrack_update.git
cd backtrack_update
chmod a+x backtrack5_update.py
./backtrack5_update.py
If you know more tools I could add to the script in order to update them please feel free to post them here.
Also if you find any bugs or have any feedback feel free to contact me in this thread. I will update the thread with each update to the script.
NOTE: Please make sure you understand what the script does before running it.
Enjoy!
Monday, 13 May 2013
How to Upgrade Wine from the Older version to Wine1.5 on uBuntu
I am new to Wine and anything like it. I want to run the application "ATCS Monitor". When I installed ATCS Monitor I received an error message:
C:\windows\system32\wshom.ocx
Unable to register the DLL/OCX: RegSvr32 failed with exit code 0x1
-From Terminal-
err:typelib:sltg_get_typelib_ref Unable to find reference
err:module:import_dll Library ScrRun.dll (which is needed by L"C:\\windows\\system32\\wshom.ocx") not found
I can get through it by just ignoring it but I then have errors in ATCS Monitor.
First, upgrade to Wine 1.3.35. Wine 1.2.3 is almost a year old and is
missing some very important updates.
Second, do a search for the file in the directory $HOME/.wine I suspect
that either it is not there or it is in the same directory as where the
program installed. ...
Ubuntu and Ubuntu derivatives (such as Kubuntu) obtain software from packages which are stored in repositories. Ubuntu's default repository includes Wine, however if you want to stay up to date with the latest Wine package you can use WineHQ's by following these instructions.
Adding the WineHQ PPA Repository:
Open the Software Sources menu by launching the Ubuntu Software Center and selecting Edit->Software Sources. Choose the Other Software tab and click Add.
Then, copy and paste the line below.
ppa:ubuntu-wine/ppaWarning: Beta packages
The 1.5 packages here are beta packages. This means they will periodically suffer from regressions, and as a result an update may break functionality in Wine. If the stable 1.4 Wine version works for you, then you may not want to use these beta packages.
Installing Wine:
Once you have added the WineHQ PPA Repository, you are ready to install.
To get the most recent Wine 1.5 beta, click this link to install the wine1.5 package.
To install the older, stable Wine 1.4 version, click this link to install the wine1.4 package.
Upgrading to a new version of Ubuntu
If you are upgrading the entire system, such as going from Ubuntu 11.10 to 12.04, you will need to come back to this page and add the repository again. The built in update manager will not switch the Wine repository automatically.
Alternative Command Line Instructions for Installing Wine:
It is also possible to add the Wine PPA and install via the terminal. This may be useful on Kubuntu, Xubuntu, and other Ubuntu derivatives.
sudo add-apt-repository ppa:ubuntu-wine/ppa
Then update APT package information by running 'sudo apt-get update'. You can now install Wine by typing 'sudo apt-get install wine1.5'.
If you'd like to browse the PPA manually, you can visit its Launchpad page.
Subscribe to:
Posts (Atom)
-
How To Hide and unhide the hard disk Volumes using CMD Commands : First check how many drives are there in my computer and then s...
-
In the rapidly evolving landscape of software development, the term " DevOps " has gained significant prominence. DevOps, short fo...
-
 While learning Terraform some time back, I wanted to leverage Availability Zones in Azure. I was specifically looking at Virtual Machine Sca...

