The video mentions AWS DevOps whitepaper, there are actually more than one, as they are not in the resources part, here I including them in the order of importance to DevOps practices and culture.
Bottles is a versatile tool designed to streamline the management and
execution of Windows applications on Linux systems. It offers a
user-friendly interface that simplifies the configuration of wine
bottles, enabling users to run a wide array of Windows software
efficiently.
Key features include:
Isolation: Each application operates in its containerized environment, enhancing compatibility and reducing conflicts.
Customization: Users can tailor settings, dependencies, and environments for each bottle, ensuring optimal performance.
Version Control: Bottles support multiple Wine versions, allowing users to select the most suitable one for their applications.
Performance Tuning: Advanced configuration options are available to optimize the performance of Windows applications on Linux.
Easy Integration: Bottles integrate seamlessly with the Linux desktop, providing a coherent user experience.
Snapshot Feature: Users can take snapshots of their bottle configurations, making it easy to revert to a previous state if needed.
Community Templates: Bottles offers community-driven templates, streamlining the setup of typical applications.
Update Management: The client provides straightforward mechanisms to update Wine and applications within bottles.
With Bottles, users gain a powerful ally to enhance their
productivity and expand the range of applications available on their
Linux systems. Let’s explore the technical steps to get Bottles up and
running on your Ubuntu system.
Install Bottles via Flatpak with Flathub
Install Flatpak for Bottles Installation (Skip if Installed)
Begin by installing Flatpak, which the package manager requires for
bottles. If Flatpak is already in your system, you can skip this step.
Execute the following command:
sudoaptinstall flatpak -y
A system reboot is recommended for those installing Flatpak for the
first time. This step ensures that all necessary paths, especially for
icons, are correctly set up. If not rebooted, you may encounter
unexpected issues.
To reboot, save your work and use the traditional graphical shutdown interface, or use the command:
Enabling Flathub is crucial as it provides access to the Bottles
package and other applications not typically available in the Ubuntu
repositories.
Install Bottles via Flatpak Command
Finally, install Bottles using Flatpak. Run the command below in your terminal:
flatpak install flathub com.usebottles.bottles -y
This command fetches and installs Bottles from the Flathub
repository, ensuring you get the latest version that is compatible with
your Ubuntu system.
Launch Bottles
CLI Command to Launch Bottles
To launch Bottles from your terminal, utilize the following command:
flatpak run com.usebottles.bottles
This command instantly activates Bottles, providing immediate access
to its features. Using the command line for launching applications like
Bottles is a direct approach many users favor for its speed and
simplicity.
GUI Method to Launch Bottles
For those who prefer a graphical user interface (GUI), Bottles can be
launched without using the command line. Follow these steps to open
Bottles through the GUI:
Click on Activities at the top left corner of your screen.
Select Show Applications to view a list of all installed applications.
Scroll to find and click on the Bottles application icon.
The Bottles app icon is showcased on Ubuntu.
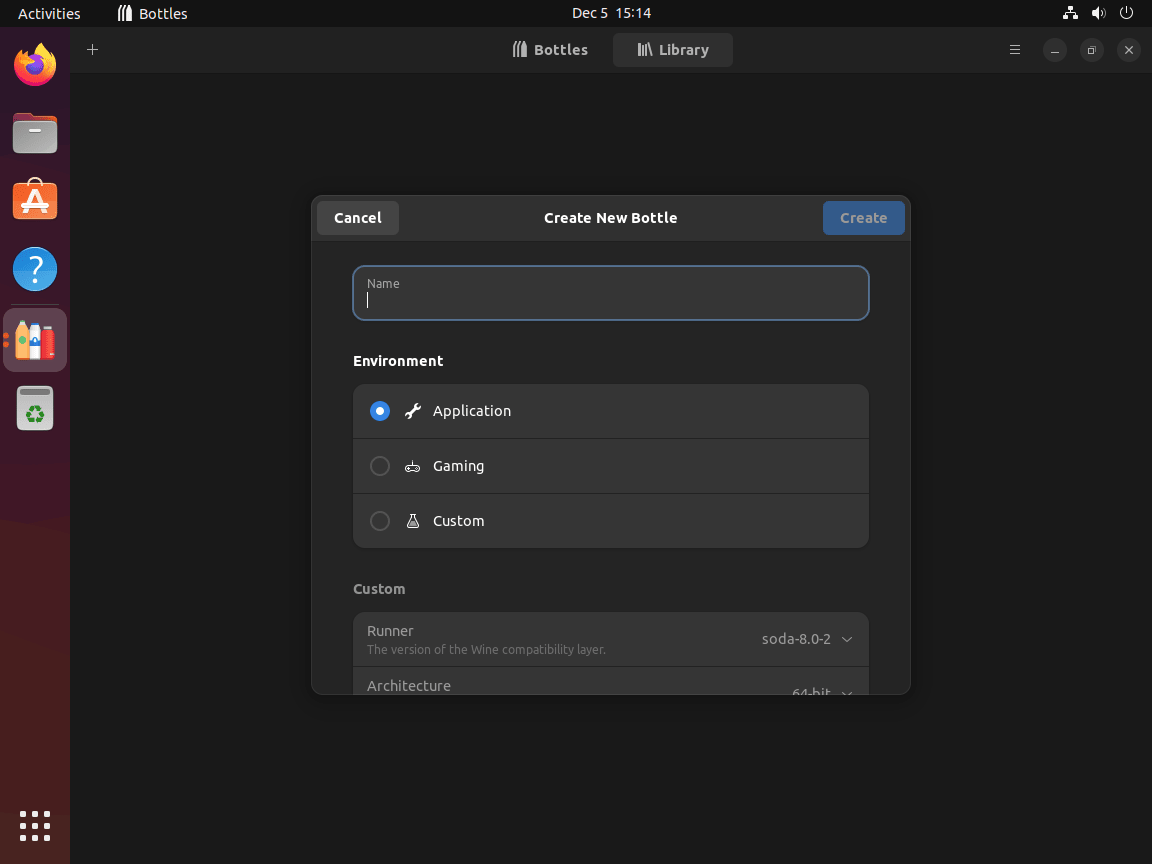
Example: Setting Up a Gaming Environment with Bottles
Establishing Your Environment
Initiate the process by creating a new environment in Bottles. This
environment will be dedicated to your gaming applications. Name it
appropriately to reflect its usage or the types of games you intend to
install. Naming conventions help organize and differentiate various
environments, especially if you plan to create multiple ones for
different purposes.
Steps to create a new bottle environment in Bottles.
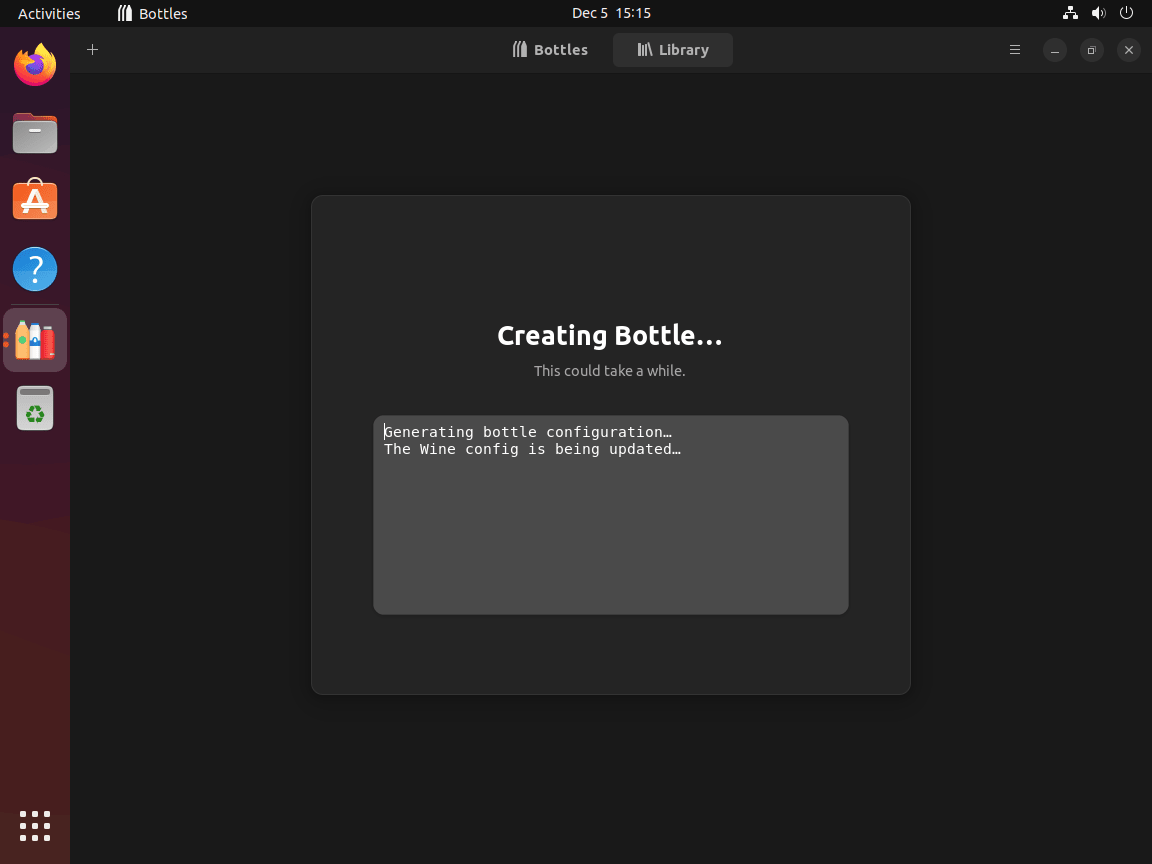
Environment Setup and Dependencies Installation
After naming your environment, Bottles will commence the setup. This
includes installing necessary Windows dependencies, a crucial step for
ensuring compatibility with gaming applications.
Note: The time taken for this setup varies based on your system’s specifications and performance capabilities.
The user interface of Bottles during a new bottle setup.
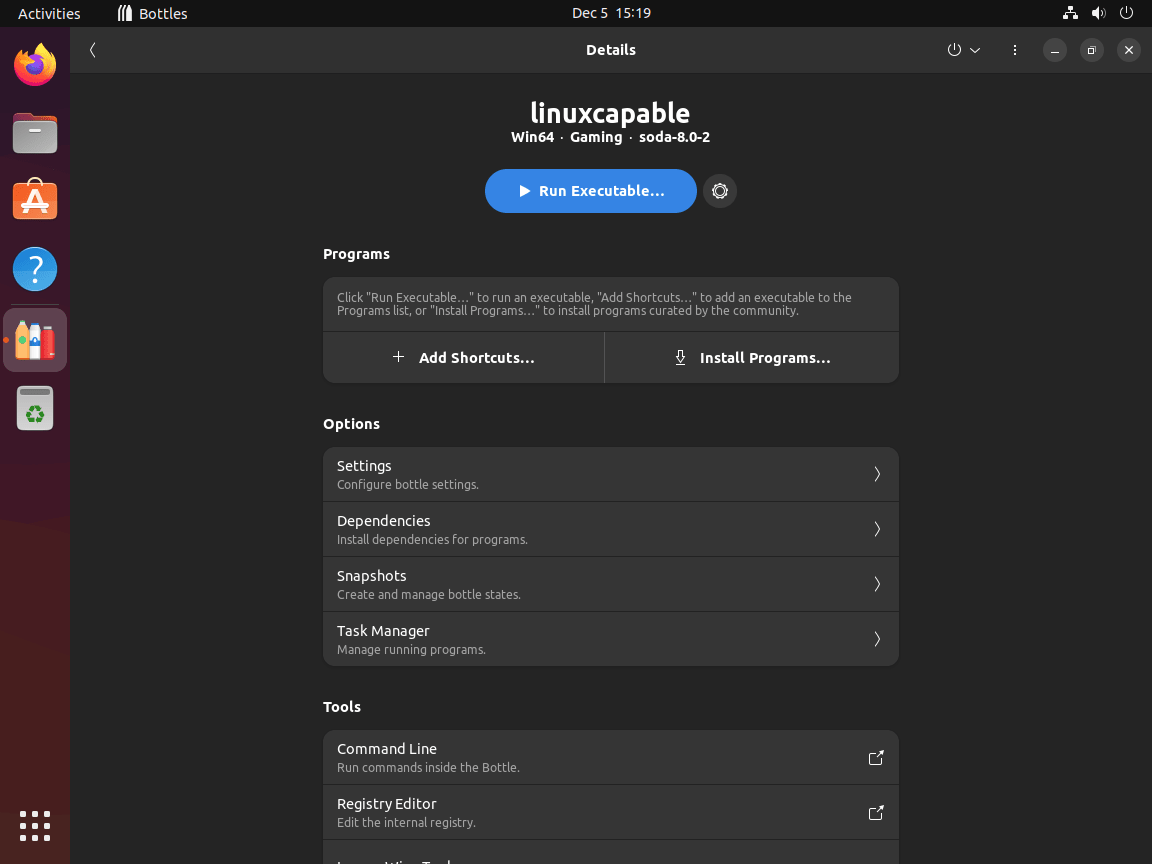
Configuring Environment Details
Once the environment setup is complete, you will access the Bottles
details section. Here, you can fine-tune various aspects like
preferences, dependencies, and program settings.
Configuration options for a new bottle in Bottles.
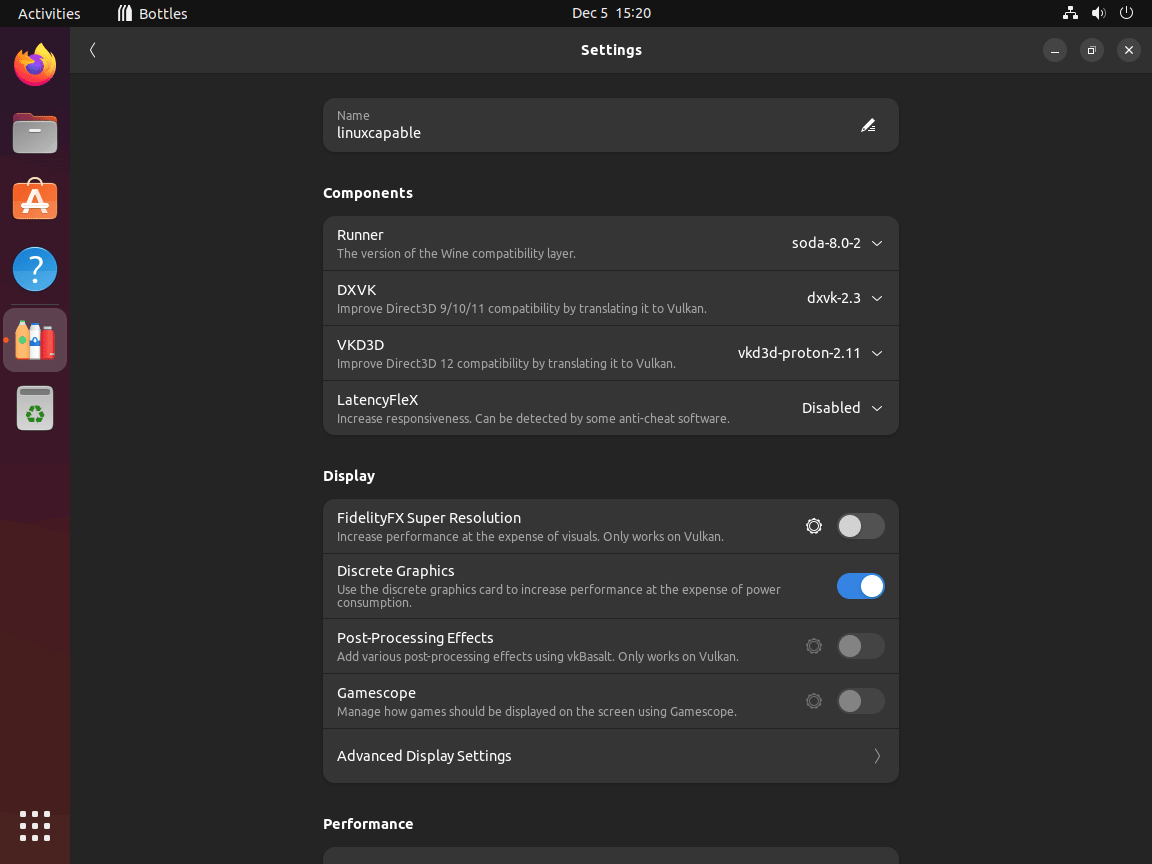
Setting Preferences
In the preferences section, you can adjust settings to improve your
gaming experience. This might include tweaking graphics settings,
managing resource allocation, or making other modifications that enhance
game performance. Each adjustment should be considered carefully to
balance system performance with gaming quality.
How to set preferences in the Bottles application.
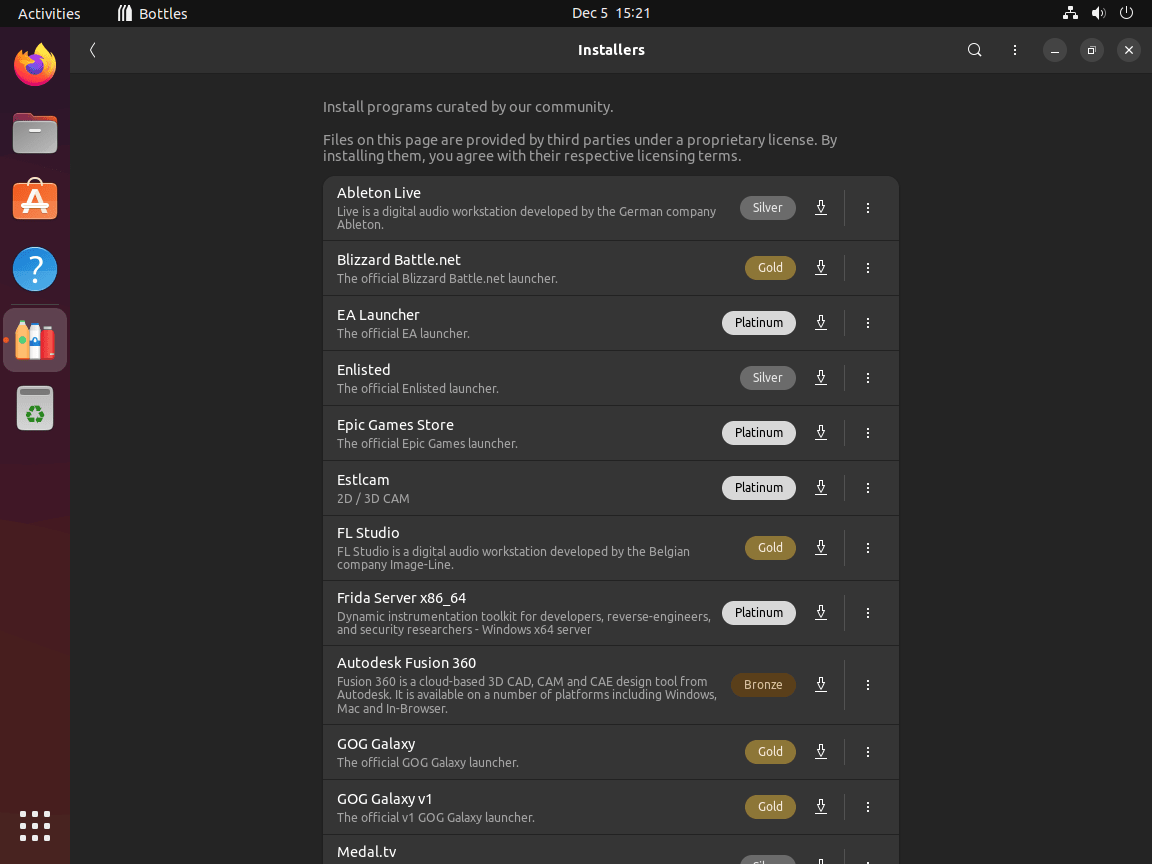
Installing Gaming Installers (If you created a Gaming Bottles)
Bottles provide direct access to popular gaming installers like
Battle.net and EA Launcher. This feature simplifies the process of
installing and managing your favorite games. Select the desired
installer, and Bottles will handle the installation process, integrating
these platforms into your Ubuntu system seamlessly.
Process of installing gaming installers in Bottles.
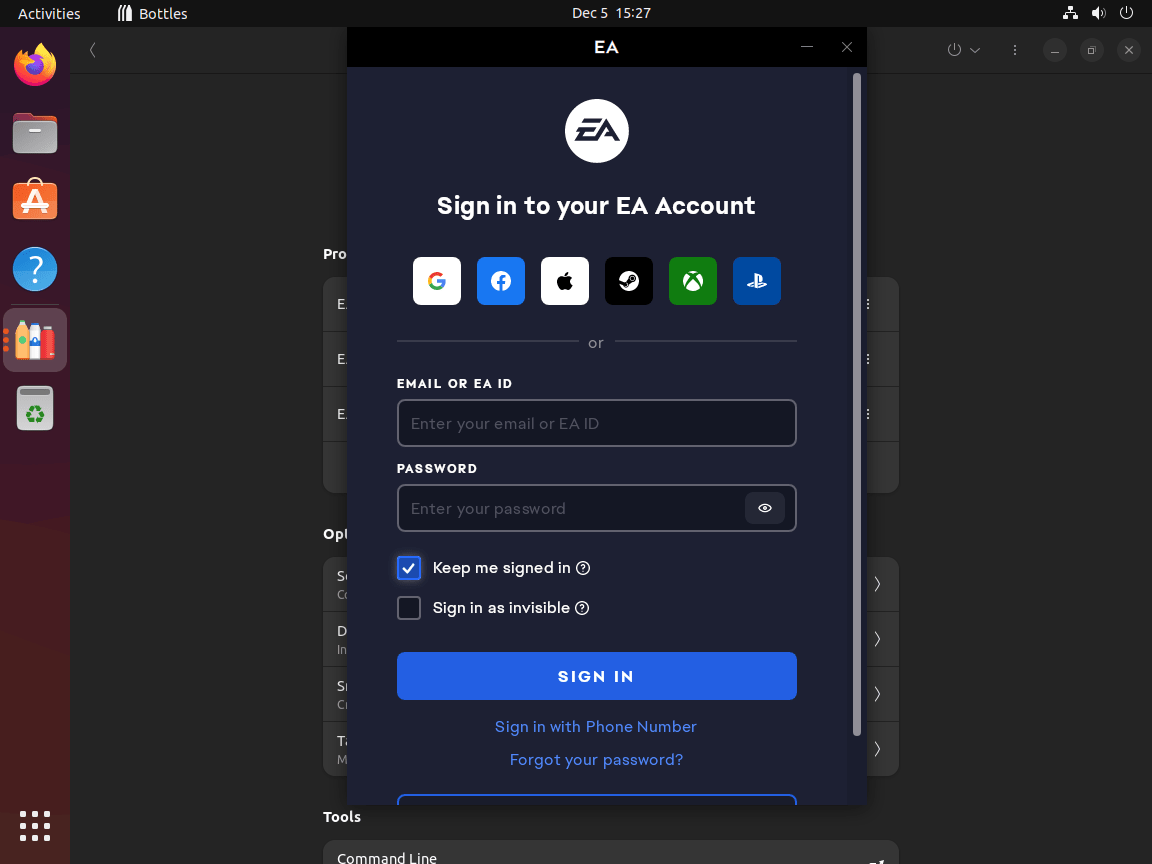
Launching Applications from Programs
After installing the gaming applications, you can launch them
directly from the Programs section in Bottles. This centralized approach
to accessing your games streamlines the user experience, keeping all
your gaming tools in one convenient location.
Accessing the EA Launcher through Bottles on Ubuntu.
Managing Bottles via Terminal
Update Bottles
To keep Bottles up-to-date, employ the following command in the
terminal. Regular updates ensure that you have the latest features and
security enhancements. It’s important to note that the version of
Bottles you have installed dictates the specific updates that will be
applied.
flatpak update
By design, Flatpak routinely checks for updates automatically. This
feature helps maintain your software without manual intervention,
ensuring you’re always running the most current version.
Remove (Uninstalling) Bottles
If you decide Bottles are no longer needed on your system, the
uninstallation process is straightforward. Use the command below to
remove Bottles. This command uninstalls the software and deletes related
data, ensuring a clean removal.
After uninstalling Bottles, it is a good practice to clean up any
remaining residual files. The following command removes unused
components, which helps free up space and keep your system organized.
flatpak remove --unused
Executing this command efficiently ensures your system remains clutter-free, especially after removing software like Bottles.
Conclusion
We’ve walked through the steps to install Bottles on Ubuntu 24.04,
22.04, or 20.04 LTS, making running Windows apps on your Linux machine
easier. Remember, Bottles offers a great blend of flexibility and
user-friendliness, so don’t hesitate to explore its features and tailor
it to your needs.
Useful Links
Here are some valuable links related to using Bottles:
Bottles Official Website: Visit the official Bottles website for information about the software, features, and download options.
Bottles Documentation: Access comprehensive documentation for detailed guides on installing, configuring, and using Bottles.
Bottles App Store: Explore the Bottles App Store for various applications that can be managed and run using Bottles.
Bottles Database: Check out the Bottles database for a list of applications and their compatibility statuses.
Bottles Forum: Join the Bottles community forum to discuss issues, share solutions, and get support from other users.
Choosing the right web hosting provider can feel overwhelming, especially with so many options out there. That’s why I decided to take a closer look at InterServer—a hosting company that's been around since 1999, promising affordable prices without sacrificing performance.
If you’re in the market for hosting, whether you’re starting a blog, running a small business, or need something more powerful, this review should give you a clearer idea of what InterServer offers and whether it’s a good fit for you.
What Hosting Options Does InterServer Offer?
InterServer provides a wide range of hosting services, and I’ll walk you through the key ones to give you a better sense of which one might work for your needs.
Web Hosting: Reliable and Affordable
InterServer’s standard web hosting package is pretty straightforward, but what sets it apart is its unlimited storage and bandwidth—all for a reasonable price. They also have a price lock guarantee, which means the rate you sign up for stays the same for the life of your account. If you’re worried about surprise price hikes, this is a big plus.
They offer free website migration, so if you’re switching from another host, they’ll handle that for you, which is a nice bonus. Plus, they provide weekly backups, so your site’s data is safe and secure.
Windows Hosting: Perfect for Developers
If you need a Windows-based hosting environment (think ASP.NET or MS SQL), InterServer has you covered. This option is ideal for developers or businesses that rely on Windows-specific apps.
VPS Hosting: Scalable and Flexible
For those who need more control over their hosting environment, InterServer’s VPS (Virtual Private Server) hosting offers a ton of flexibility. You can scale up resources as your site grows, and they offer both Linux VPS and Windows VPS options.
They also have a WordPress VPS tailored for WordPress users. It’s optimized for performance, and they make installation super easy with a one-click setup. If you run a WordPress site, this might be worth looking into since it’s designed specifically for your platform.
Dedicated Servers: Complete Control
For businesses or websites that need serious power, InterServer’s dedicated servers give you full control over your hosting environment. You can customize everything, from the amount of storage to the type of processor.
If you’re working with AI, machine learning, or any data-heavy tasks, they even offer GPU-dedicated servers, which can handle big workloads efficiently. It’s a solid option for enterprises or anyone needing top-tier performance.
Storage Solutions: Safe and Secure
InterServer isn’t just about hosting—they also offer a range of storage solutions for businesses that need to store large amounts of data. Whether you’re dealing with cloud storage, archiving, or just need reliable backups, they’ve got something that’ll fit your needs. It’s a good solution for businesses or developers who manage a lot of data or media files.
Colocation Services: Enhanced Security and Control
For businesses wanting to maintain control over their hardware while utilising a secure, high-performance facility, InterServer provides colocation services in their New Jersey data centre. This service is ideal for companies looking to store and manage their servers in a secure, climate-controlled environment with round-the-clock support. It’s a great option for businesses that require a high level of physical control and security without the costs of maintaining their own facility.
Customer Support and Reliability
Customer service is a major selling point for InterServer. They offer 24/7 support through phone, email, and live chat, ensuring customers can reach them whenever necessary. The Tips and Resources section of their website is packed with useful guides and tutorials, helping users resolve issues independently when needed.
When it comes to reliability, InterServer guarantees a 99.9% uptime, thanks to its redundant infrastructure and robust security measures. Weekly backups and free website migration ensure that your data is safe and secure, giving you peace of mind as you scale your website or business.
User Reviews and Feedback
Most users have praised InterServer for its affordability, reliable performance, and excellent customer support. Some have highlighted the lack of hidden fees and the price lock guarantee as key advantages. However, there are some mixed reviews regarding the user interface, with a few users noting that it could be more intuitive.
One of the most appealing aspects of InterServer is their price lock guarantee, which ensures that your hosting price remains the same for as long as you use the service—no surprise hikes after your initial term. Additionally, unlimited resources, customisable server options, and scalable solutions make InterServer a versatile provider that can meet the needs of various user groups, from small businesses to large enterprises.
Recommendations
Web Hosting is a great choice for small businesses, bloggers, and personal projects, offering simplicity and affordability with no sacrifice in features. VPS hosting is highly recommended for developers or businesses that expect growth, as it allows for scalable resources. Enterprises and high-traffic sites should consider dedicated hosting, especially if they need GPU resources for advanced processing tasks.
Conclusion: Is InterServer Right for You?
In conclusion, InterServer offers a range of hosting services that cater to different needs—from affordable web hosting for personal websites to powerful dedicated servers for enterprises and data-intensive applications. Their price lock guarantee, reliable customer support, and a variety of customizable options make them a solid choice for businesses and developers alike. If you’re looking for a cost-effective, scalable, and reliable hosting solution, InterServer could be the right hosting provider for you.
The VMWare Authorization service is an essential service for normal
functionality of all the virtual machines under the belt of VMware
application. Users who are facing this problem, won’t be able to
initialize, connect or control the remote devices.
But, just like other
problems regarding the VMware's, you may fix this VMware Authorization
service following these easy sets of solutions.
Table of Contents
Fix 1 – Initiate the VMware Authorization service
VMware Authorization service needs to start up automatically. So, use the Services page to manage that.
Step 1 – Hit the Windows button and begin to type “services“.
Step 2 – Next, open “Services” to open it up.
Step 3 – Find the “VMware Authorization” service there in this list.
Step 4 – Once you have found that, right-tap that service and click “Start” to initiate the service.
Step 5 – Now, look for the “Windows Management Instrumentation” service.
Step 6 – Next, just right-click this service as well and click “Start” to start this service as well.
The VMware Authorization service depends upon this service as well.
After starting up both the services, relaunch the VMware and check.
If the problem still persists, try the next solution.
Fix 2 – Give the VM Authorization service administrative rights
VMware Authorization service requires administrative permissions to
be functioning normally on your system. So, the user running the VMs
must be under the umbrella of the ‘Administrators’ group.
Step 1 – You can do this from the User Accounts wizard. So, quickly press the Win+R keys.
Step 2 – After this, type this and hit Enter.
netplwiz
Step 3 – Enter the “Users” section.
Step 4 – Find the account that is using the VMWare on the system. Double-tap the account to access that.
Step 5 – Get to the “Group Memberships” tab.
Step 6 – After this, select the “Administrator” type.
Step 7 – Save this alteration using the “Apply” and “OK” buttons.
After including the account to the list of administrators, close the terminal.
You may need to restart your system.
After this, try launching VMware once more.
Fix 3 – Change the system startup settings
Make sure that the VMware services starts automatically during the system startup.
Step 1 – You can do this System Configuration page. To do that, right-click the Windows button and click “Run“.
Step 2 – Next, write this and click the “OK” button.
msconfig
Step 3 – Visit the “Services” tab.
Step 4 – Go down straight to the list of services and find the “VMware Authorization service“.
Step 5 – Make sure to check all the VMware-related services in there.
Step 6 – Finally, click the “Apply” and “OK” buttons to apply and save the changes in System Configuration.
Step 7 – Windows will show you a prompt to restart the system. So, tap “Restart now” to restart the computer.
After the system restarts, you can launch the VMware and check again. It will function normally.
Fix 4 – Repair the VMware
Repairing the VMware should get it working on your system once again.
Step 1 – Search “VMware” from the search box.
Step 2 – Later, right-click the “VMware Workstation” and click “Uninstall” to uninstall that from your system.
Step 3 – As this takes you to the Installed Apps section, scroll down to find the “VMware Workstation” on your system.
Step 4 – Next, click the dot button and click “Modify“.
Step 5 – Keep going through the VMware Setup page.
Step 6 – When the main step appears, choose the “Repair” option and hit the “Next” button to start the repairing operation.
When the repairing process is done, you won’t be seeing the “The VMware Authorization Service is not running” message while using VMware.
Let's face it, developers: we've all accidentally committed a secret (or two) to our code repository at some point. Maybe it was an API key, a database password, or that super-secret encryption key you swore you'd never forget. ♂️
The problem? Those exposed secrets can be a hacker's dream come true. A leaked secret can bring your entire application crashing down, wreaking havoc on your data and reputation. Shuddersville. Many good developers do not pay attention to this critical aspect while working on the code, behaviour which most of the time becomes very costly and painful.
That's where GitHub Advanced Security for Azure DevOps swoops in like a superhero with a cape (well, maybe more like a shield, but you get the idea). This powerful integration brings the muscle of GitHub's security features into your Azure DevOps workflow, so you can identify and squash those secret leaks before they become a disaster.
Here's how GitHub Advanced Security for Azure DevOps saves your bacon:
Secret Scanning: It acts like a super-sleuth, scouring your code for any exposed secrets like passwords, tokens, and keys. No more accidental oopsies making it past your commit.
Dependency Scanning: Those third-party libraries you love? They can have hidden vulnerabilities. Advanced Security scans your dependencies to expose any weak spots so you can patch them up before they get exploited.
CodeQL Code Scanning: This built-in code analysis tool is like a security X-ray for your codebase. It hunts for potential vulnerabilities and coding errors, so you can fix them before they become a problem.
The best part? This security suite integrates seamlessly into your Azure DevOps workflow. No need to jump through hoops or learn a whole new platform. You can find, fix, and prevent security issues all within your familiar Azure DevOps environment. Win-win!
So, ditch the stress of exposed secrets and vulnerable code. Embrace the power of GitHub Advanced Security for Azure DevOps. Your future self (and your security team) will thank you for it.
P.S. Looking for more info? Check out the official documentation to see how to get started with GitHub Advanced Security for Azure DevOps and start building more secure software today!
Amazon AWS MTTR (Mean Time to Recovery) and MTTD (Mean Time to Detect) are key metrics used to measure and improve system reliability and incident management. Here's a breakdown of each:
MTTR (Mean Time to Recovery):
What it is for: MTTR represents the average time it takes to recover from a system failure or incident. This metric is critical in evaluating the efficiency and speed of your recovery process after something goes wrong.
Use in AWS: AWS services and infrastructure are built with high availability, but incidents like configuration issues, downtime, or hardware failures can still occur. MTTR helps DevOps teams understand how quickly they can restore normal operations after an incident.
Example: If your EC2 instance crashes, MTTR measures how long it takes to identify the issue, apply a fix, and restore the service to full functionality.
MTTD (Mean Time to Detect):
What it is for: MTTD measures the average time it takes to detect an issue or incident from the moment it occurs. Identifying how responsive your monitoring systems are in catching problems early is critical.
Use in AWS: In AWS, MTTD can be improved by using services like CloudWatch, AWS X-Ray, and GuardDuty, which help detect performance degradation, security threats, or failures in your system. The sooner you detect a problem, the faster you can work on fixing it.
Example: MTTD would measure how long your monitoring systems take to detect a spike in error rates in an application hosted on AWS Lambda.
Key Benefits:
Lower MTTR means quicker recovery from incidents, minimising downtime and reducing impact on end users.
Lower MTTD means quicker detection, allowing teams to act before incidents escalate into bigger problems.
Both metrics are crucial in assessing and improving the resilience and reliability of your AWS-based infrastructure. 💡
VMware Desktop Hypervisor products Fusion and Workstation are used by
millions of people every day to run virtual machines on their Windows,
Linux and Mac computers. They give users the ability to quickly and
easily build “local virtual” environments to install other operating
systems, learn about technology, build and test software, complex
systems, browsers, apps, games, and more.
For many in our community, Workstation and Fusion are the first
VMware products that they’ve ever used, and it’s an important tool for
understanding Virtualization as well as the fundamentals of vSphere.
Going beyond that, commercial organizations get value from VMware
Desktop Hypervisor apps for a number of reasons including development
and testing of apps and systems and interacting with their vSphere
environments.
As we complete the integration of Fusion and Workstation into
Broadcom, I wanted to share with the community some changes to our
product lineup and how we deliver them to our community.
We’ve been diligently working on important changes to our product
lineup to provide ongoing, lasting value to our customers and to the
VMware community at large, and we’re thrilled to be able to share with
our community the next steps in our plan for the future of VMware
Desktop Hypervisor apps.
Our goal with these changes has been to simplify how we bring VMware
Desktop Hypervisor apps to market, while maintaining our support of the
broader community of VMware Workstation and Fusion users of both free
and paid products. So let’s dig into this simplification and more
importantly, what this means to you as customers.
Pro Apps are now Free for Personal Use and Licensed for Commercial Use
The most exciting part is that Fusion Pro and Workstation Pro will
now have two license models. We now provide a Free Personal Use or a
Paid Commercial Use subscription for our Pro apps. Users will decide
based on their use case whether a commercial subscription is required.
This means that everyday users who want a virtual lab on their Mac, Windows or Linux computer can do so for free simply by registering and downloading the bits from the new download portal located at support.broadcom.com
Customers who use Fusion and Workstation at/for work require a paid
commercial subscription, which can be purchased through an authorized
Broadcom Advantage partner. More on that below.
VMware Workstation Player + Fusion Player Discontinued
With our fully featured Pro products being made free for personal use
and paid for commercial use, we are discontinuing their lesser
counterparts VMware Workstation Player and VMware Fusion Player. At this
time they will no longer be available for purchase. Users of our
Personal Use Player products can upgrade to the more full-featured Pro
versions without any cost. Workstation Player will continue to be
bundled with Workstation Pro just as it is today, so as an app it will
continue.
Users with Fusion Player personal use licenses can simply update to
Fusion 13.5.2 and delete your license key. You must update to 13.5.2,
but removing the existing Player key will unlock the full “Pro for
Personal Use” licensing without needing any additional keys. Here is a
simple KB that describes what to do: https://knowledge.broadcom.com/external/article?articleNumber=367660
For Workstation Player for Windows and Linux, Workstation Pro
requires a new download and install but is licensed for Personal Use by
default. You will need a customer account at support.broadcom.com to
access downloads.
Customers of Fusion Player 13 and Workstation Player 17 with
commercial licenses will continue to see their products function and no
new license keys are required for continued use of these versions. Once
the active support term expires, customers are encouraged to upgrade to
the Pro version of these products for continued support and updates.
Fusion Player and Workstation Player will continue to be supported
for existing customers in alignment with their existing EOL and EOGS
dates.
All active customer accounts and associated active entitlements/licenses have been migrated to Broadcom’s customer portal, so existing license keys will now be found there.
Subscription model for commercial use
With the new commercial model, we have reduced our product group
offerings down to a single SKU for users who require commercial use
licensing. This simplification eliminates 40+ other SKUs and makes
quoting and purchasing VMware Desktop Hypervisor apps, Fusion Pro and
Workstation Pro, easier than ever.
The new Desktop Hypervisor app subscription can be purchased from any Broadcom Advantage partner.
If you don’t currently have a Broadcom partner, we have brought on a
new reseller, Digital River, to support customers without needing a
pre-existing commercial account. The VMware Desktop Hypervisor
subscription is sold for $120/year and can be purchased from the new
online store located here: https://store.cloudvista.com
What do customers get with their subscription?
The new paid subscription provides entitlement to use Fusion Pro and
Workstation Pro for commercial purposes subject to the terms and
conditions outlined in our “Specific Program Documentation” (Available here).
Subscriptions provide continued product updates, both major and minor,
for the duration of the subscription term. When a ‘major’ version is
released requiring a new license key, customers will be able to generate
appropriate new keys within their Broadcom customer portal, much like
how it worked in the past for customers with active “SnS’. In alignment
with Broadcom’s practices, commercial customers will also receive
support via the partner they purchased from.
Are there any product differences between Free and Paid?
The text “This product is licensed for personal use only” within the
product user interface is not present when a commercial license is used.
There are otherwise no functional differences.
So often when we are out meeting the community, we hear about the
value that Workstation, and later Fusion, have brought to the VMware
community over the past 25 years is immeasurable. Workstation’s heritage
reaches back to the very first product that the company ever shipped,
ubiquitous with the name ‘VMware’ even to this day.
To that end, we’re thrilled to continue the legacy that has built so
many careers and enriched the lives of so many. There’s never been a
better time to run local VMware virtual machines!
Podcasts
To discuss the changes, I recently went on a couple podcasts with my good friends Duncan, John and Pete!
Unexplored Territory with Duncan
Virtually Speaking with Pete and John in the Fishbowl on campus
VMware Workstation Player + Fusion Player Transition
Here’s a look at your options going forward if you are a user of our Player products.