Friday, 21 March 2014

How to Change Office 2010 License Key

Issue: You go to activate Microsoft Office 2010 and you receive a message stating, “Your copy of Microsoft Office Professional Plus 2010 cannot be activated because the specified Product Key has already been activated the maximum number of times permitted for your software license as specified in the Microsoft Software License Terms.”


The solution is to change the product key to another product key. I will show you three different methods of changing the License Key
Method 1
Open “regedit”

Navigate the registry to: HKEY_LOCAL_MACHINE\SOFTWARE\Microsoft\Office\14.0\Registration\ and delete the whole “Registration” key located under the “14.0″ key
Right click “Registration”
Select “Delete”

Press “Yes”


Close Regedit, Restart an Office 2010 application. You should be prompted to reenter your License Key

Method 2
Open to Microsoft Word
Press “File”
Press “Help”
Select “Change Product Key” (this option was not here on my installation, I used Method 1)


Method 3
Click on Start Menu > Control Panel > Programs and Features (or Add/Remove Programs, depending on your operating system).
Click on your product, e.g. Microsoft Office Professional Plus 2010
Click “Change” on the top menu.


Select the option to “Enter a Product Key.”
Press “Continue”


Changing your Product Key
Once you complete one of the Methods listed above you should be able to change your Product Key
Enter the appropriate product key from the top of this page and click “Continue.”


Accept the agreement
Press “Continue”

Configuration will occur

Press “Close”

Select “I want to activate the software over the Internet (recommended)”
Press “Next”

Your product should activate successfully
Press “Close”


Tuesday, 22 October 2013

OpenVPN Client Configuration on Ubuntu 12.04

OpenVPN Client Configuration on Ubuntu 12.04

To use the Ubuntu as OpenVPN client, install these packages:
sudo apt-get install network-manager-openvpn
2
sudo apt-get install network-manager-openvpn-gnome
3
Select the “Edit Connections” from Network Manager GUI:
4
From the VPN tab, click on ‘Add‘ button:
5
Select OpenVPN as the VPN Connection Type and press “Create“:
6
Enter all the required information like OpenVPN’s server ip address/name as the “Gateway“, “Type” to “Certificates (TLS)“, locate and point your “User Certificate” , “CA Certificate and “Private Key“. Also click on “Advanced” button:
7
Enable compression or other special settings as per your requirement:
8
Connect to the VPN:
9
If everything go well, it will show you the success message:
10
Check your interface configuration, you will find one new interface named “tun0” something:
ifconfig
11
Hope this will help you!

Friday, 18 October 2013

How to Remove Vmware Workstation From Ubuntu 13.04 for Good


VMWare Workstation doesn't ship in a deb, so it isn't registered in dpkg (which is why you can't find it in the software center). It does have an install and uninstall utility though.

To uninstall VMWare Workstation, you will need to run
vmware-installer --uninstall-product vmware-workstation

If you just run
vmware-installer

by itself, it will print all the options you have available. If you run
vmware-installer -l

It will print a list of all VMWare products you have installed.

Tuesday, 1 October 2013

How to Install Ruby & Rails on CentOS, Fedora or RedHat

#get root access
$su -
$ cd /tmp
 
#Remove old Ruby
$ yum remove ruby
# Install dependencies
$ yum groupinstall "Development Tools"
$ yum install zlib zlib-devel
$ yum install openssl-devel
$ wget http://pyyaml.org/download/libyaml/yaml-0.1.4.tar.gz
$ tar xzvf yaml-0.1.4.tar.gz
$ cd yaml-0.1.4
$ ./configure
$ make
$ make install
# Install ruby
$ wget http://ftp.ruby-lang.org/pub/ruby/1.9/ruby-1.9.3-p194.tar.gz
$ tar zxf ruby-1.9.3-p194.tar.gz
$ cd ruby-1.9.3-p194
$ ./configure
$ make
$ make install
# Update rubygems
$ gem update --system
$ gem install bundler
#Test ruby and rubygems are working
#Close shell and reopen for changes to take effect
$ruby -v
$gem --version
# Rails
$ yum install sqlite-devel
$ gem install rails
$ gem install sqlite3

Thursday, 12 September 2013

Installing LXC ( Linux Containers ) With LXC Web Pannel In Ubuntu

What is LXC

Linux Containers (LXC) are lightweight virtualization technology and provide a free software virtualization system for computers running GNU/Linux, This is accomplished through kernel level isolation, It allows one to run multiple virtual units (containers) simultaneously on the same host.
  • manage resources using PCG ( process control groups ) implemented via cgroup filesystem
  • Resource isolation via new flags to the clone(2) system call (capable of create several types of new namespace for things like PIDs and network routing)
  • Several additional isolation mechanisms (such as the “-o newinstance” flag to the devpts filesystem).
The LXC package combines these Linux kernel mechanisms to provide a userspace container object, a lightweight virtual system with full resource isolation and resource control for an application or a system.
Installing LXC ( ubuntu 13.04 )
 $ sudo apt-get install lxc
Creating container
$ sudo lxc-create -t ubuntu -n ubuntu
$ sudo lxc-start -n ubuntu
Login in container
$ sudo lxc-console -n ubuntu -t 1
Install LXC web panel
$ sudo apt-get install lxc debootstrap bridge-utils -y
$ sudo su
$ wget http://lxc-webpanel.github.com/tools/install.sh -O - | bash
Login in LXC web panel
open broswer 

http://localhost:5000  
username :  admin 
password admin
web panel config file :  /srv/lwp/lwp.conf
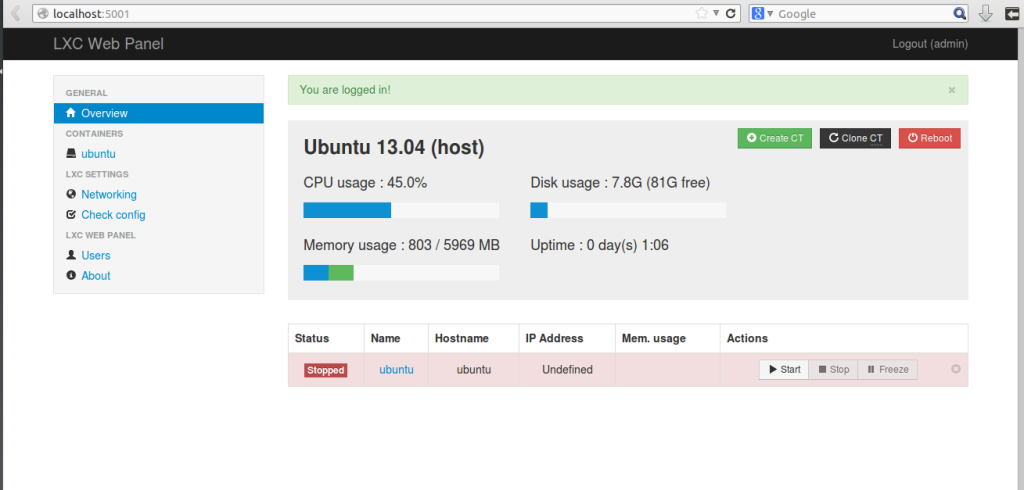
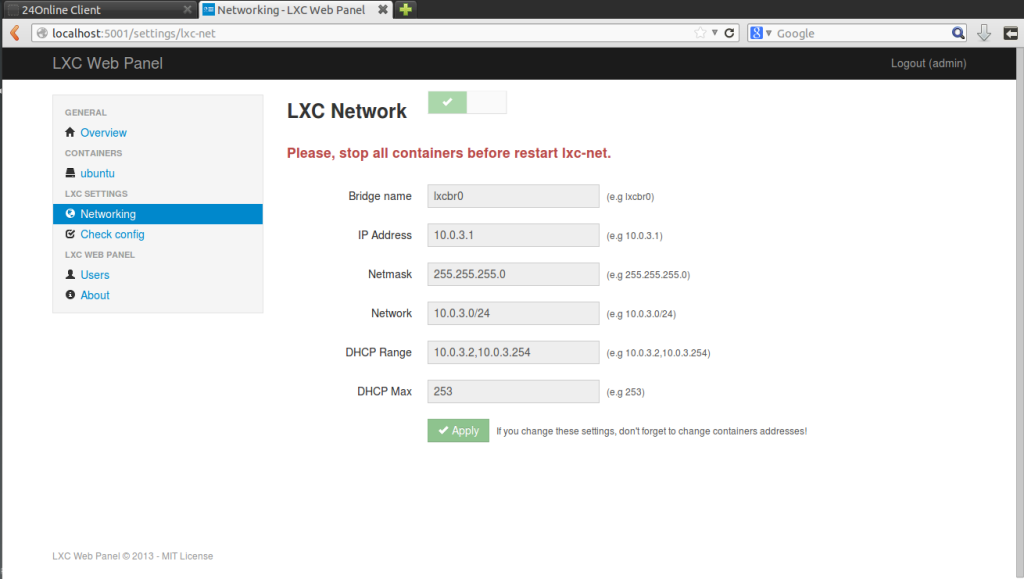
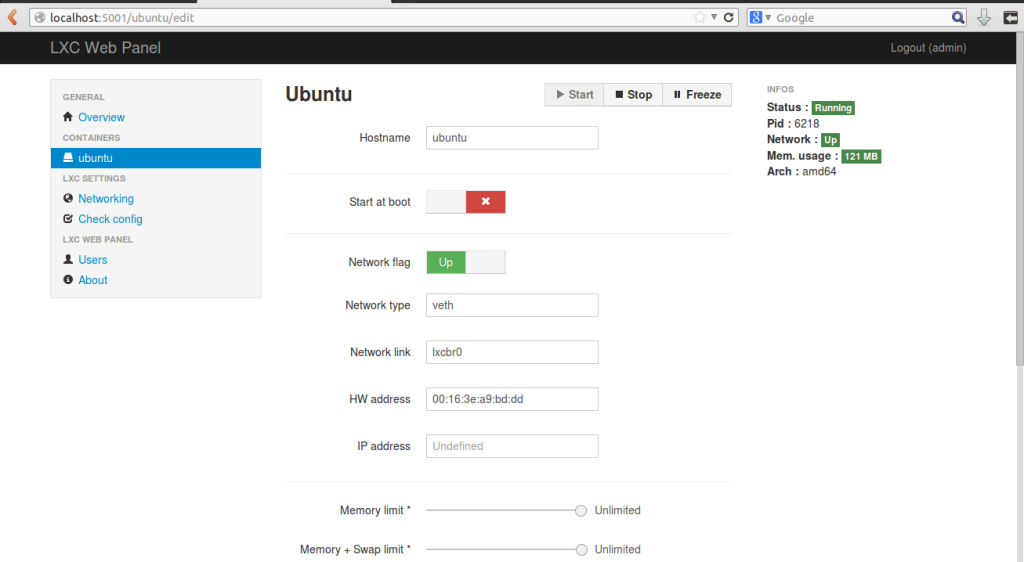
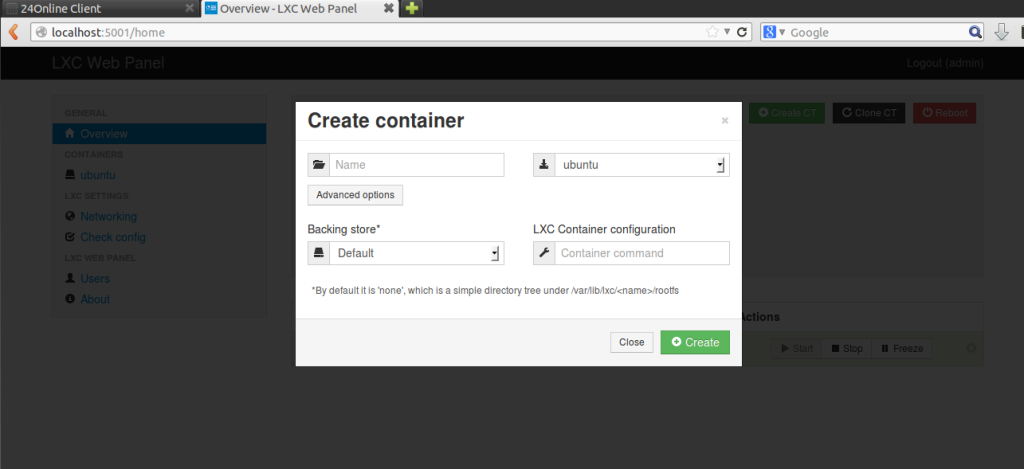
lxc1
lxc3
lxc2
lxc5

useful links :

Source :  http://www.computersnyou.com/2123/2013/07/installing-lxc-with-lxc-web-pannel-in-ubuntu/  By On

Resolving SFTP Import Failures on Amazon AWS: Best Practices for Cloud Development and SRE Engineering

In the fast‐paced world of Cloud Development and SRE Engineering , encountering transient errors can disrupt your workflow. Recently, our t...